The Biggest Little Saws You've Never Seen
A slightly absurd project to build 1:2" scale-model vintage radial arm saws
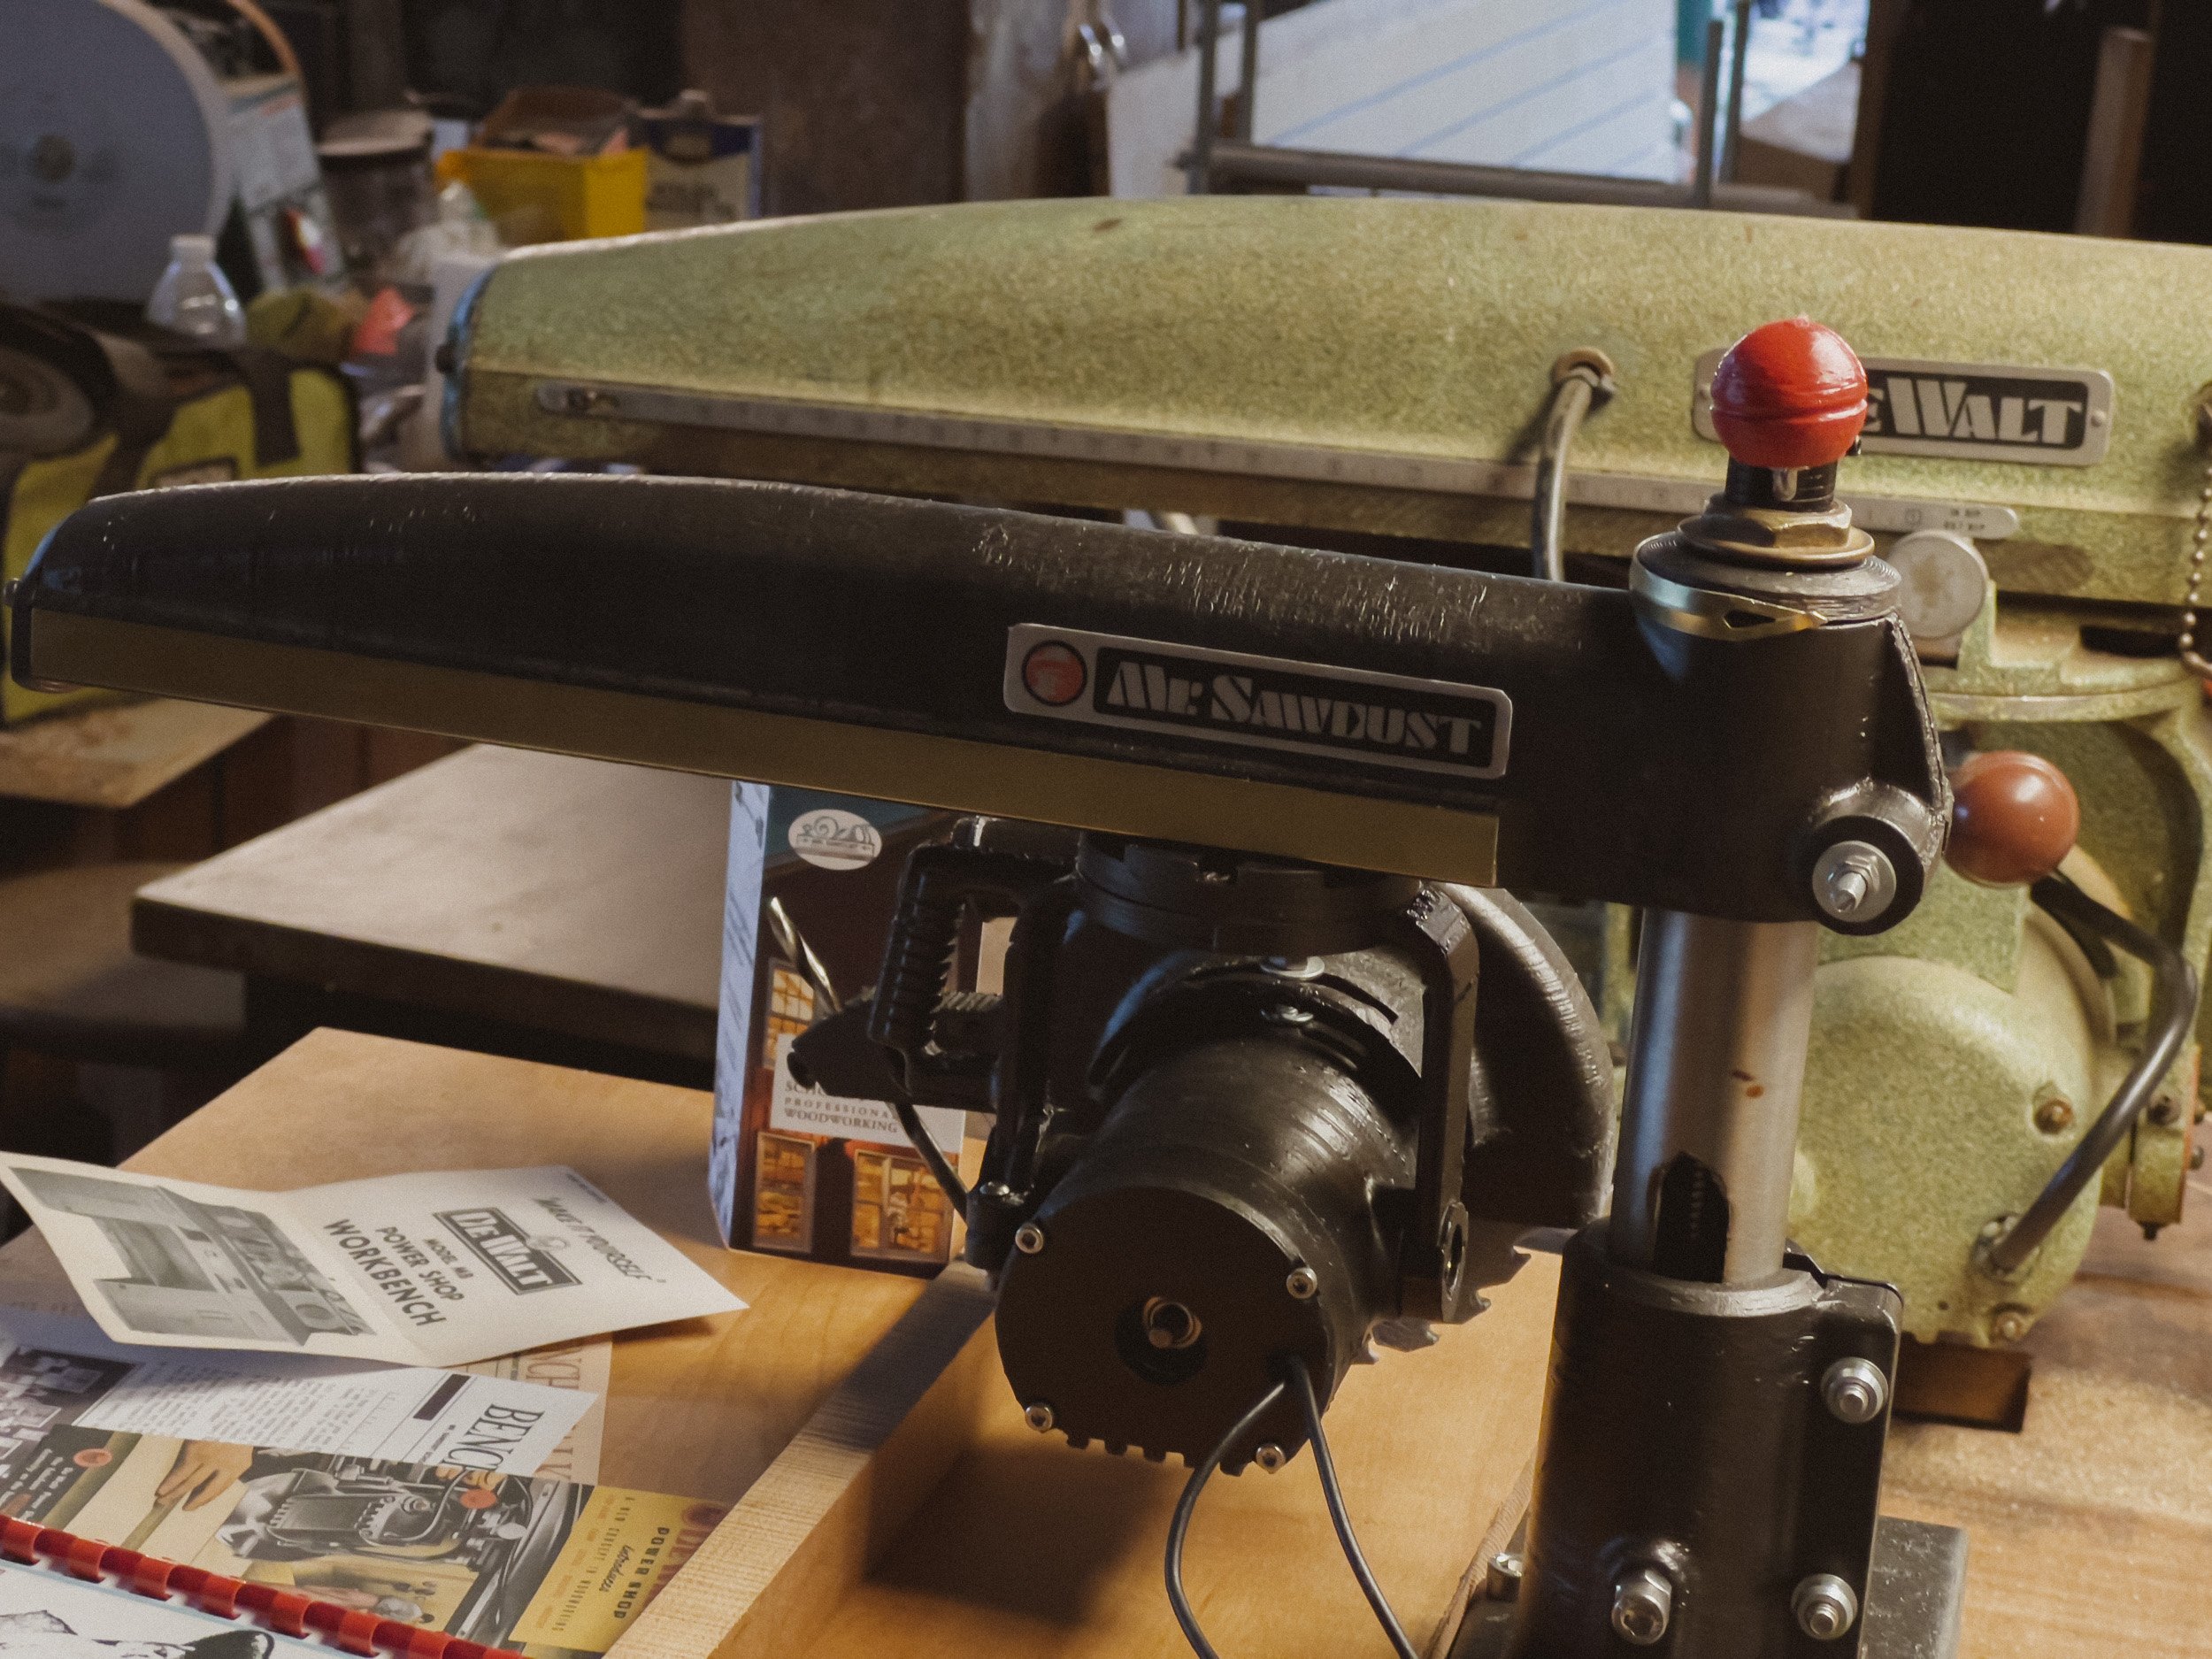
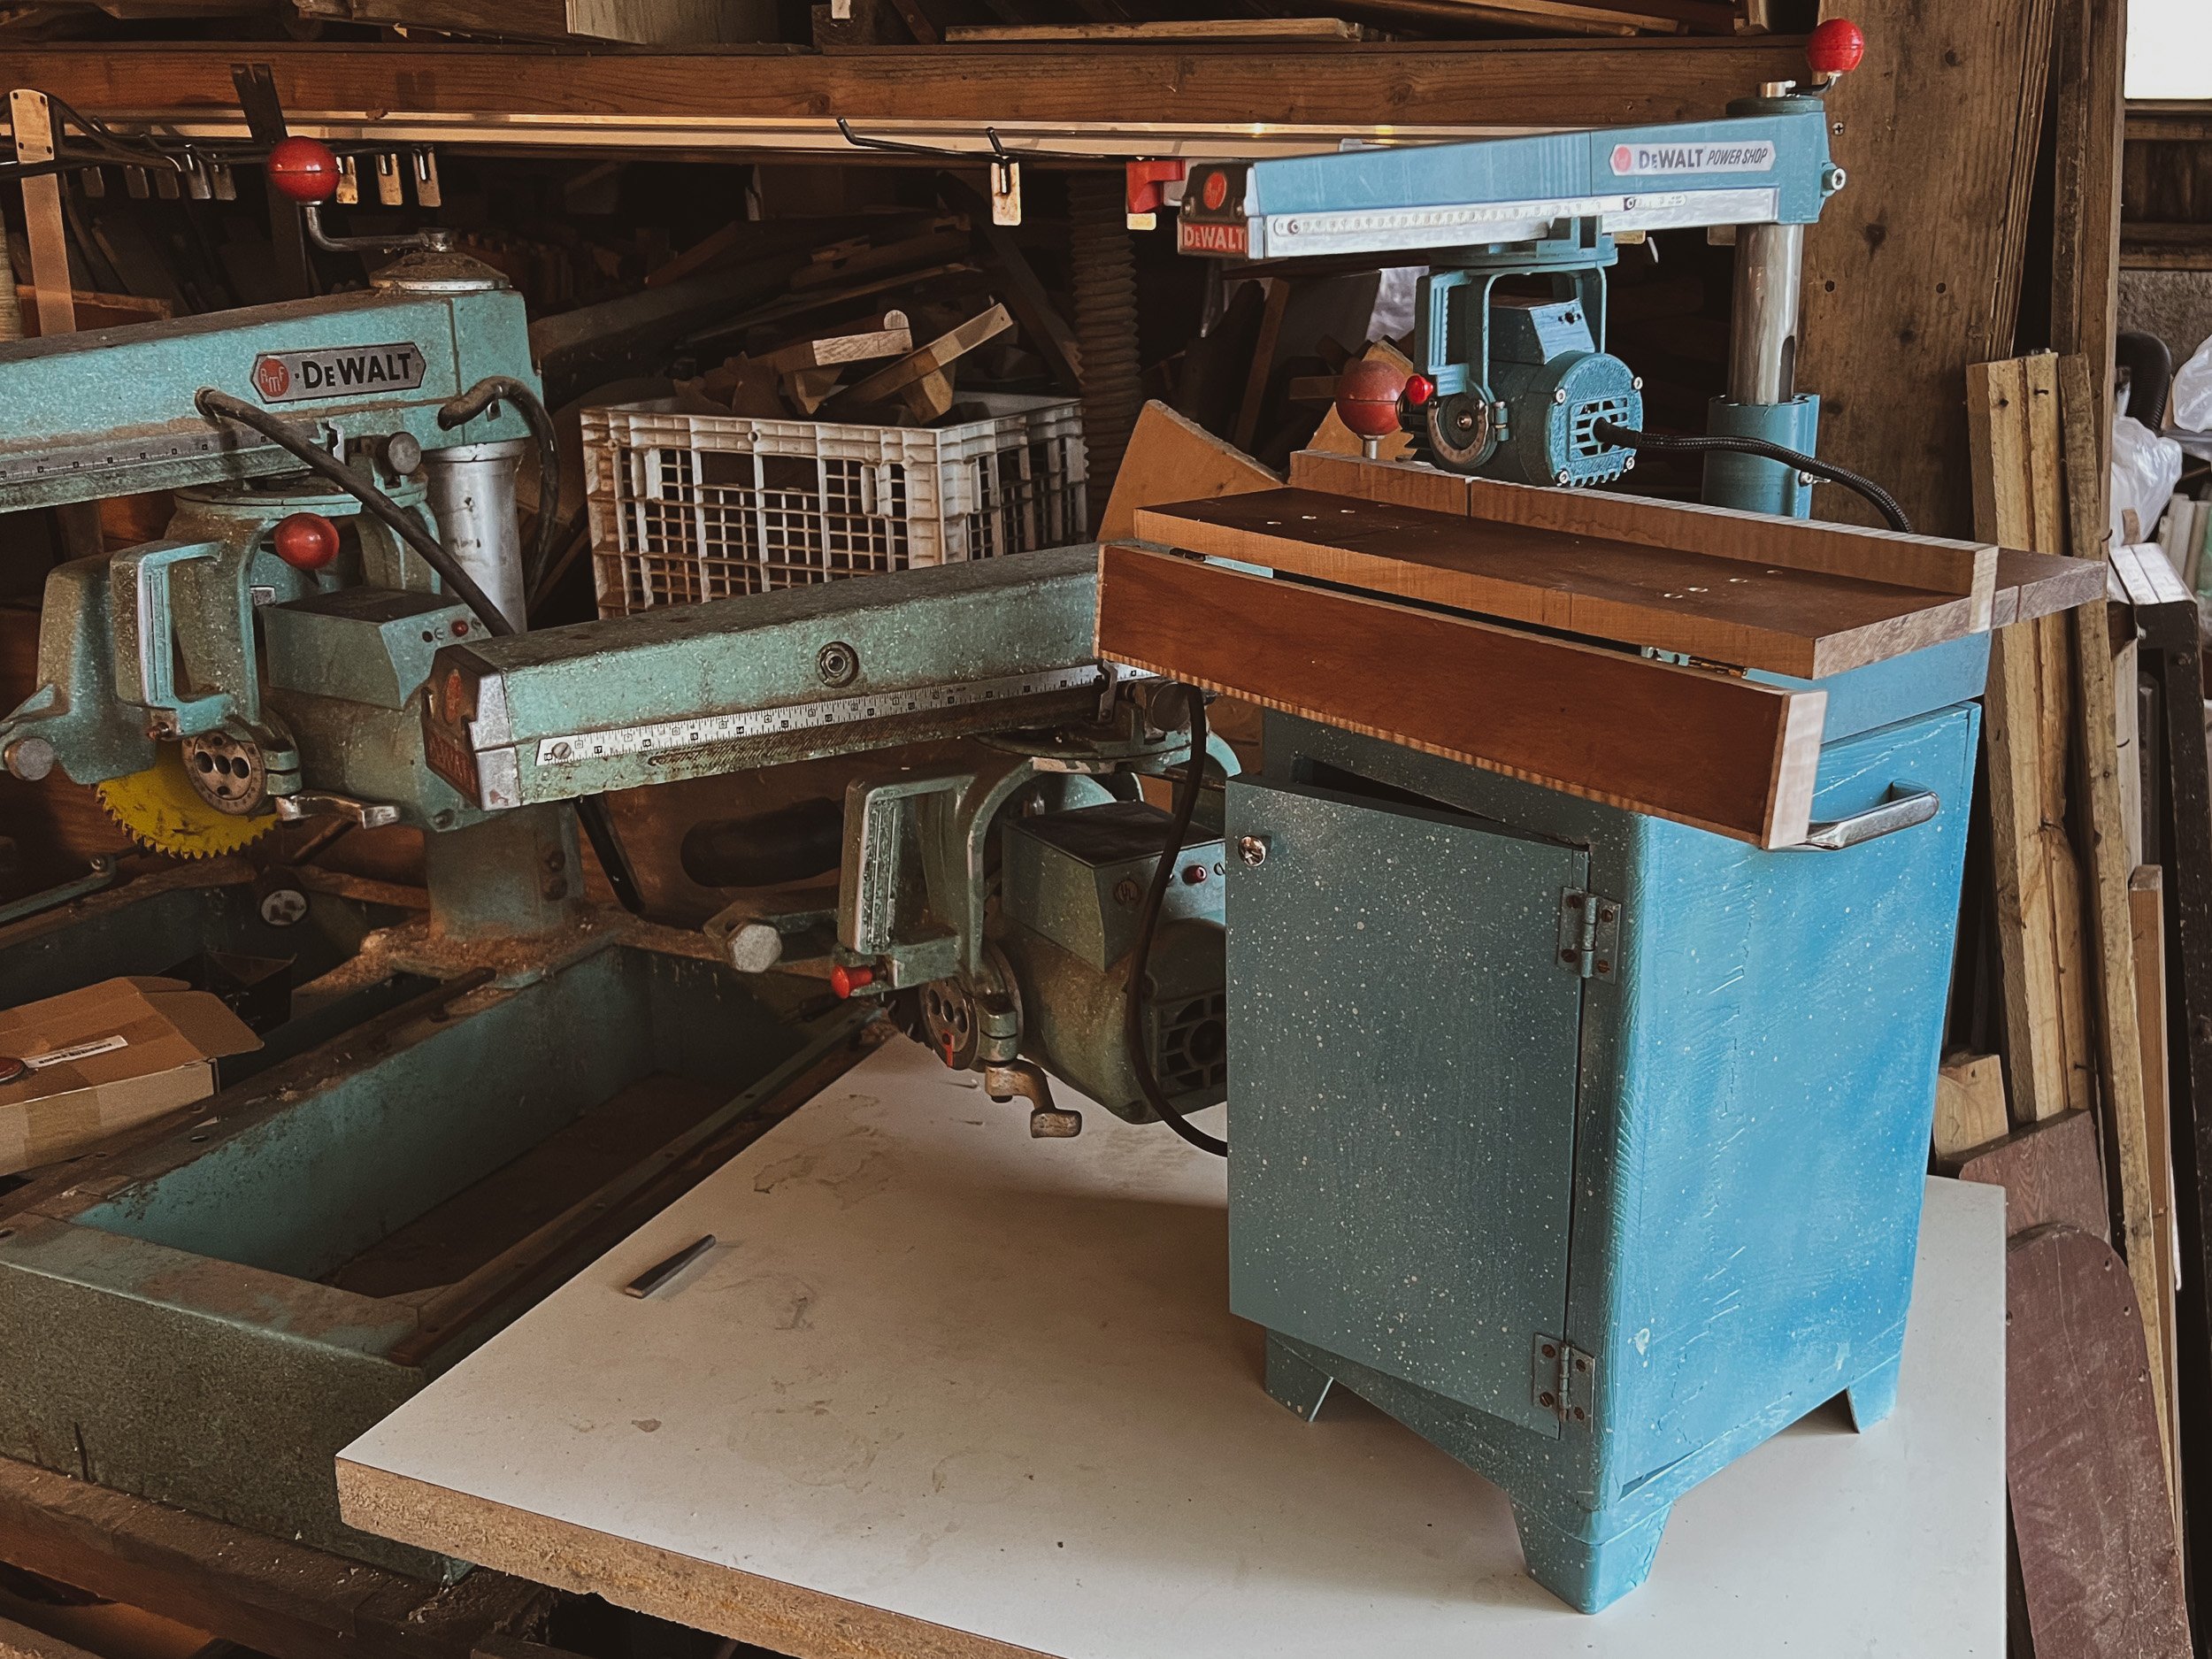
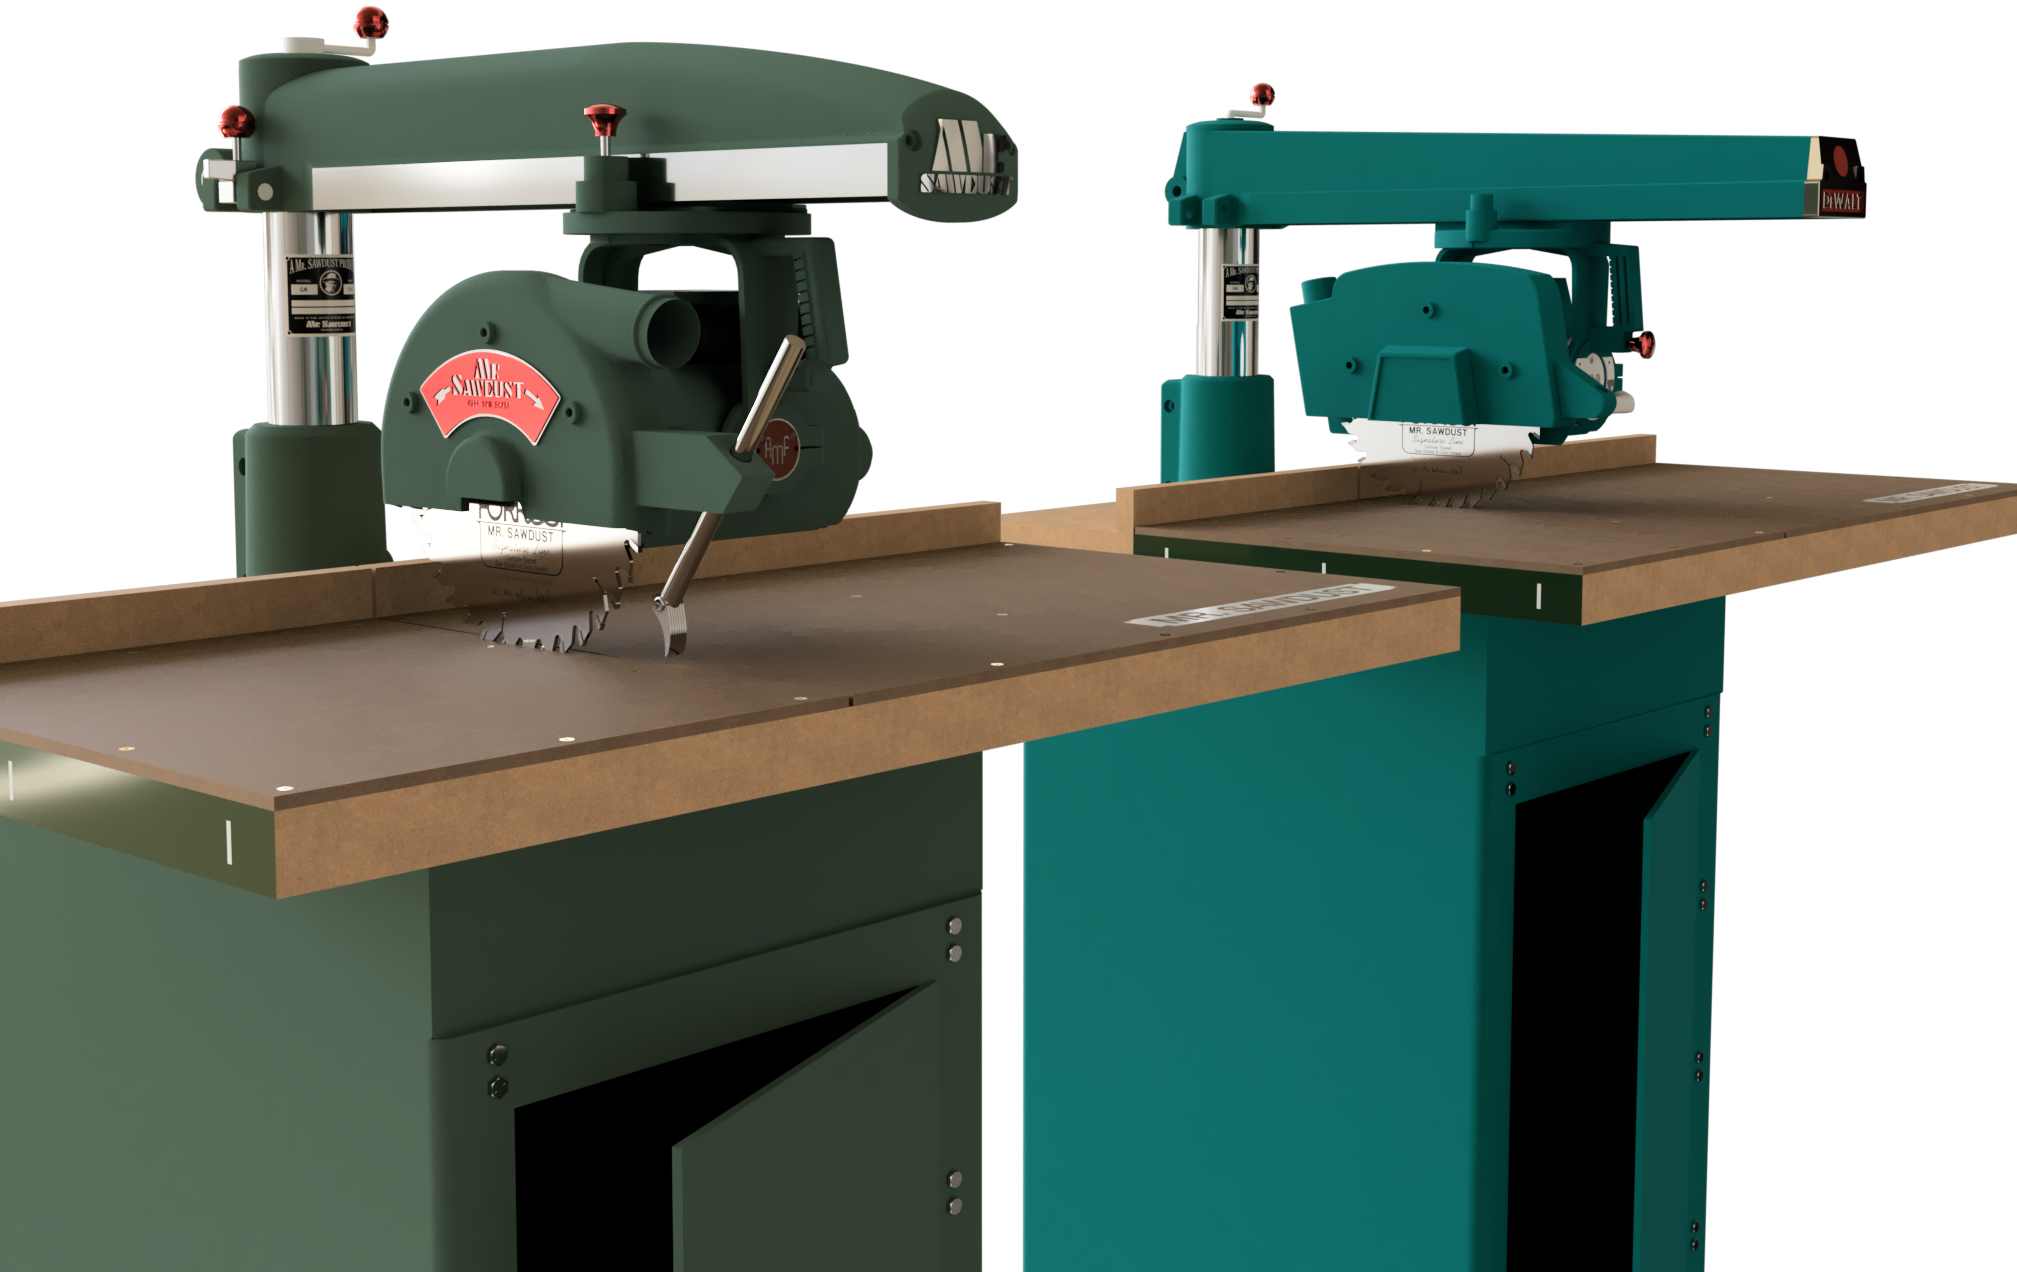
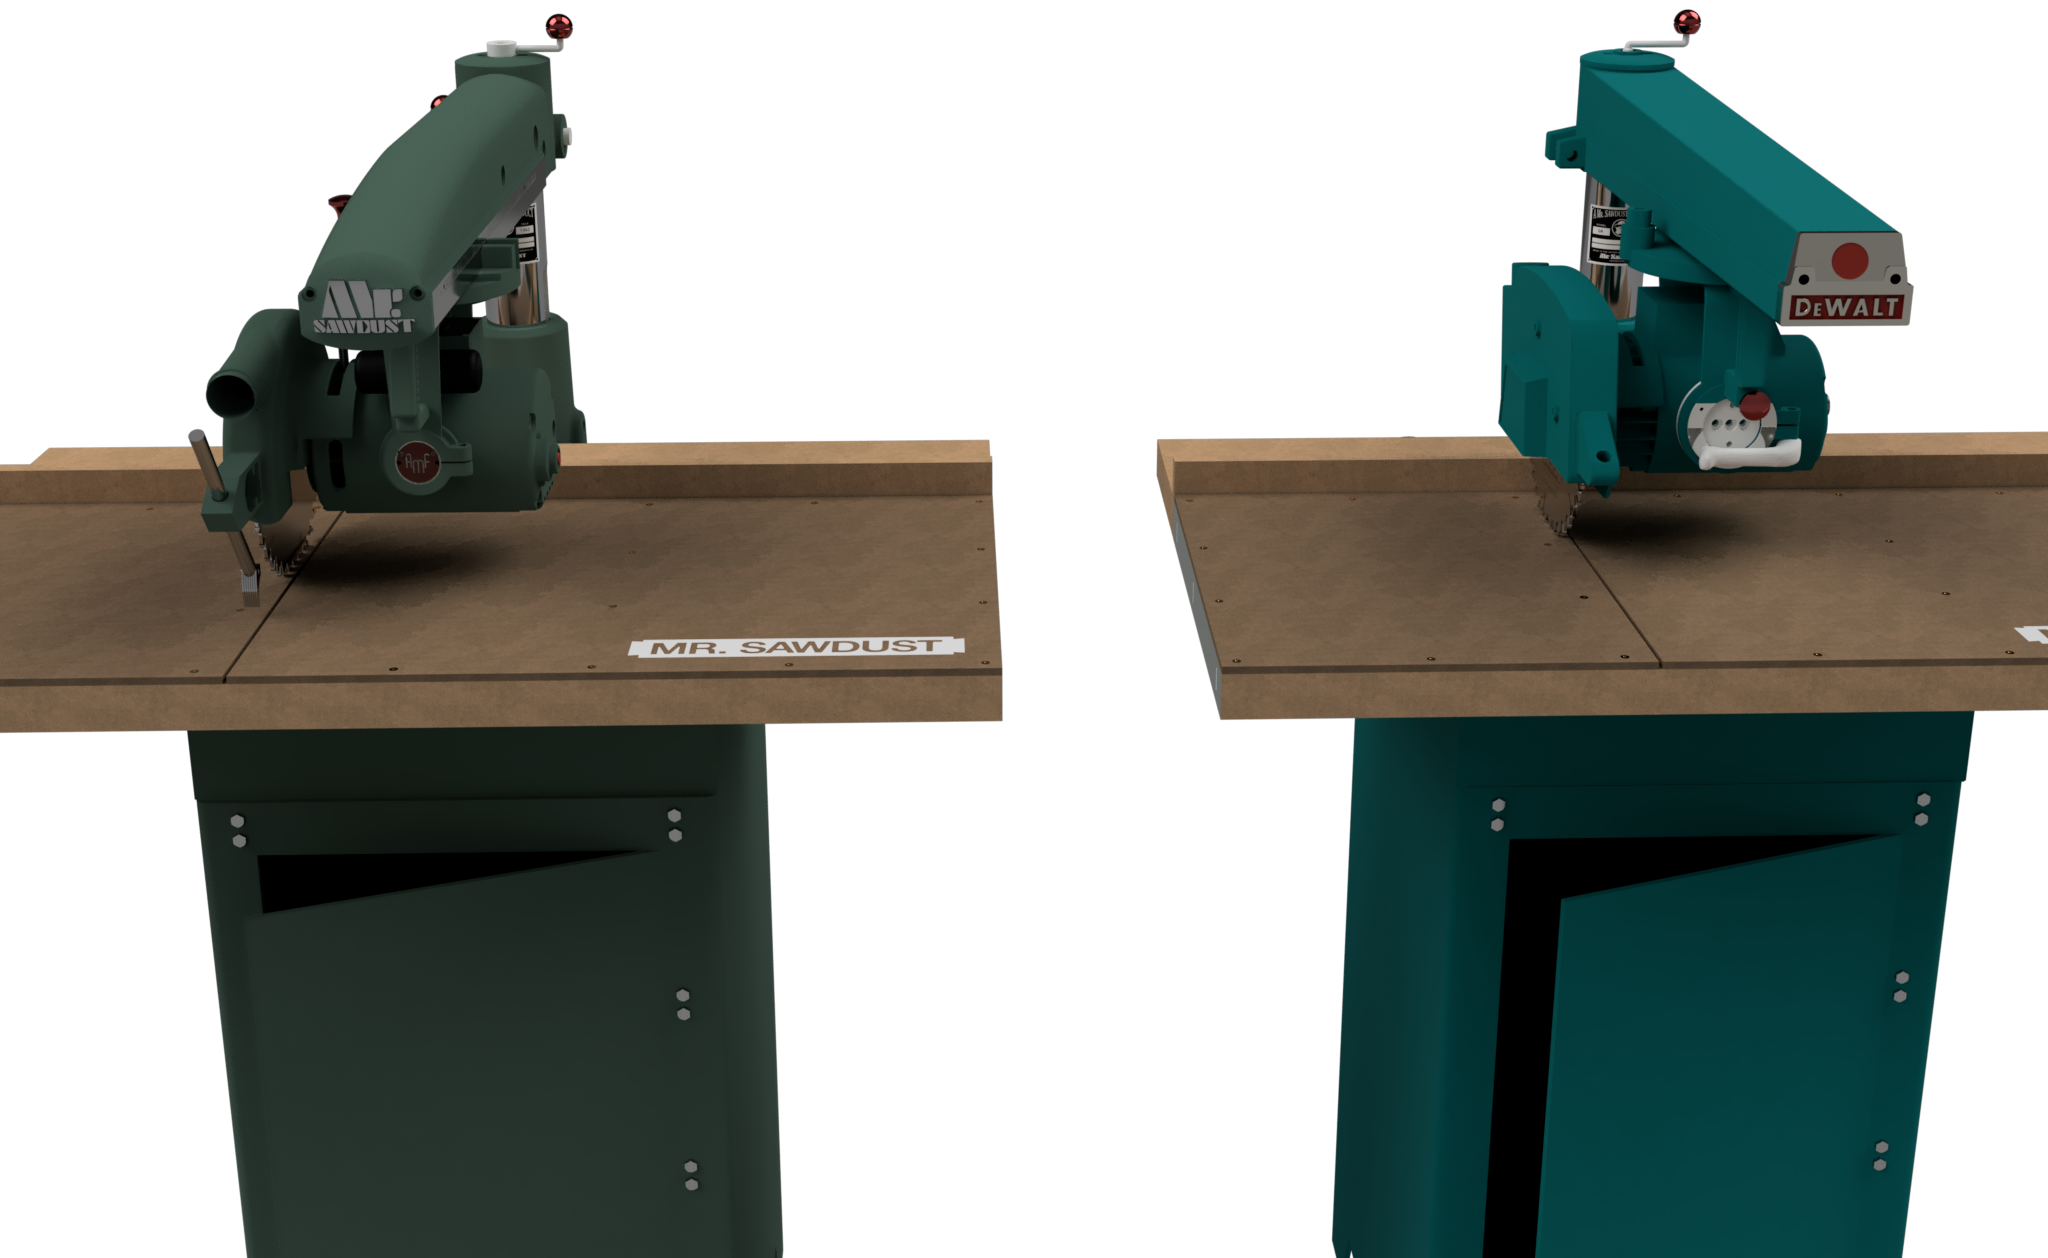
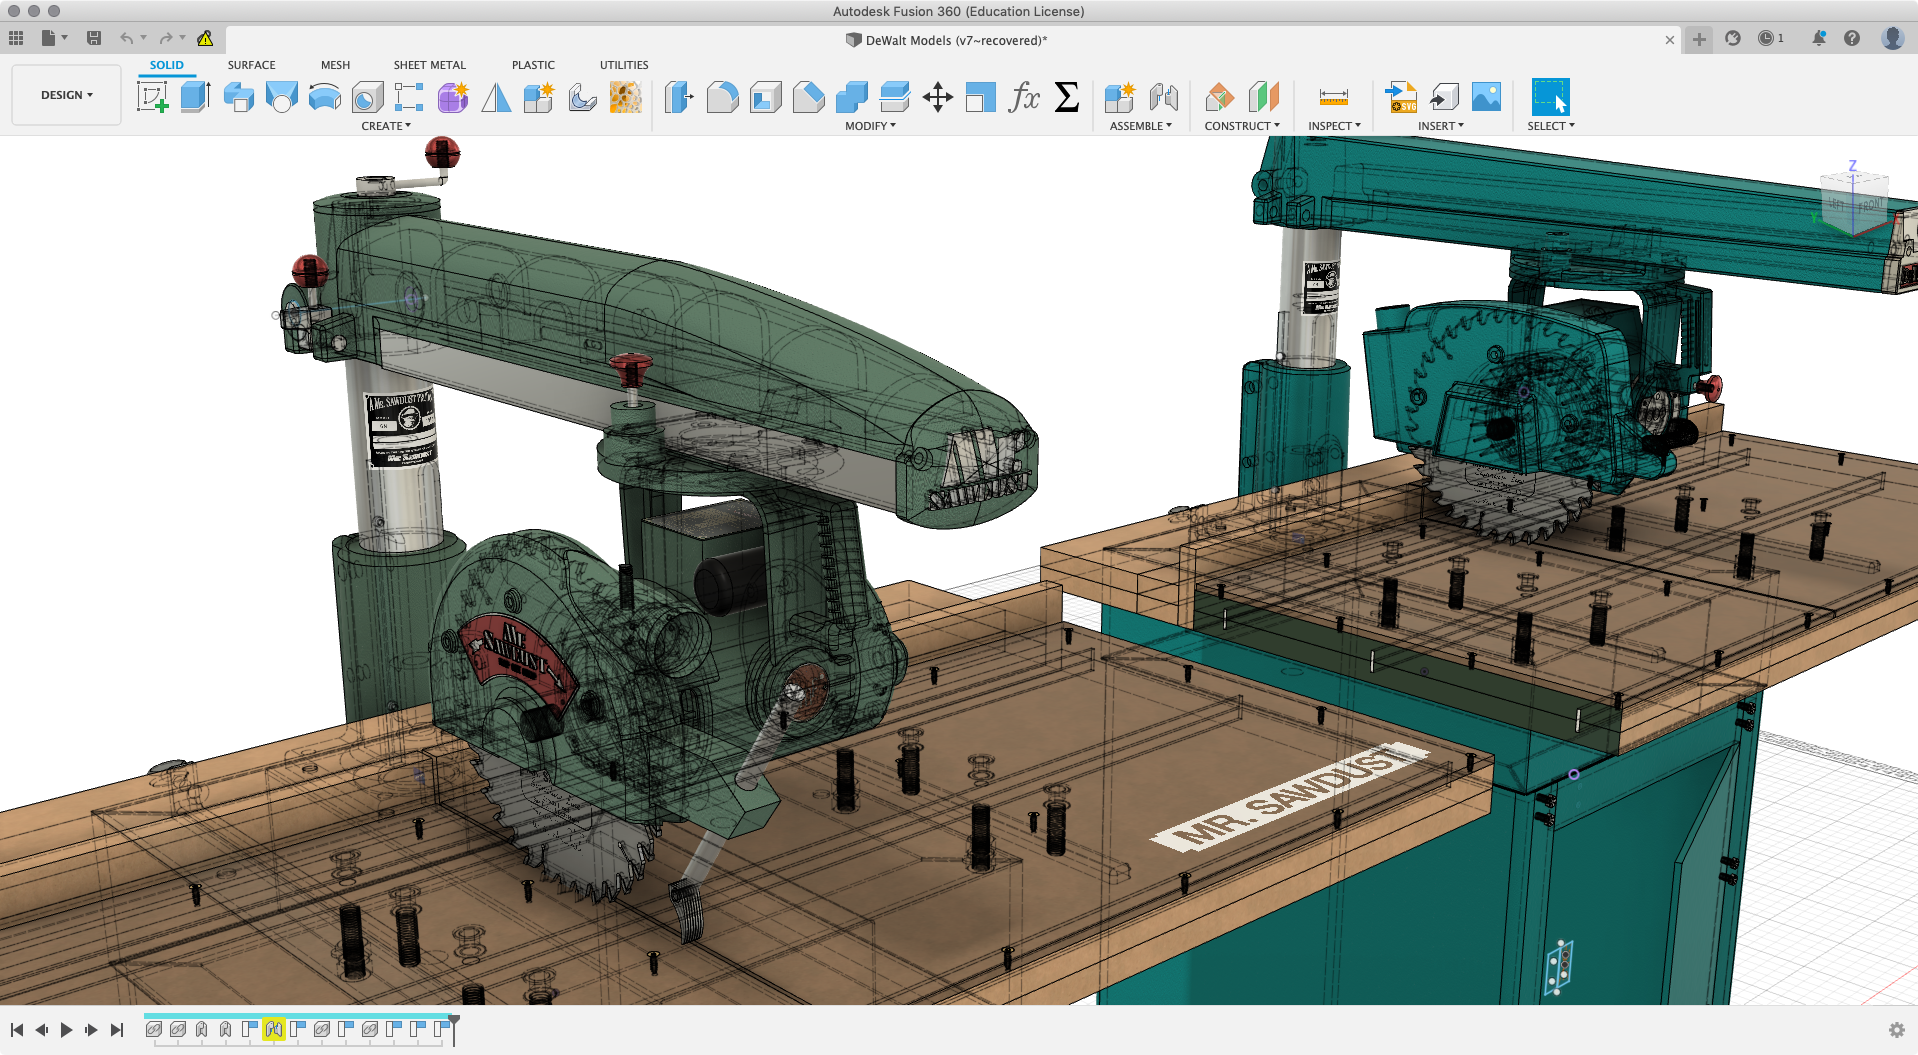
These little radial arm saws are exactly half the size of the same model you might have and love in your workshop. While they’re miles from perfect, they’re neat enough to share, just as they are.
I’m someone who loves “big, little things”. Substantial models of human-scale machines and objects. The perfect scale depends on the actual thing – whether it’s a house, a machine, or a furniture piece. I just appreciate making a model big enough to border on ridiculous — inconvenient to even figure out where to put it once you have it done and in front of you. It seems I’ve managed to tick both those boxes in this case.
This started as a quick page to organize some photos, but predictably I ended up making an ordeal of it – so for the curious, you’ll find your fill of nerdy specifics I thought worth sharing.
— David
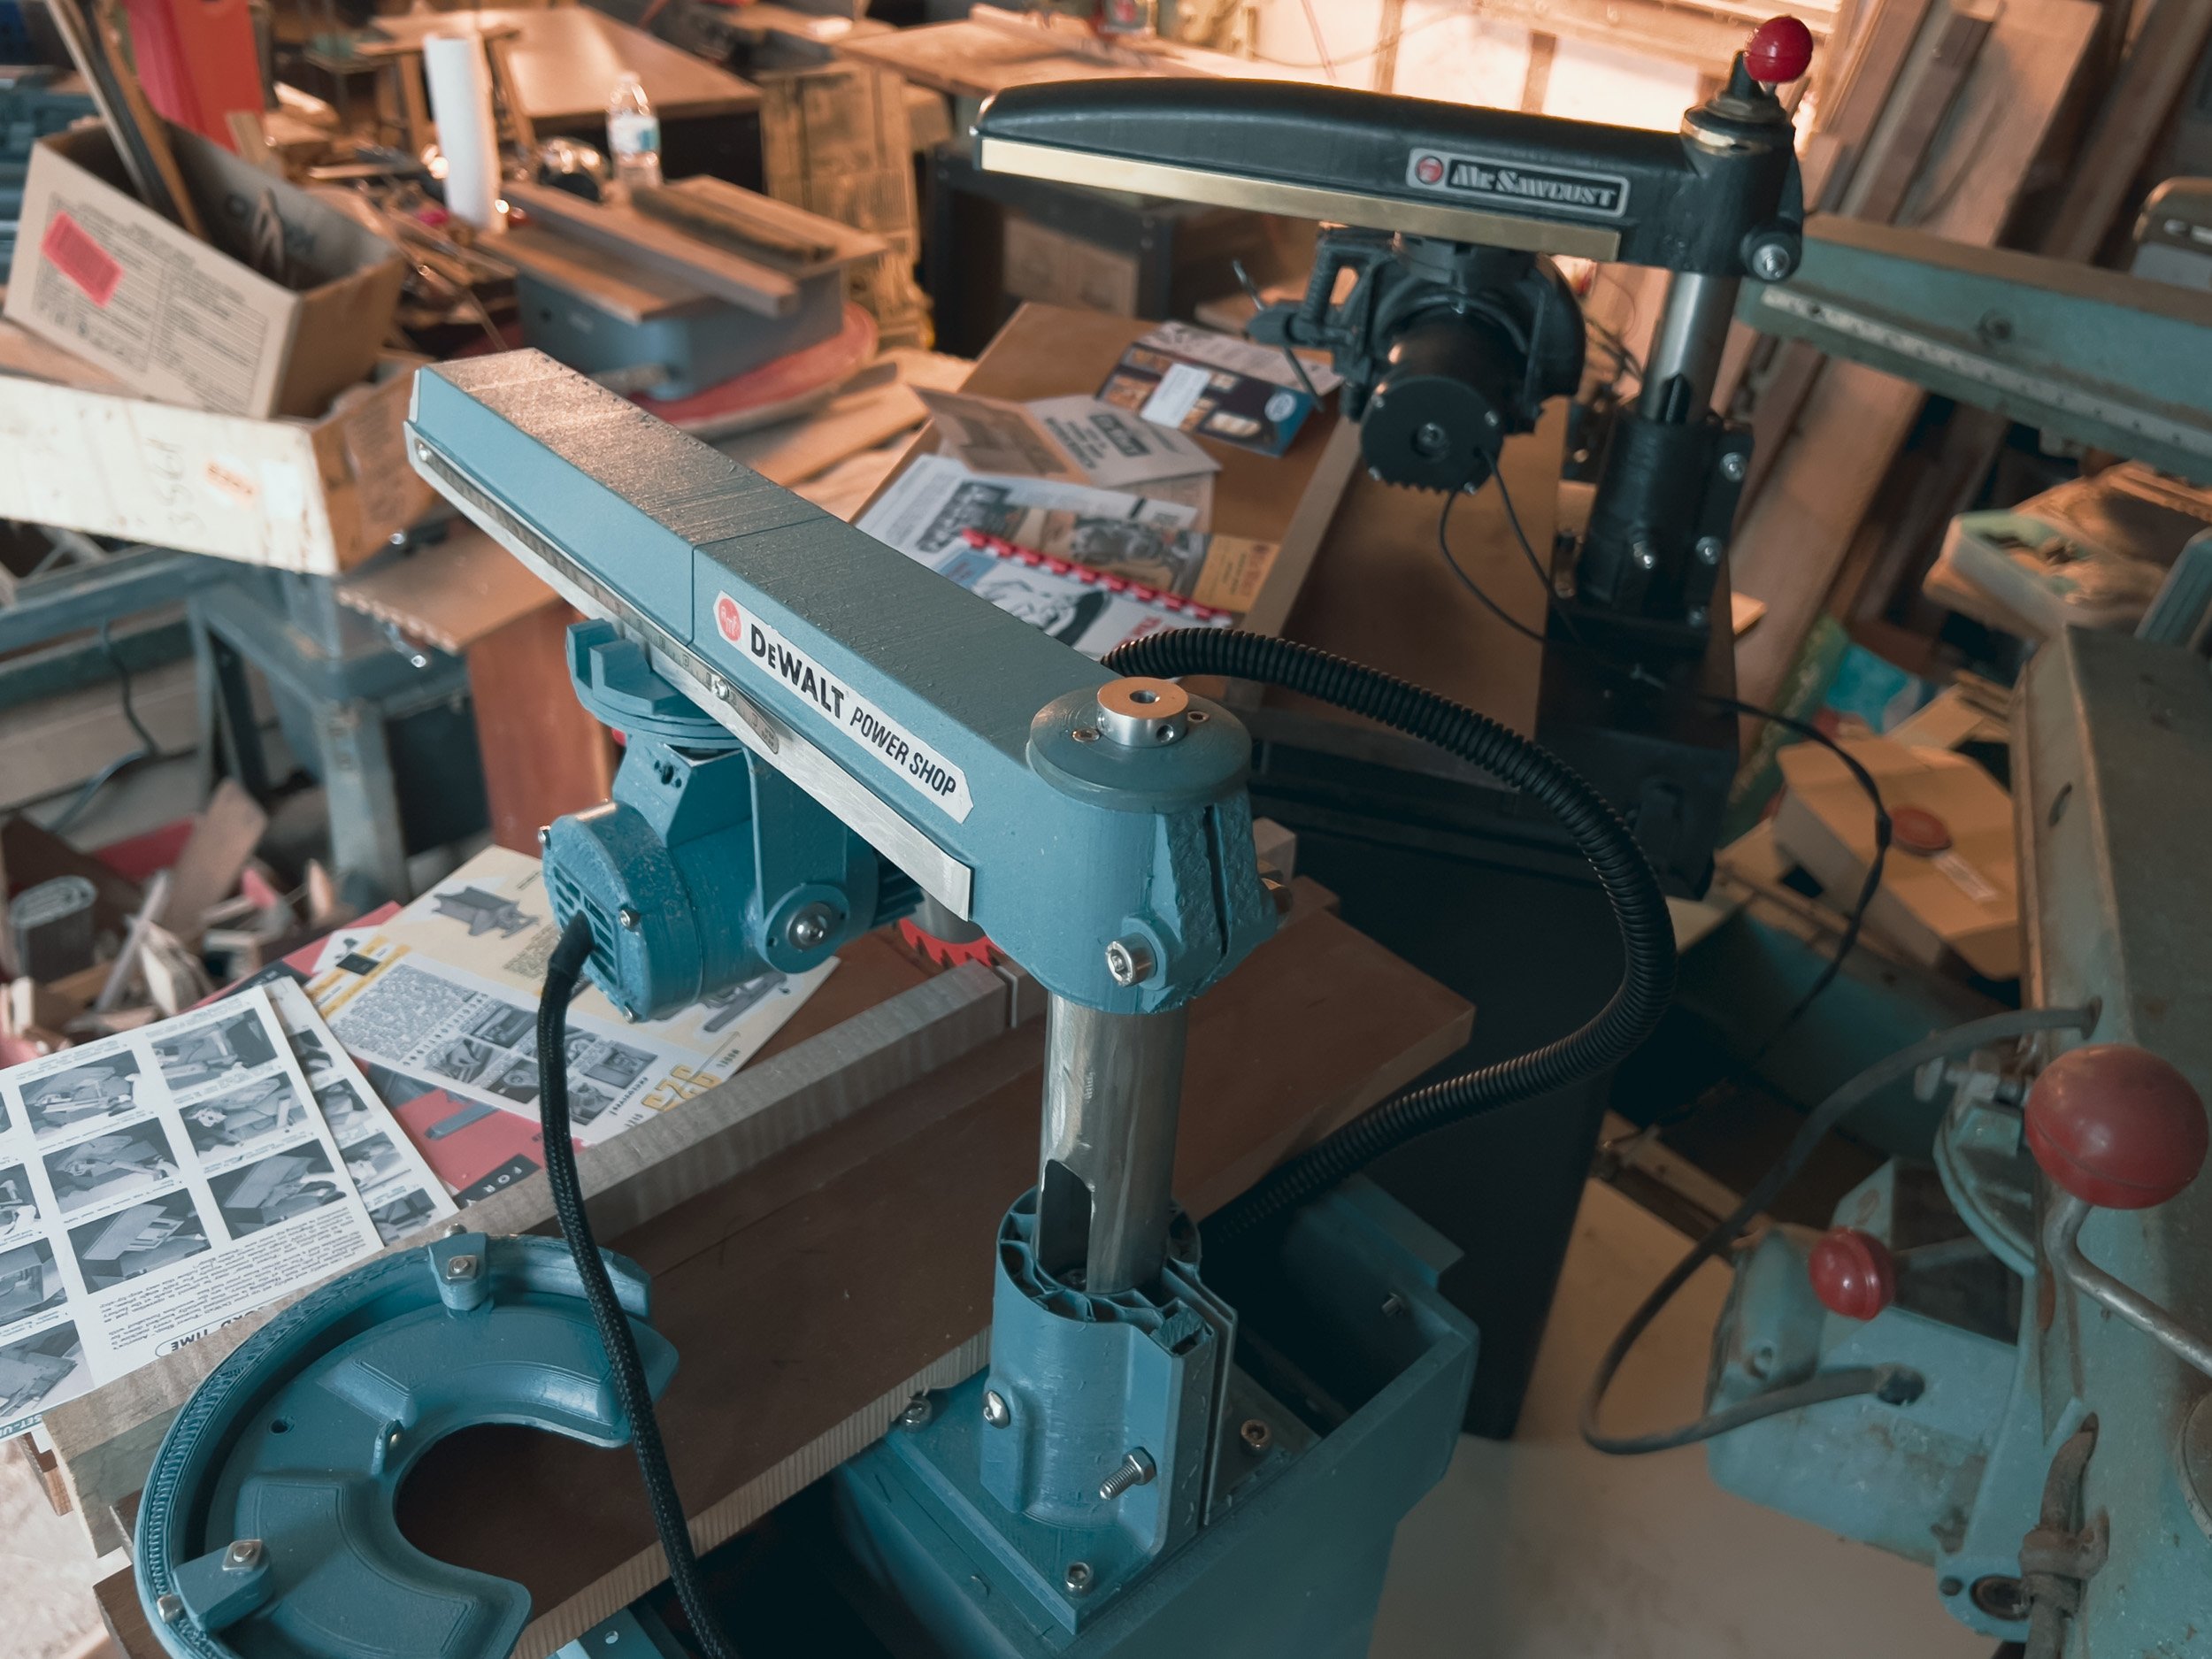
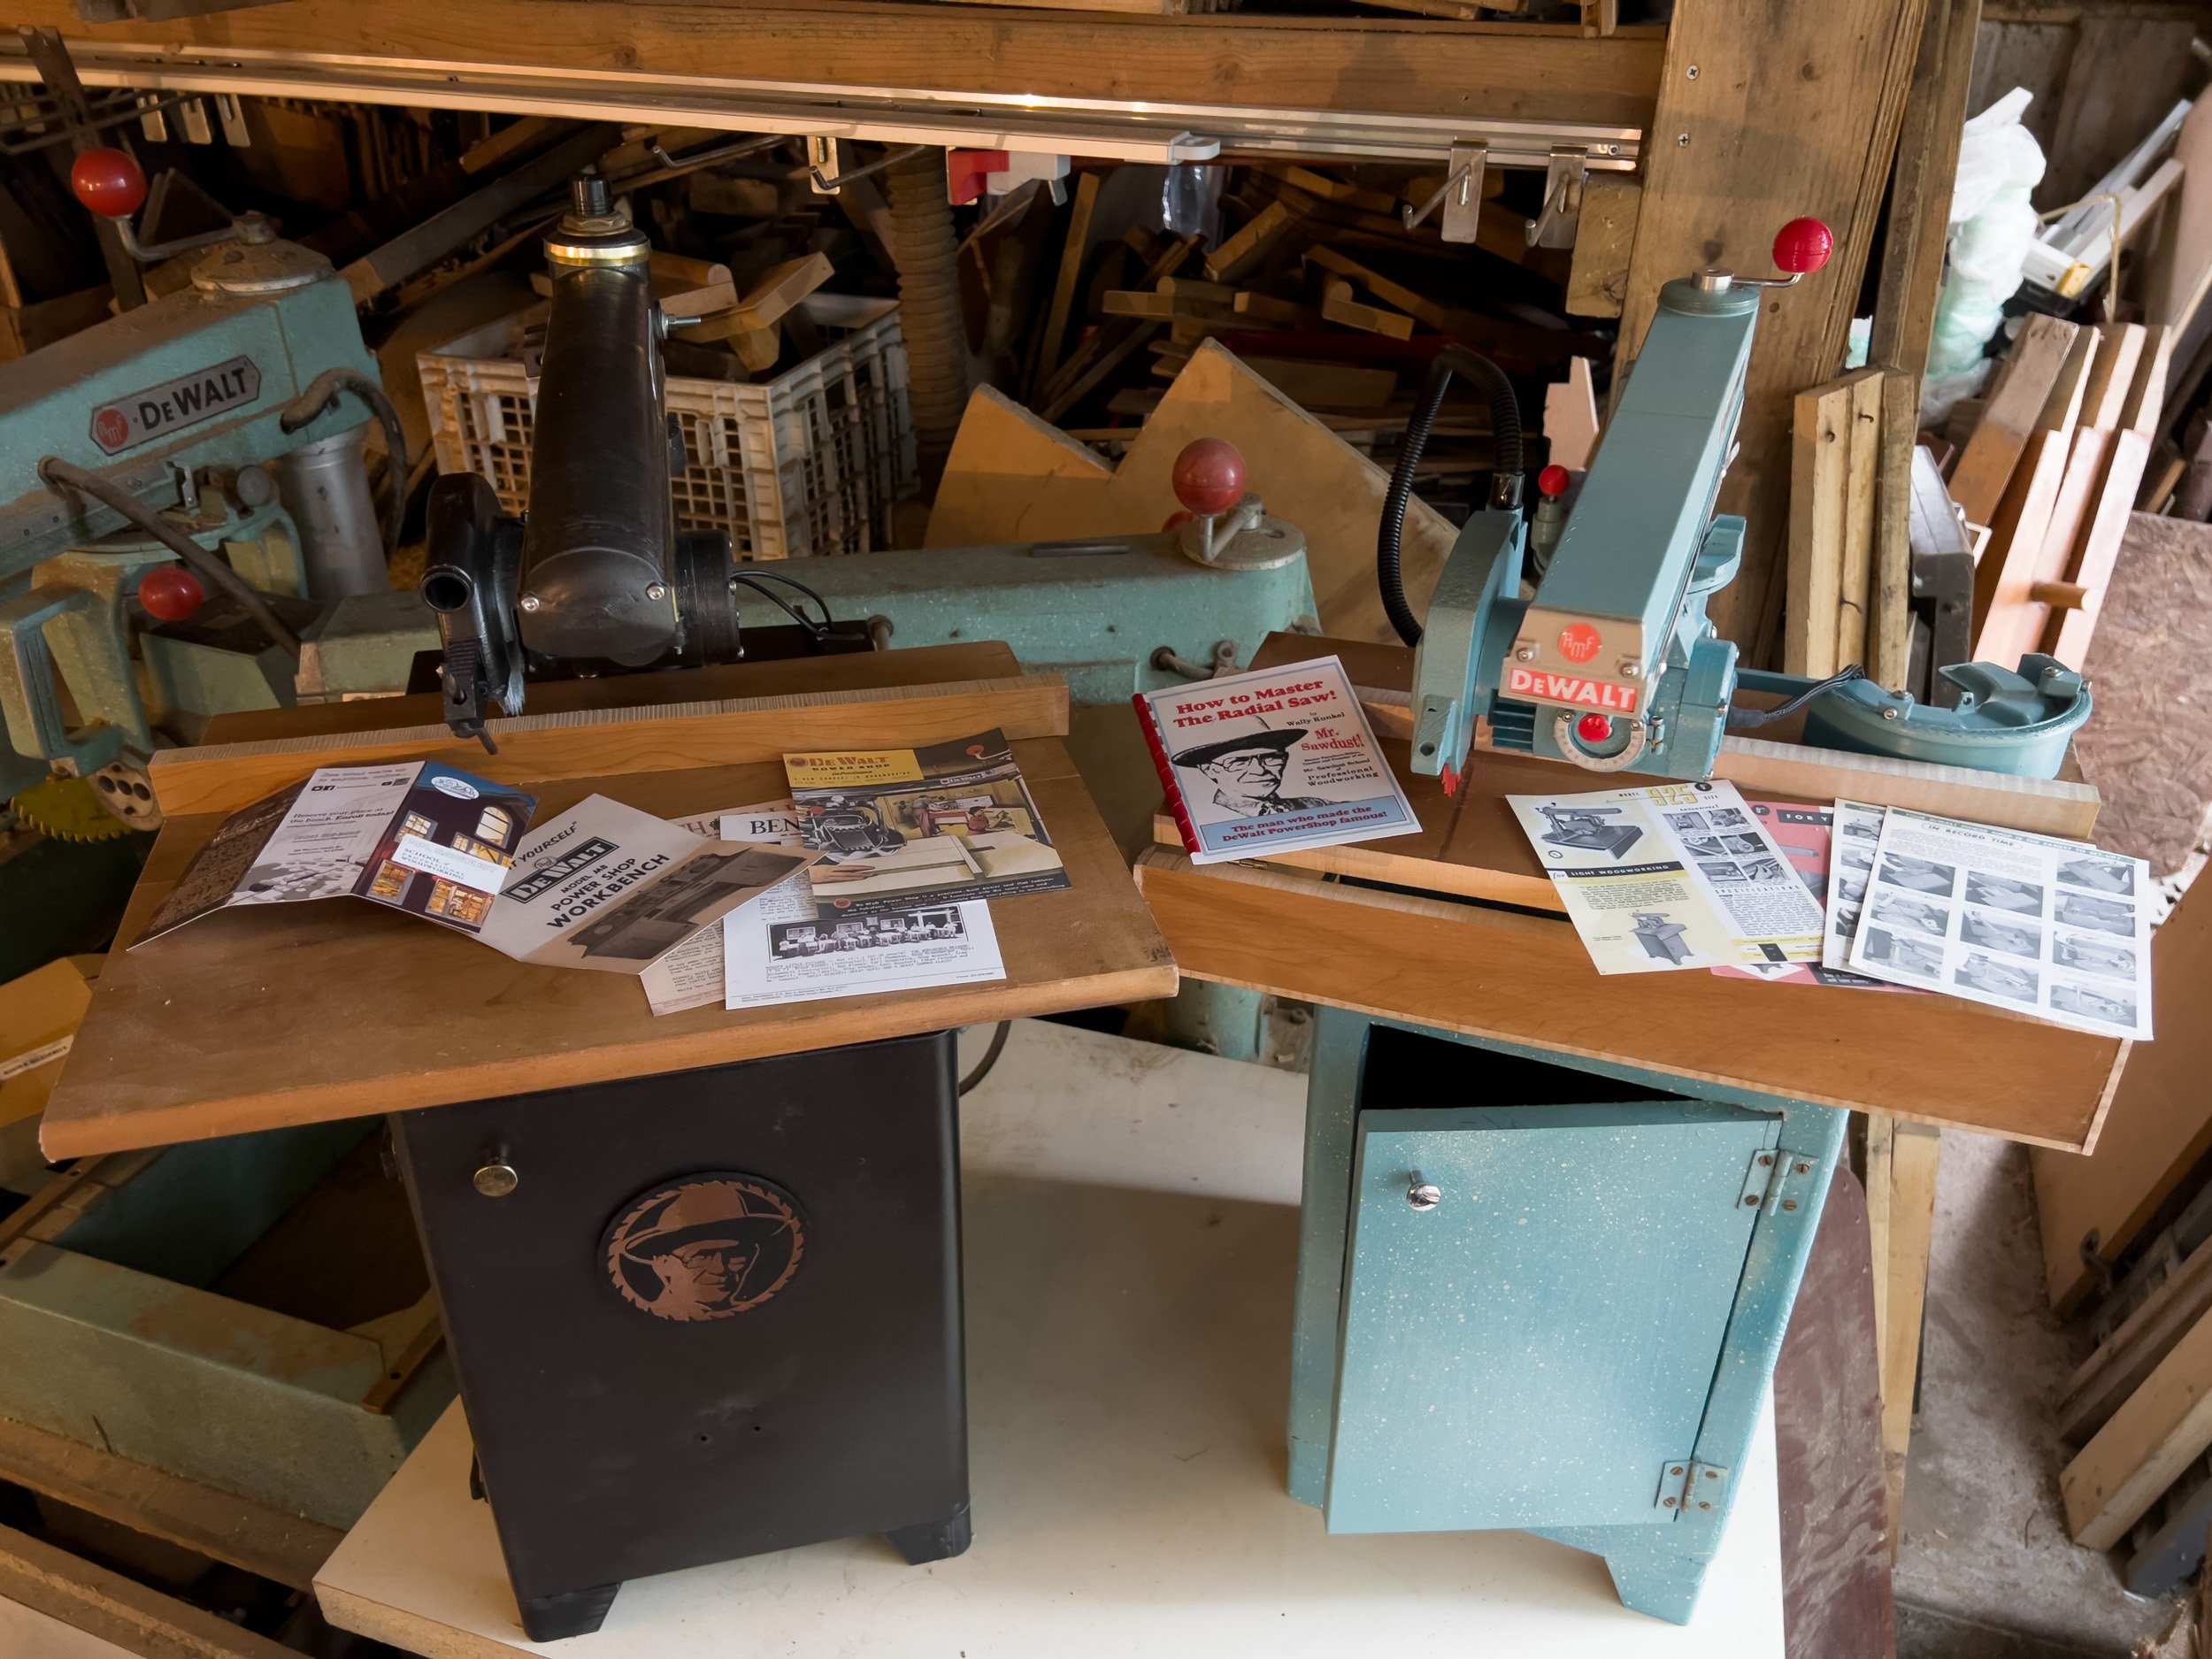
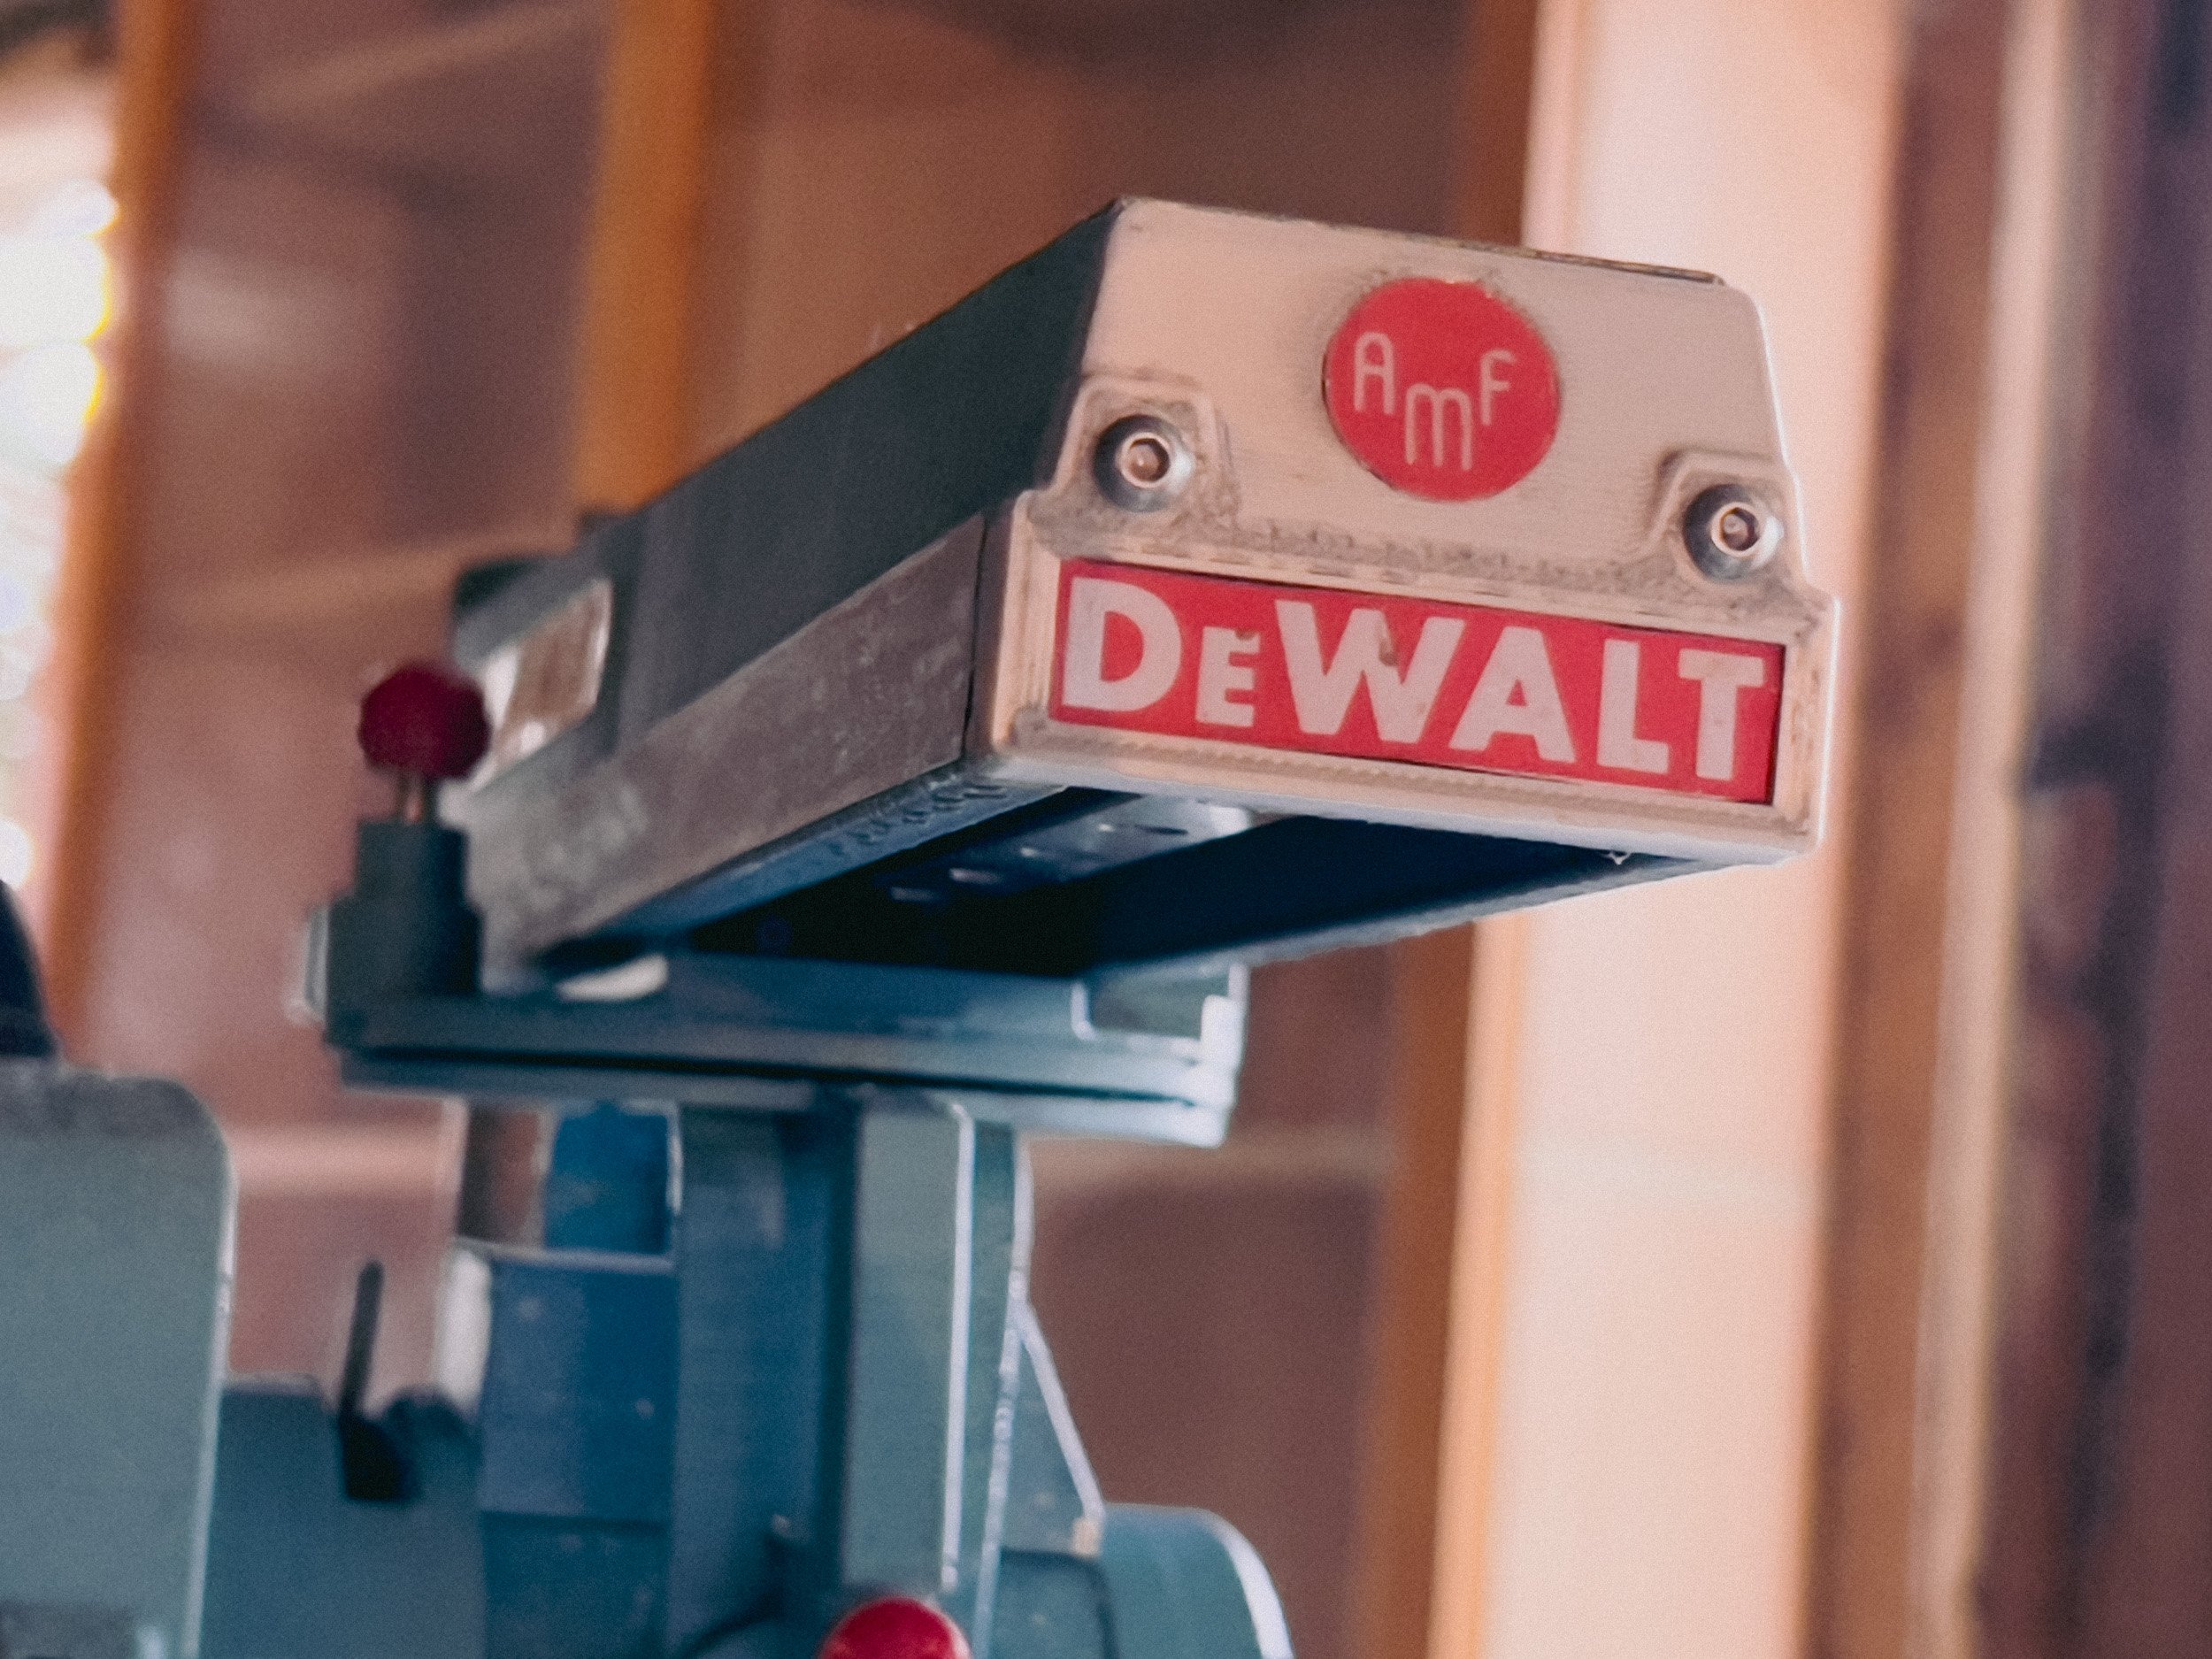


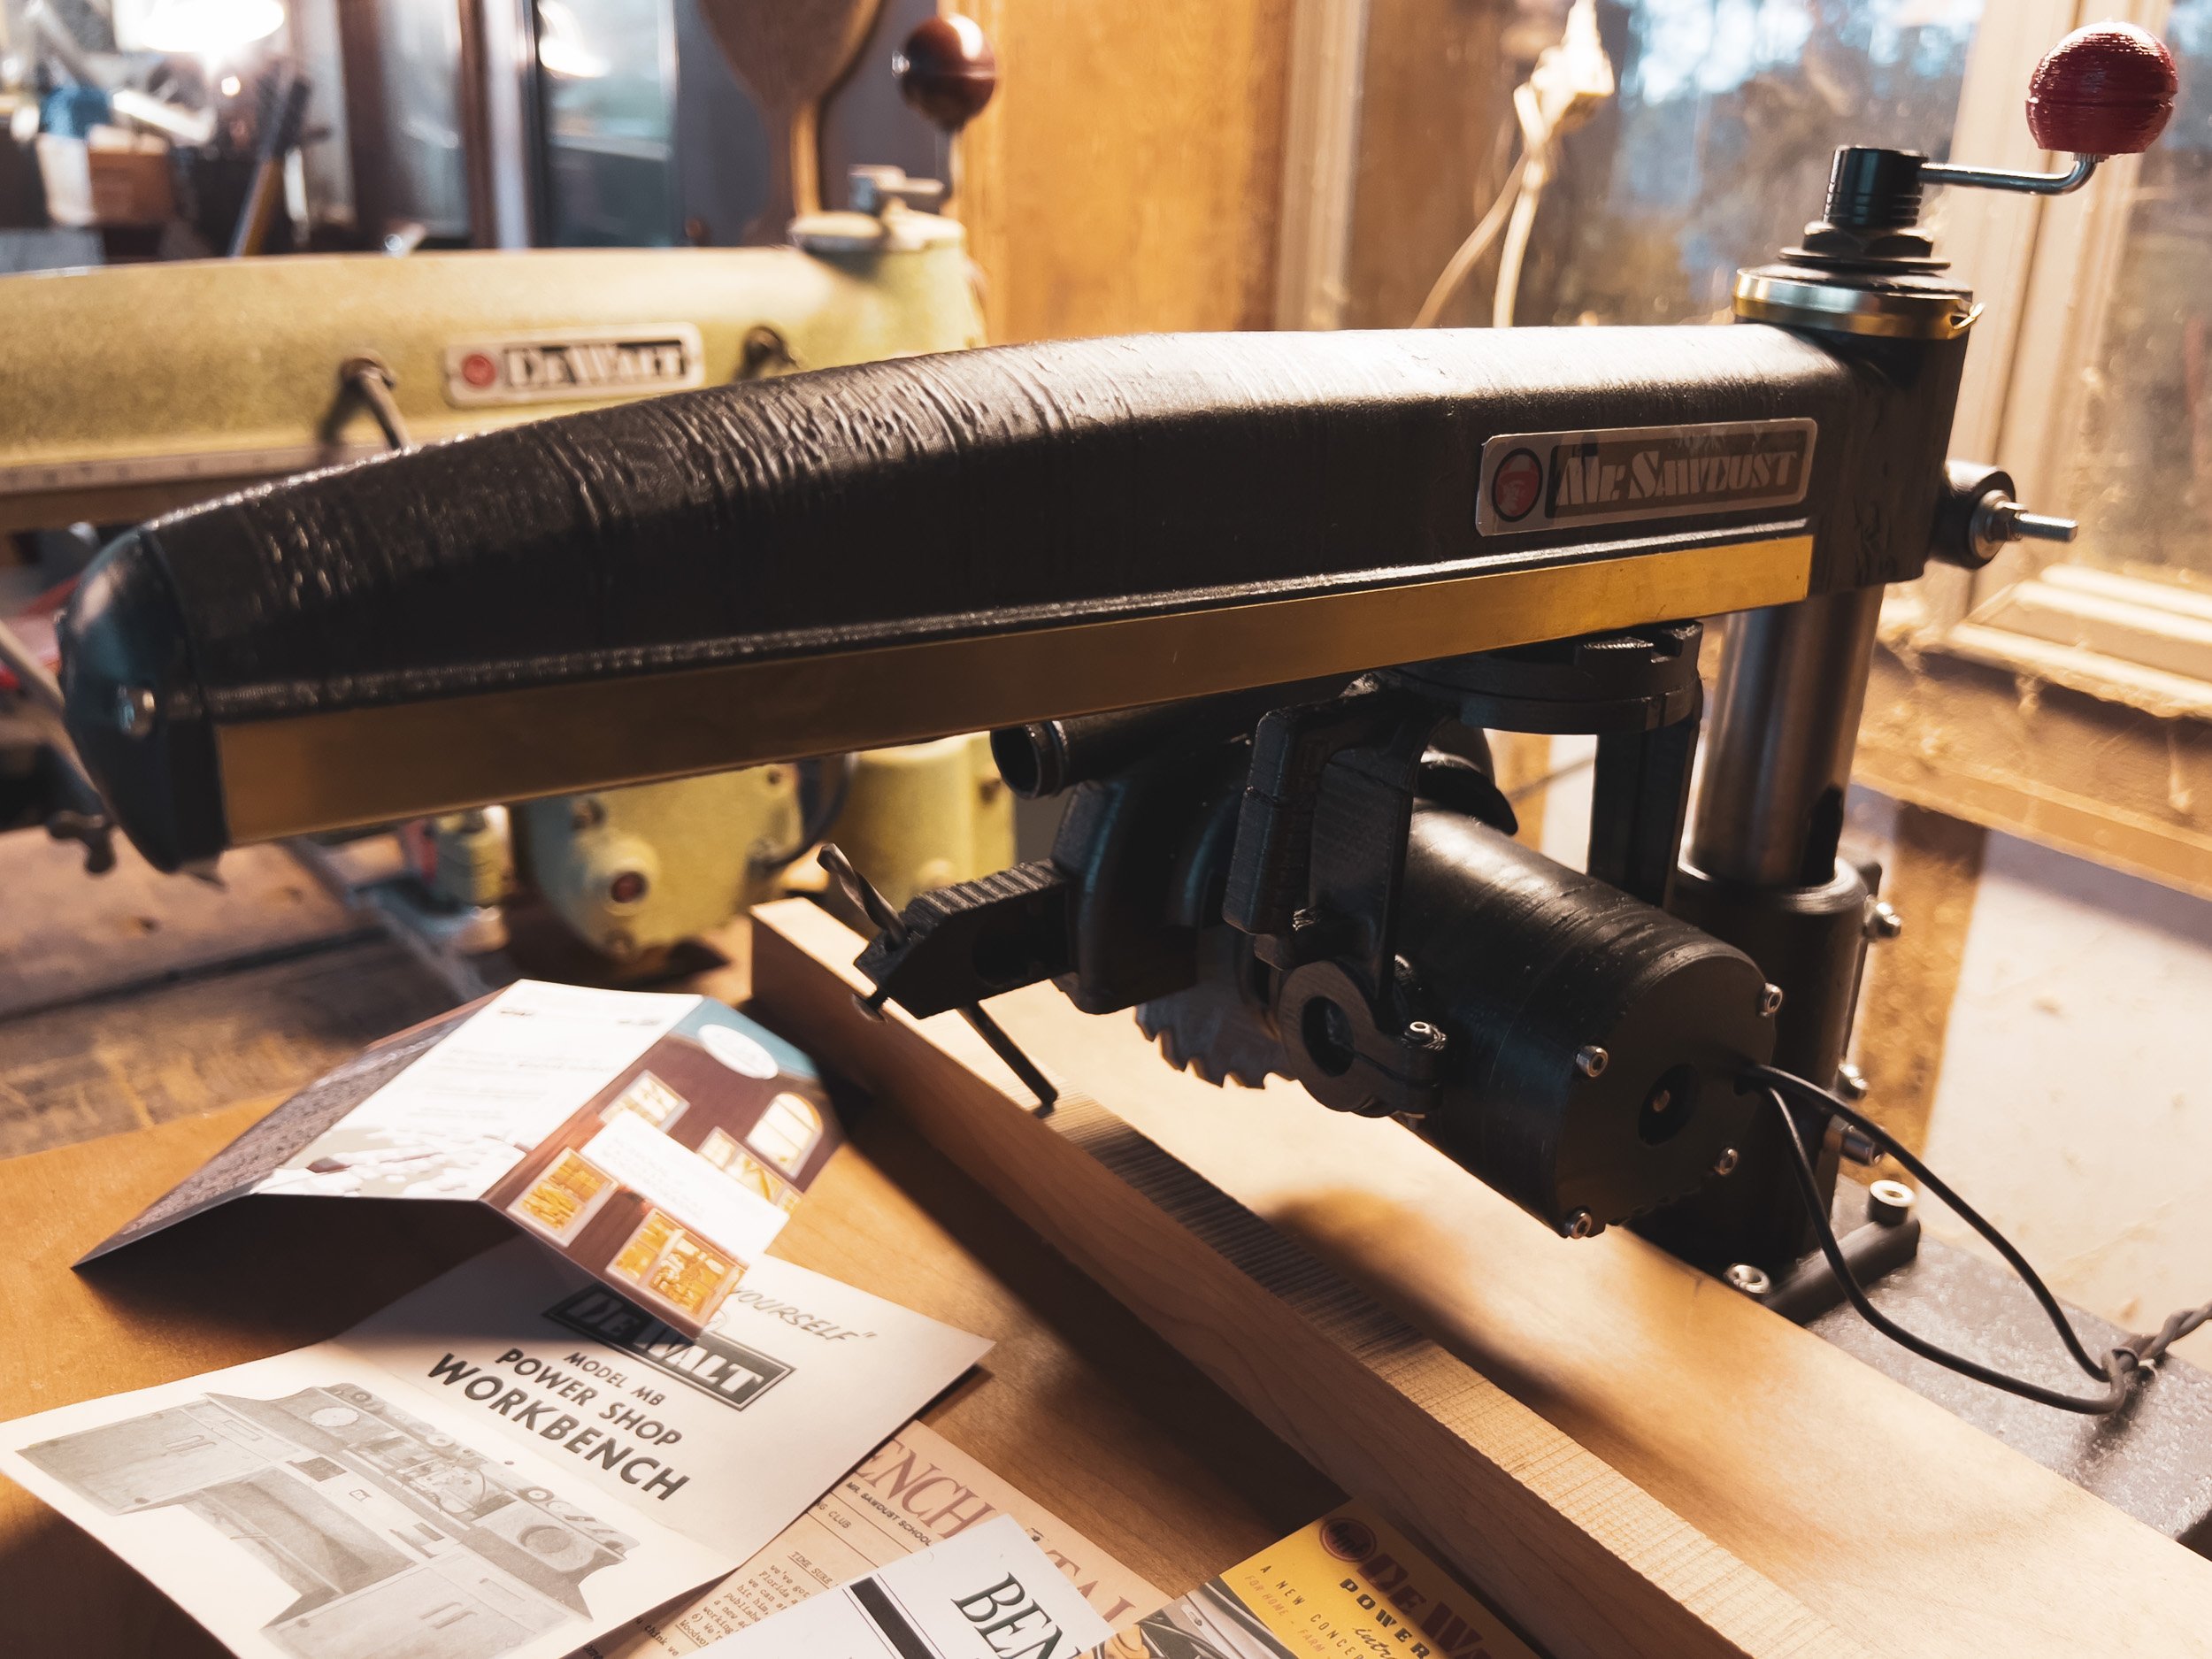
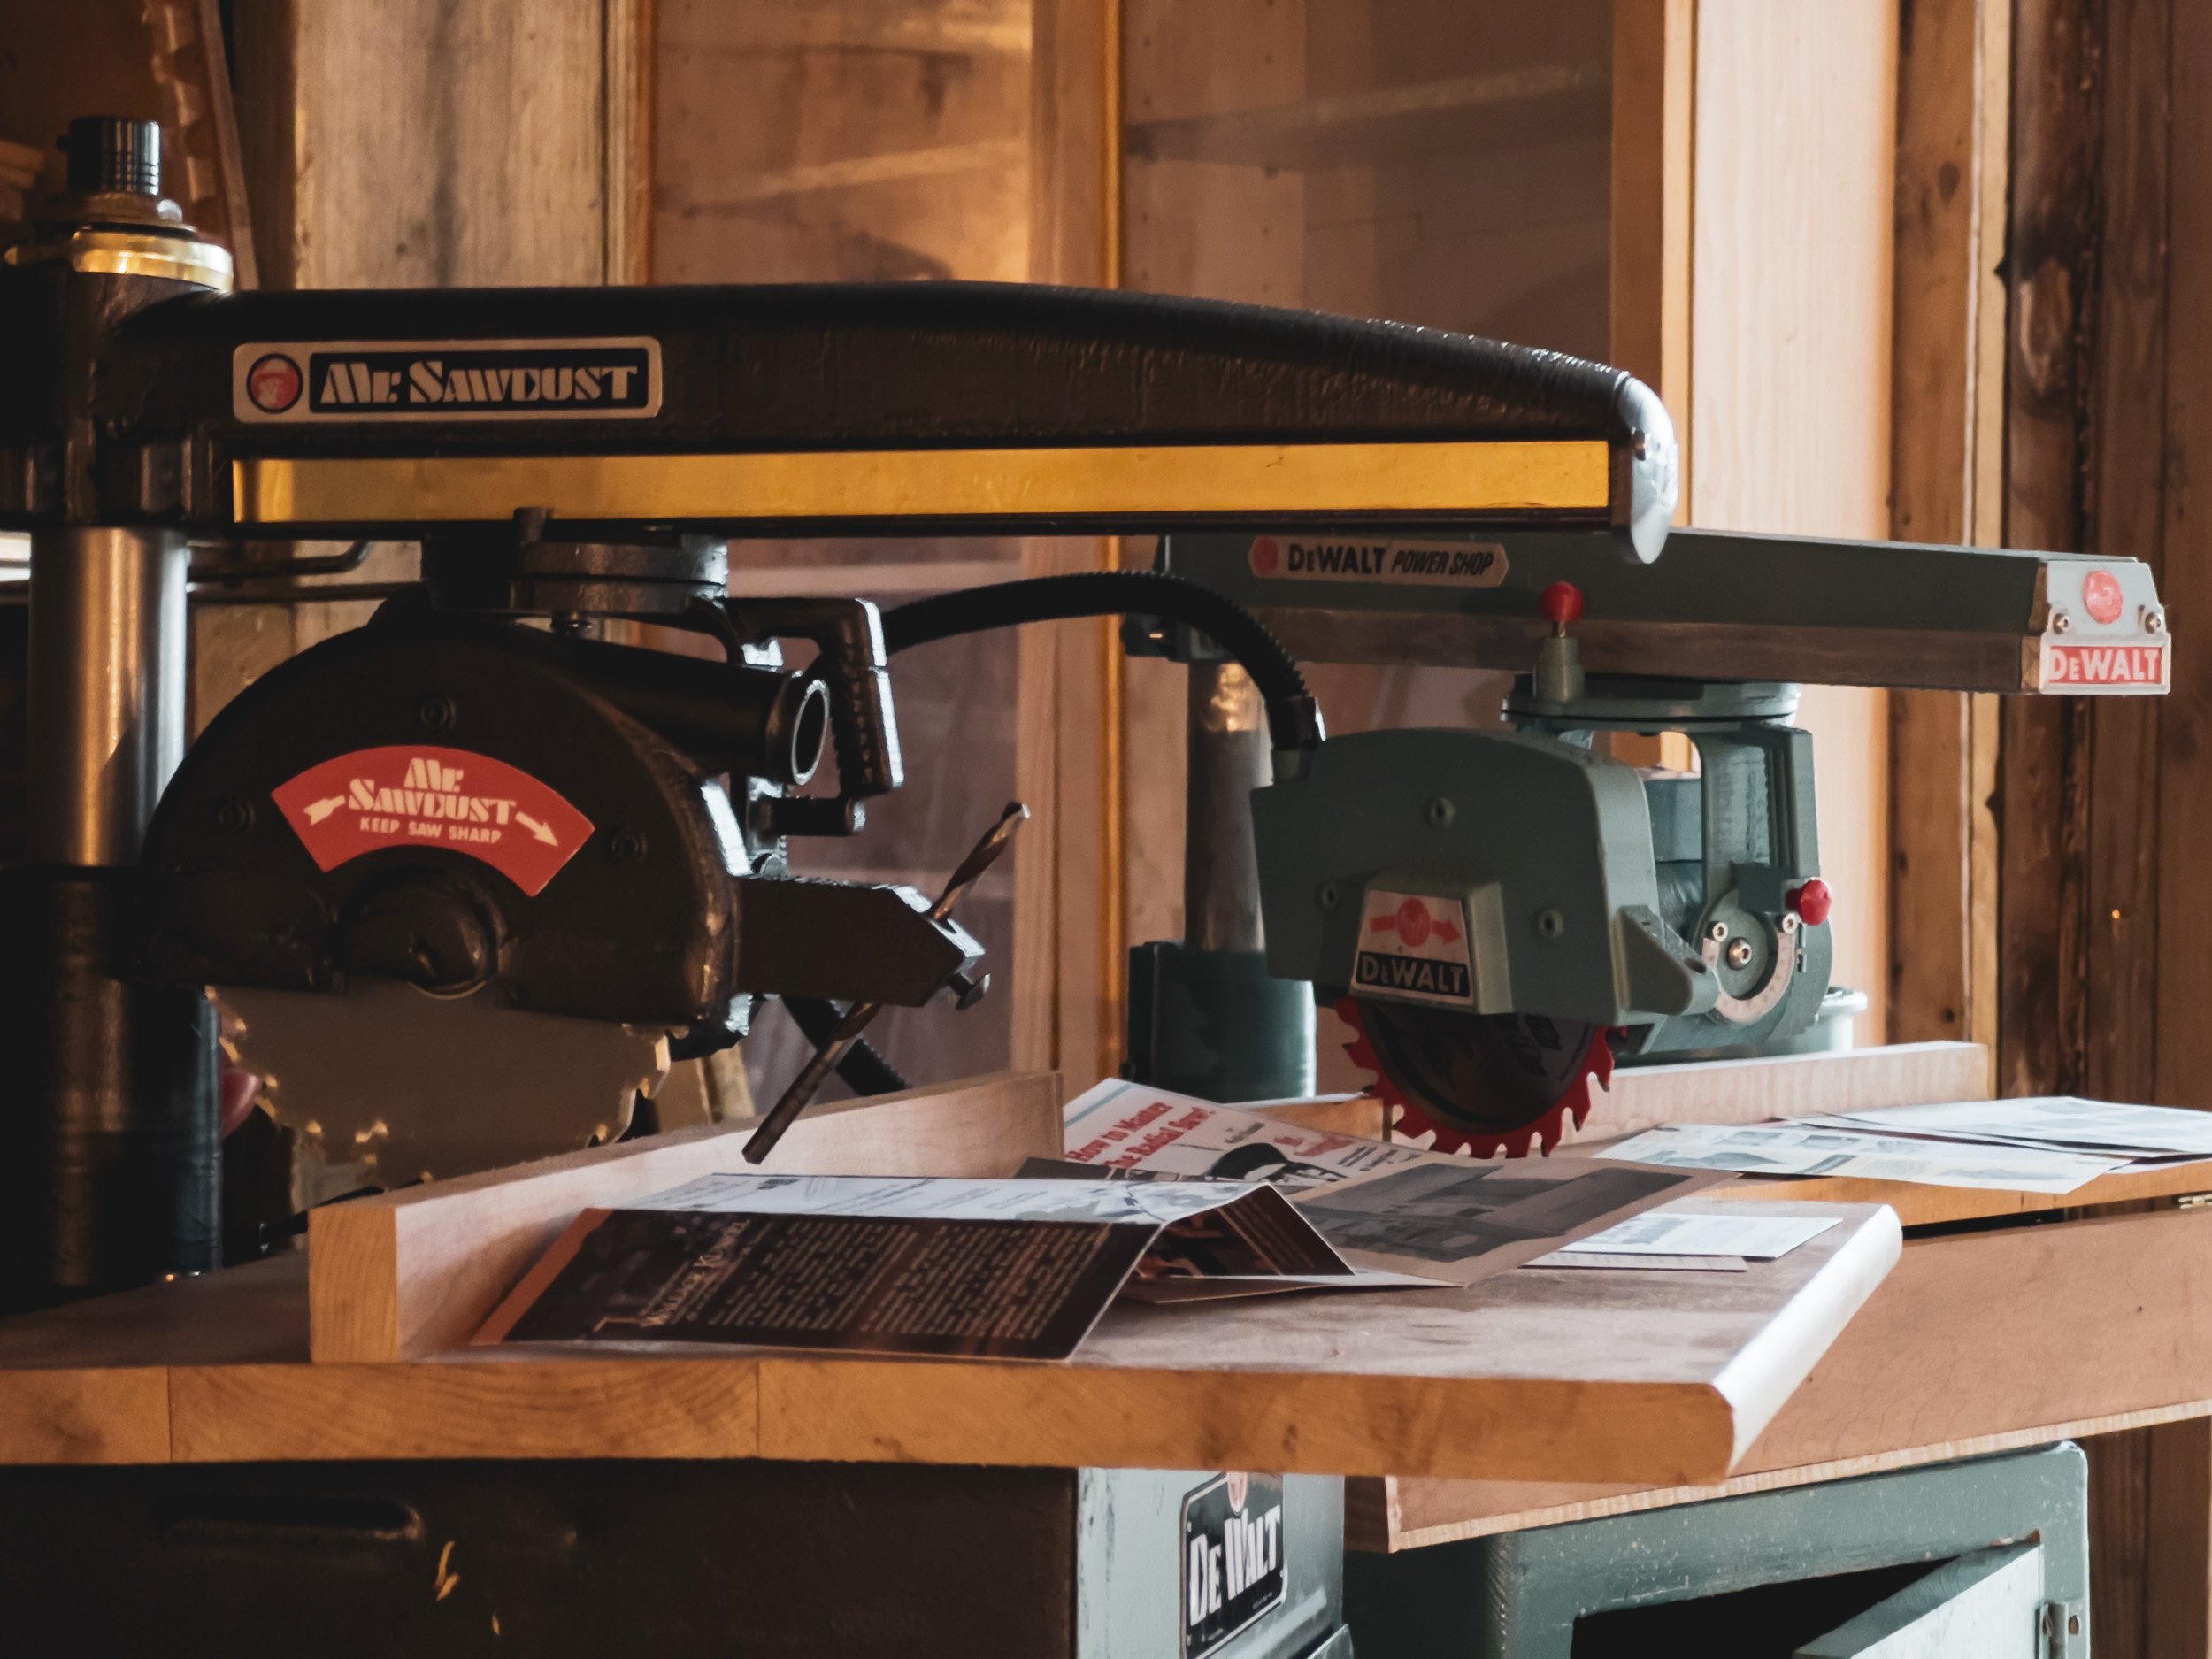
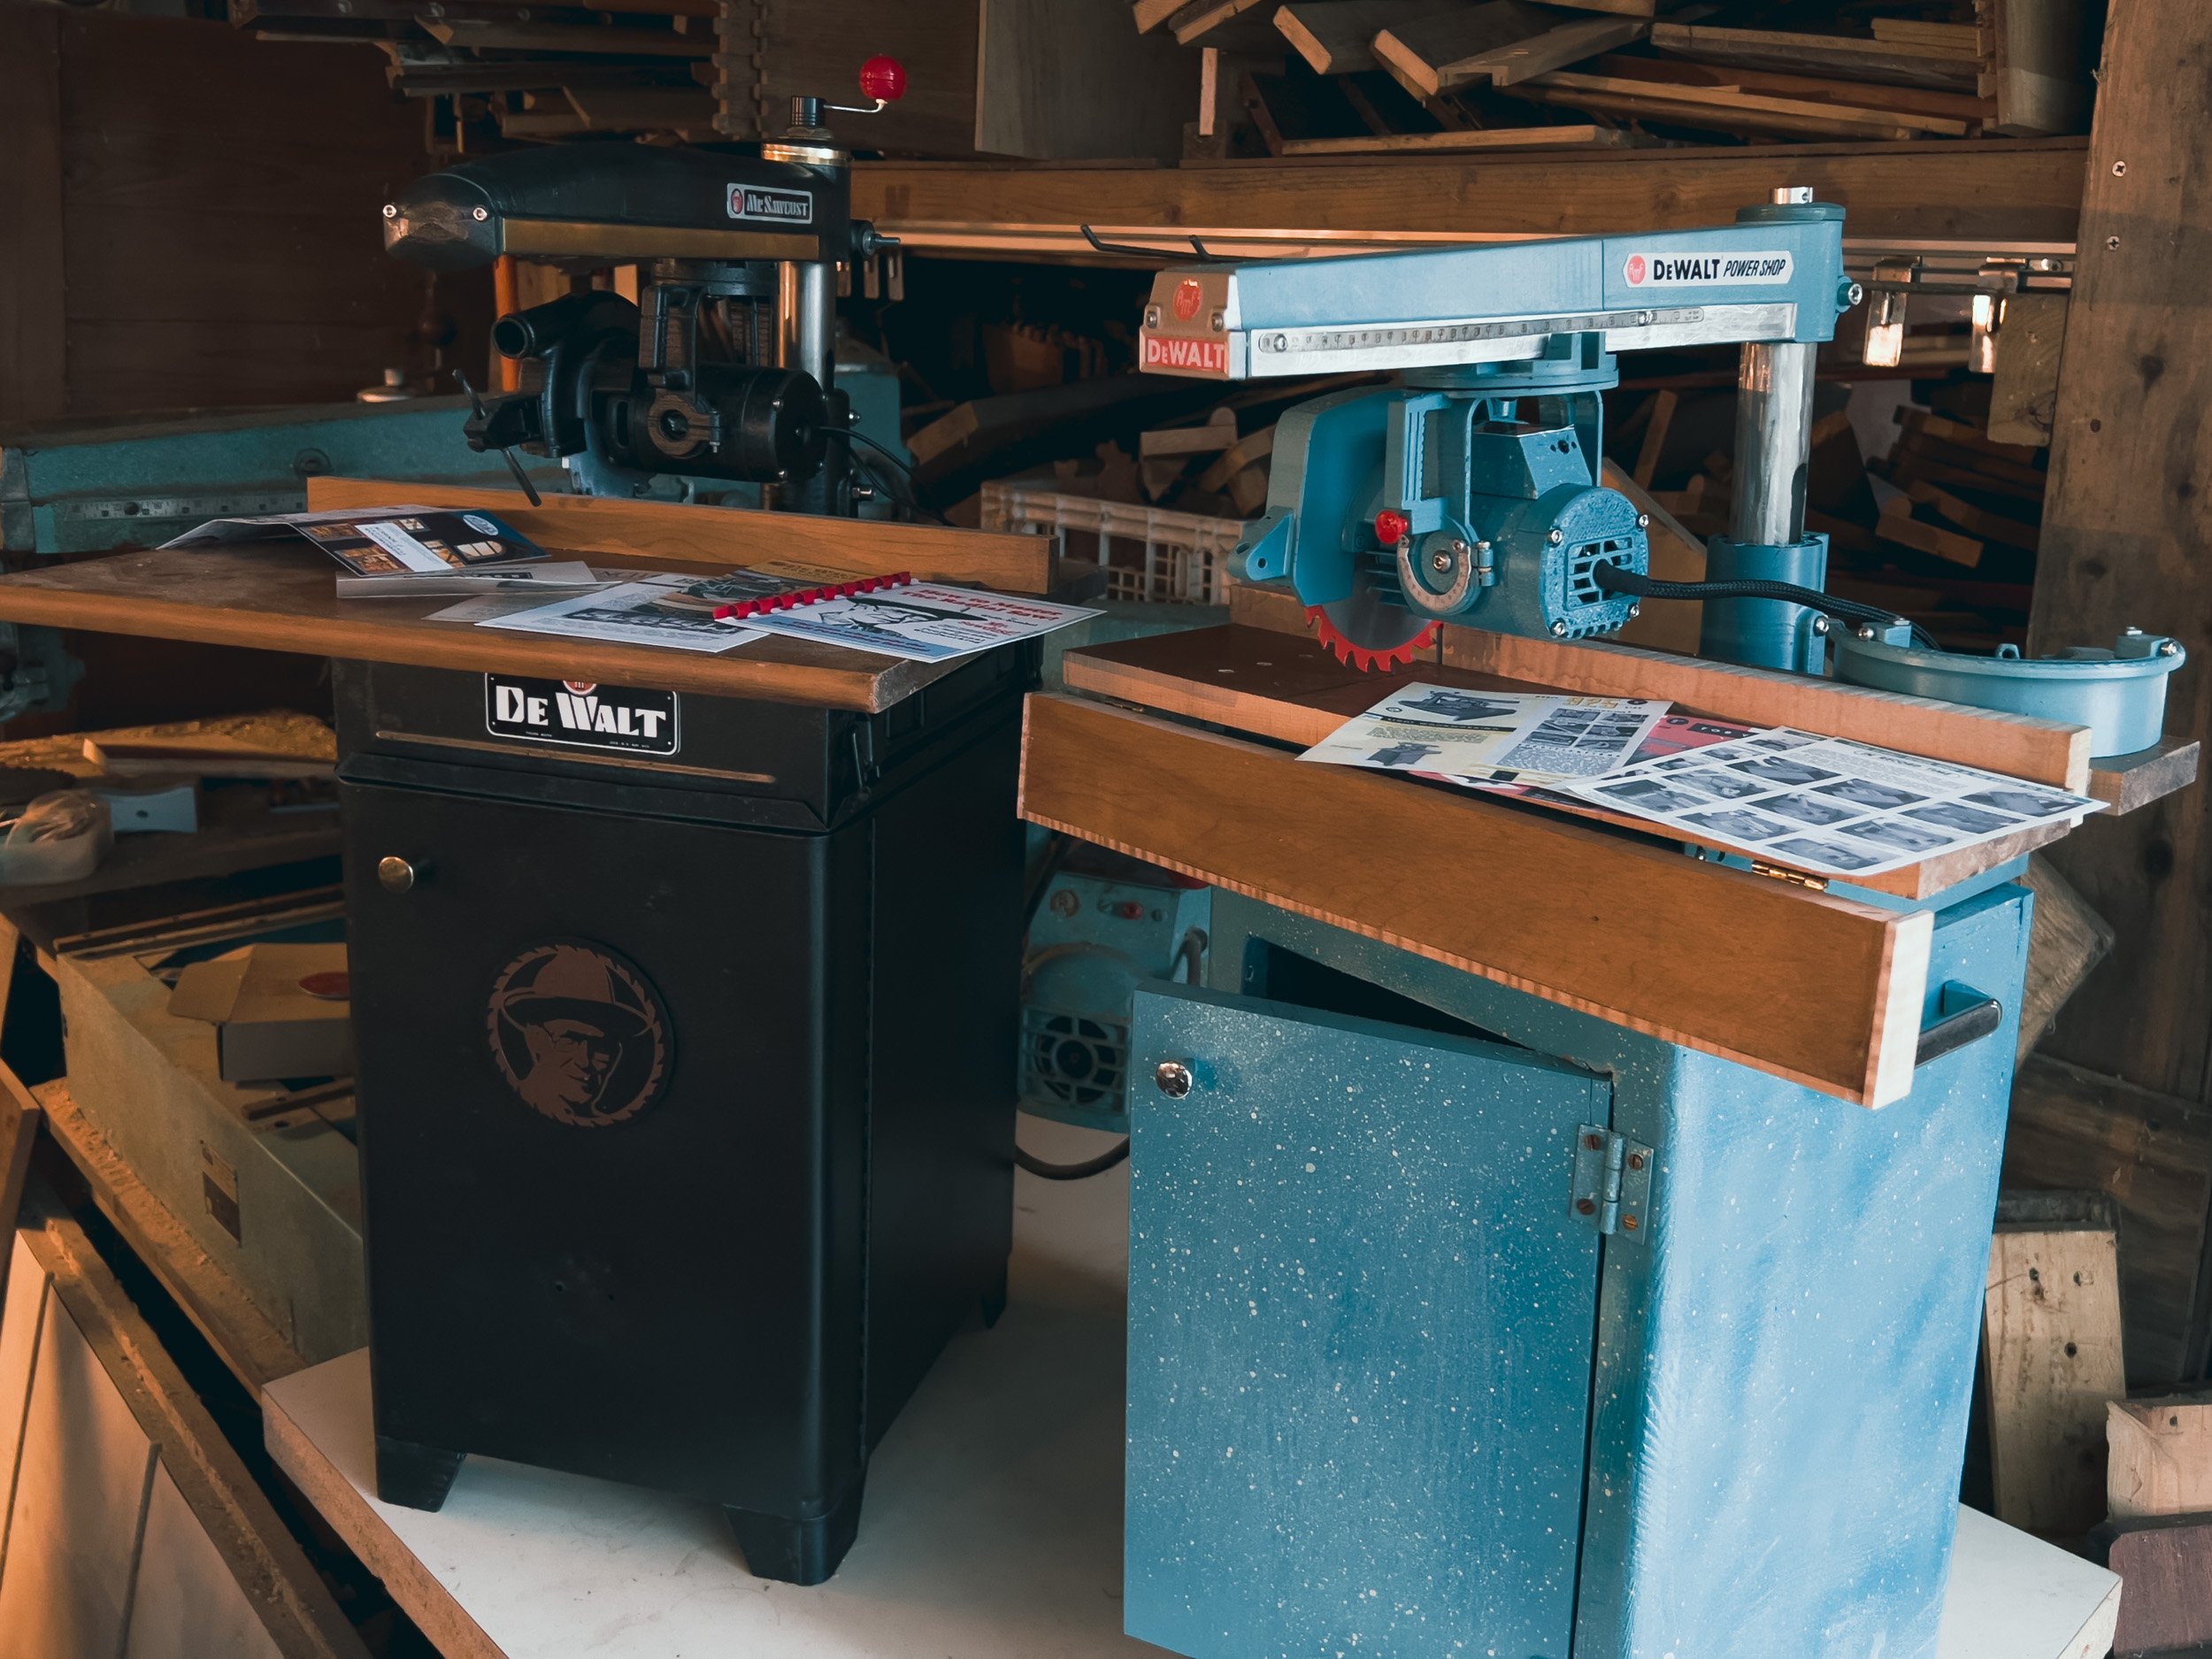
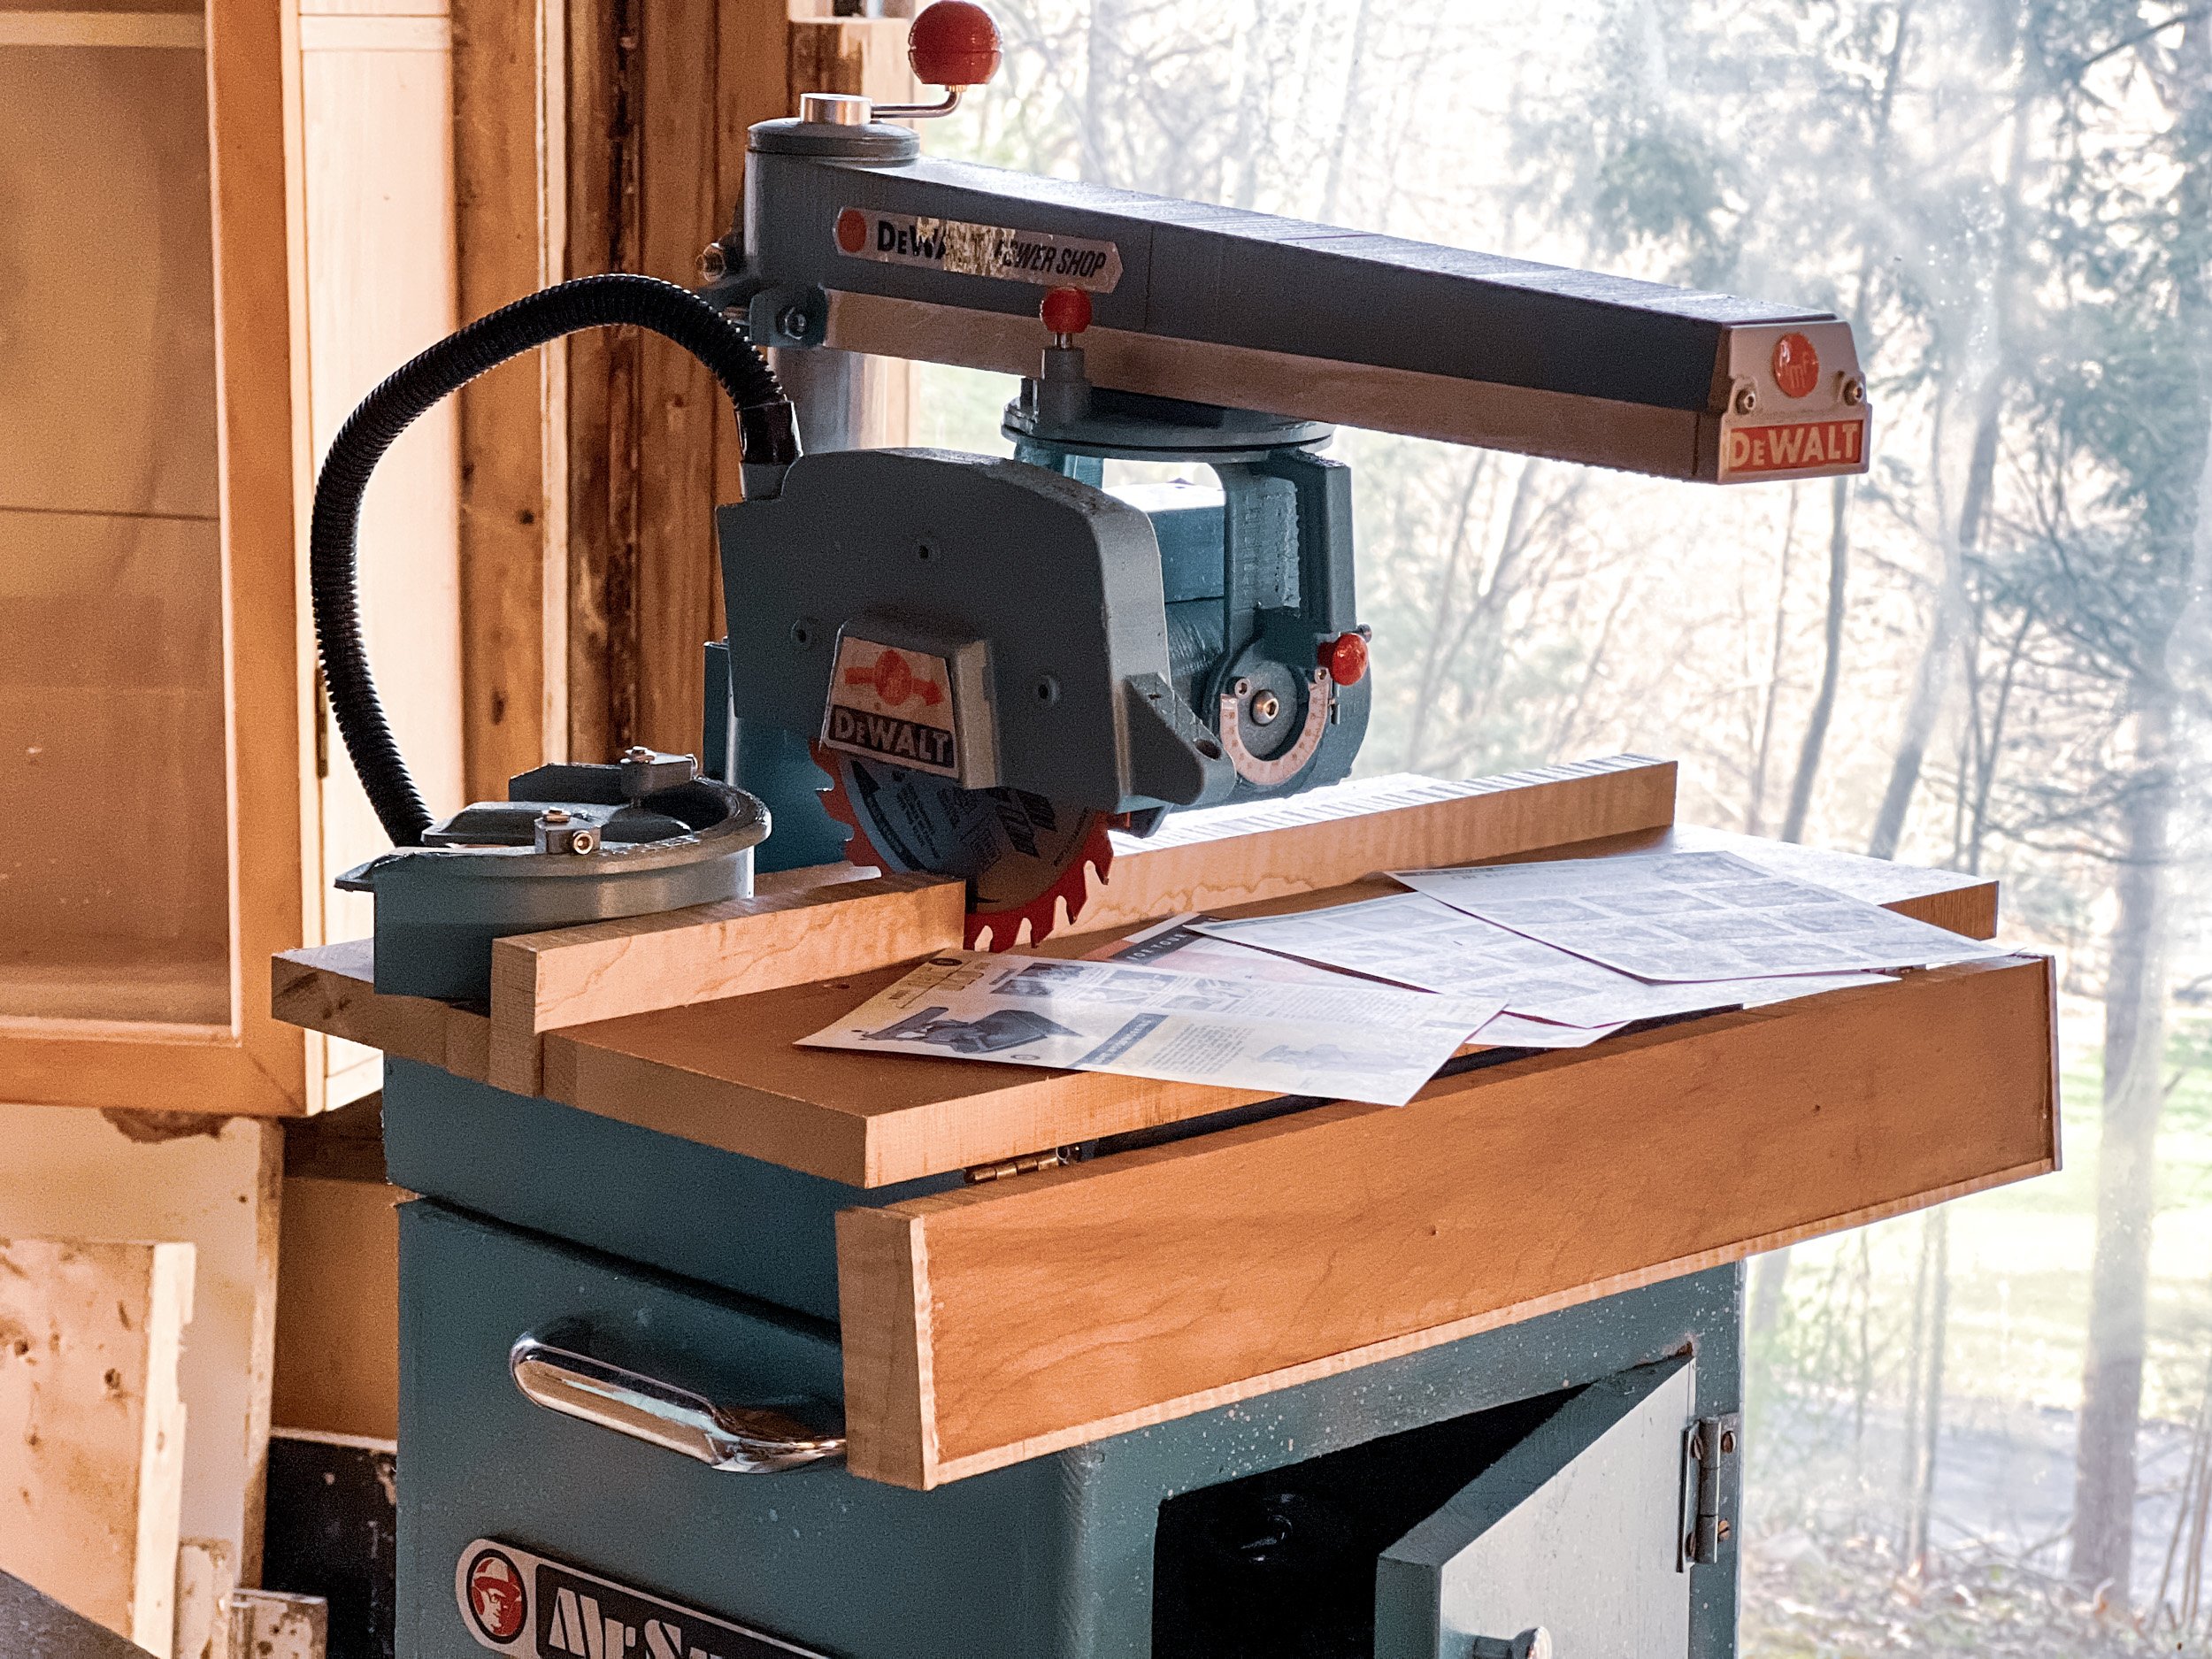
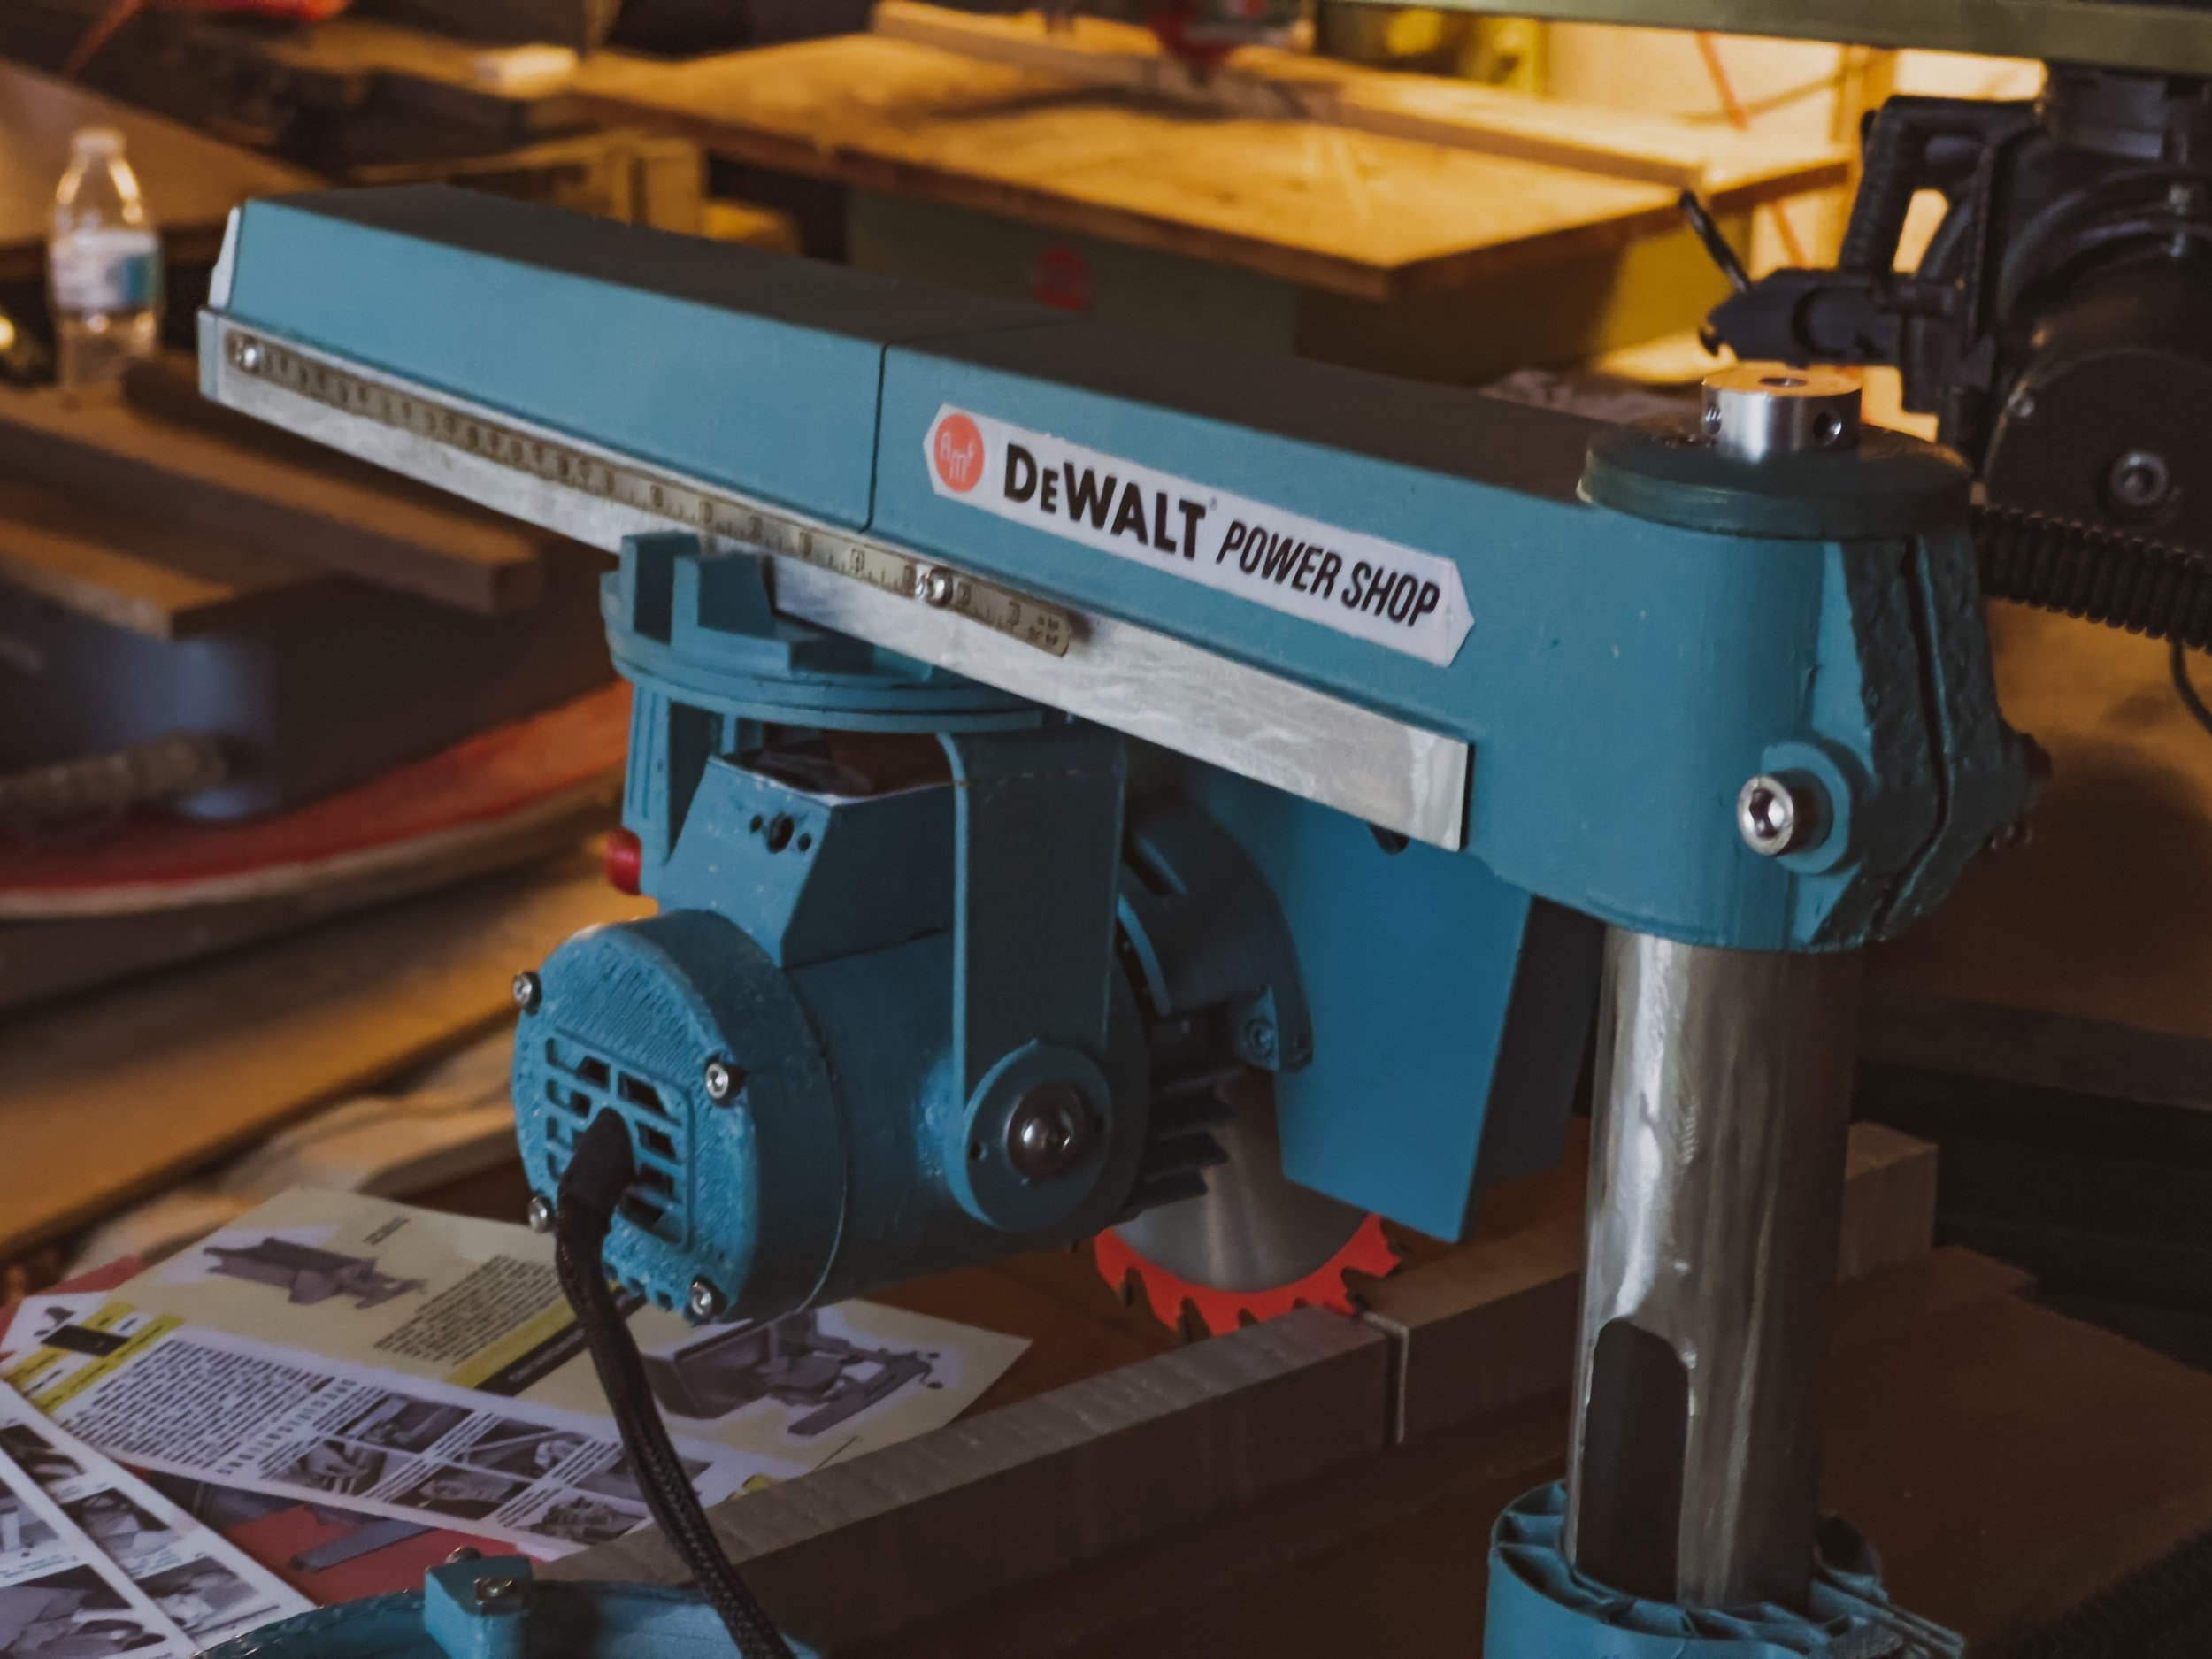
All I’ll say about the little MBF is about the color. As much as I wanted to make an authentically “DeWalt green” model – I knew anything “just close” with that color would keep me up at night. I’m sure there’s some industrial process to coat something this color in a matter of seconds, but I’m saving that challenge for the next one.
You only realize how complex that color is if you look closely… like, 1200DPI-close…So this first one got the black-and-brass treatment. If black was good enough for this original brochure cover – one of my favorites – it was good enough for now.
Additional photos at varying points along the way…


There’s something I love about this specific piece of old DeWalt literature. It takes you right into what was a relatable, exciting moment for whoever just started unpacking one of these, back around… what, 1958-60? It also made me look closely at how all the components arrived, and got put together for the first time.The MBF seemingly took forever, as is usually the case doing anything the first time through. I was about to call this little project done and get back to whatever I should actually be doing with my life.
Then I told myself… “let me just model the 925 arm”… “and print it at 1:4 scale… just to see how it looks.”
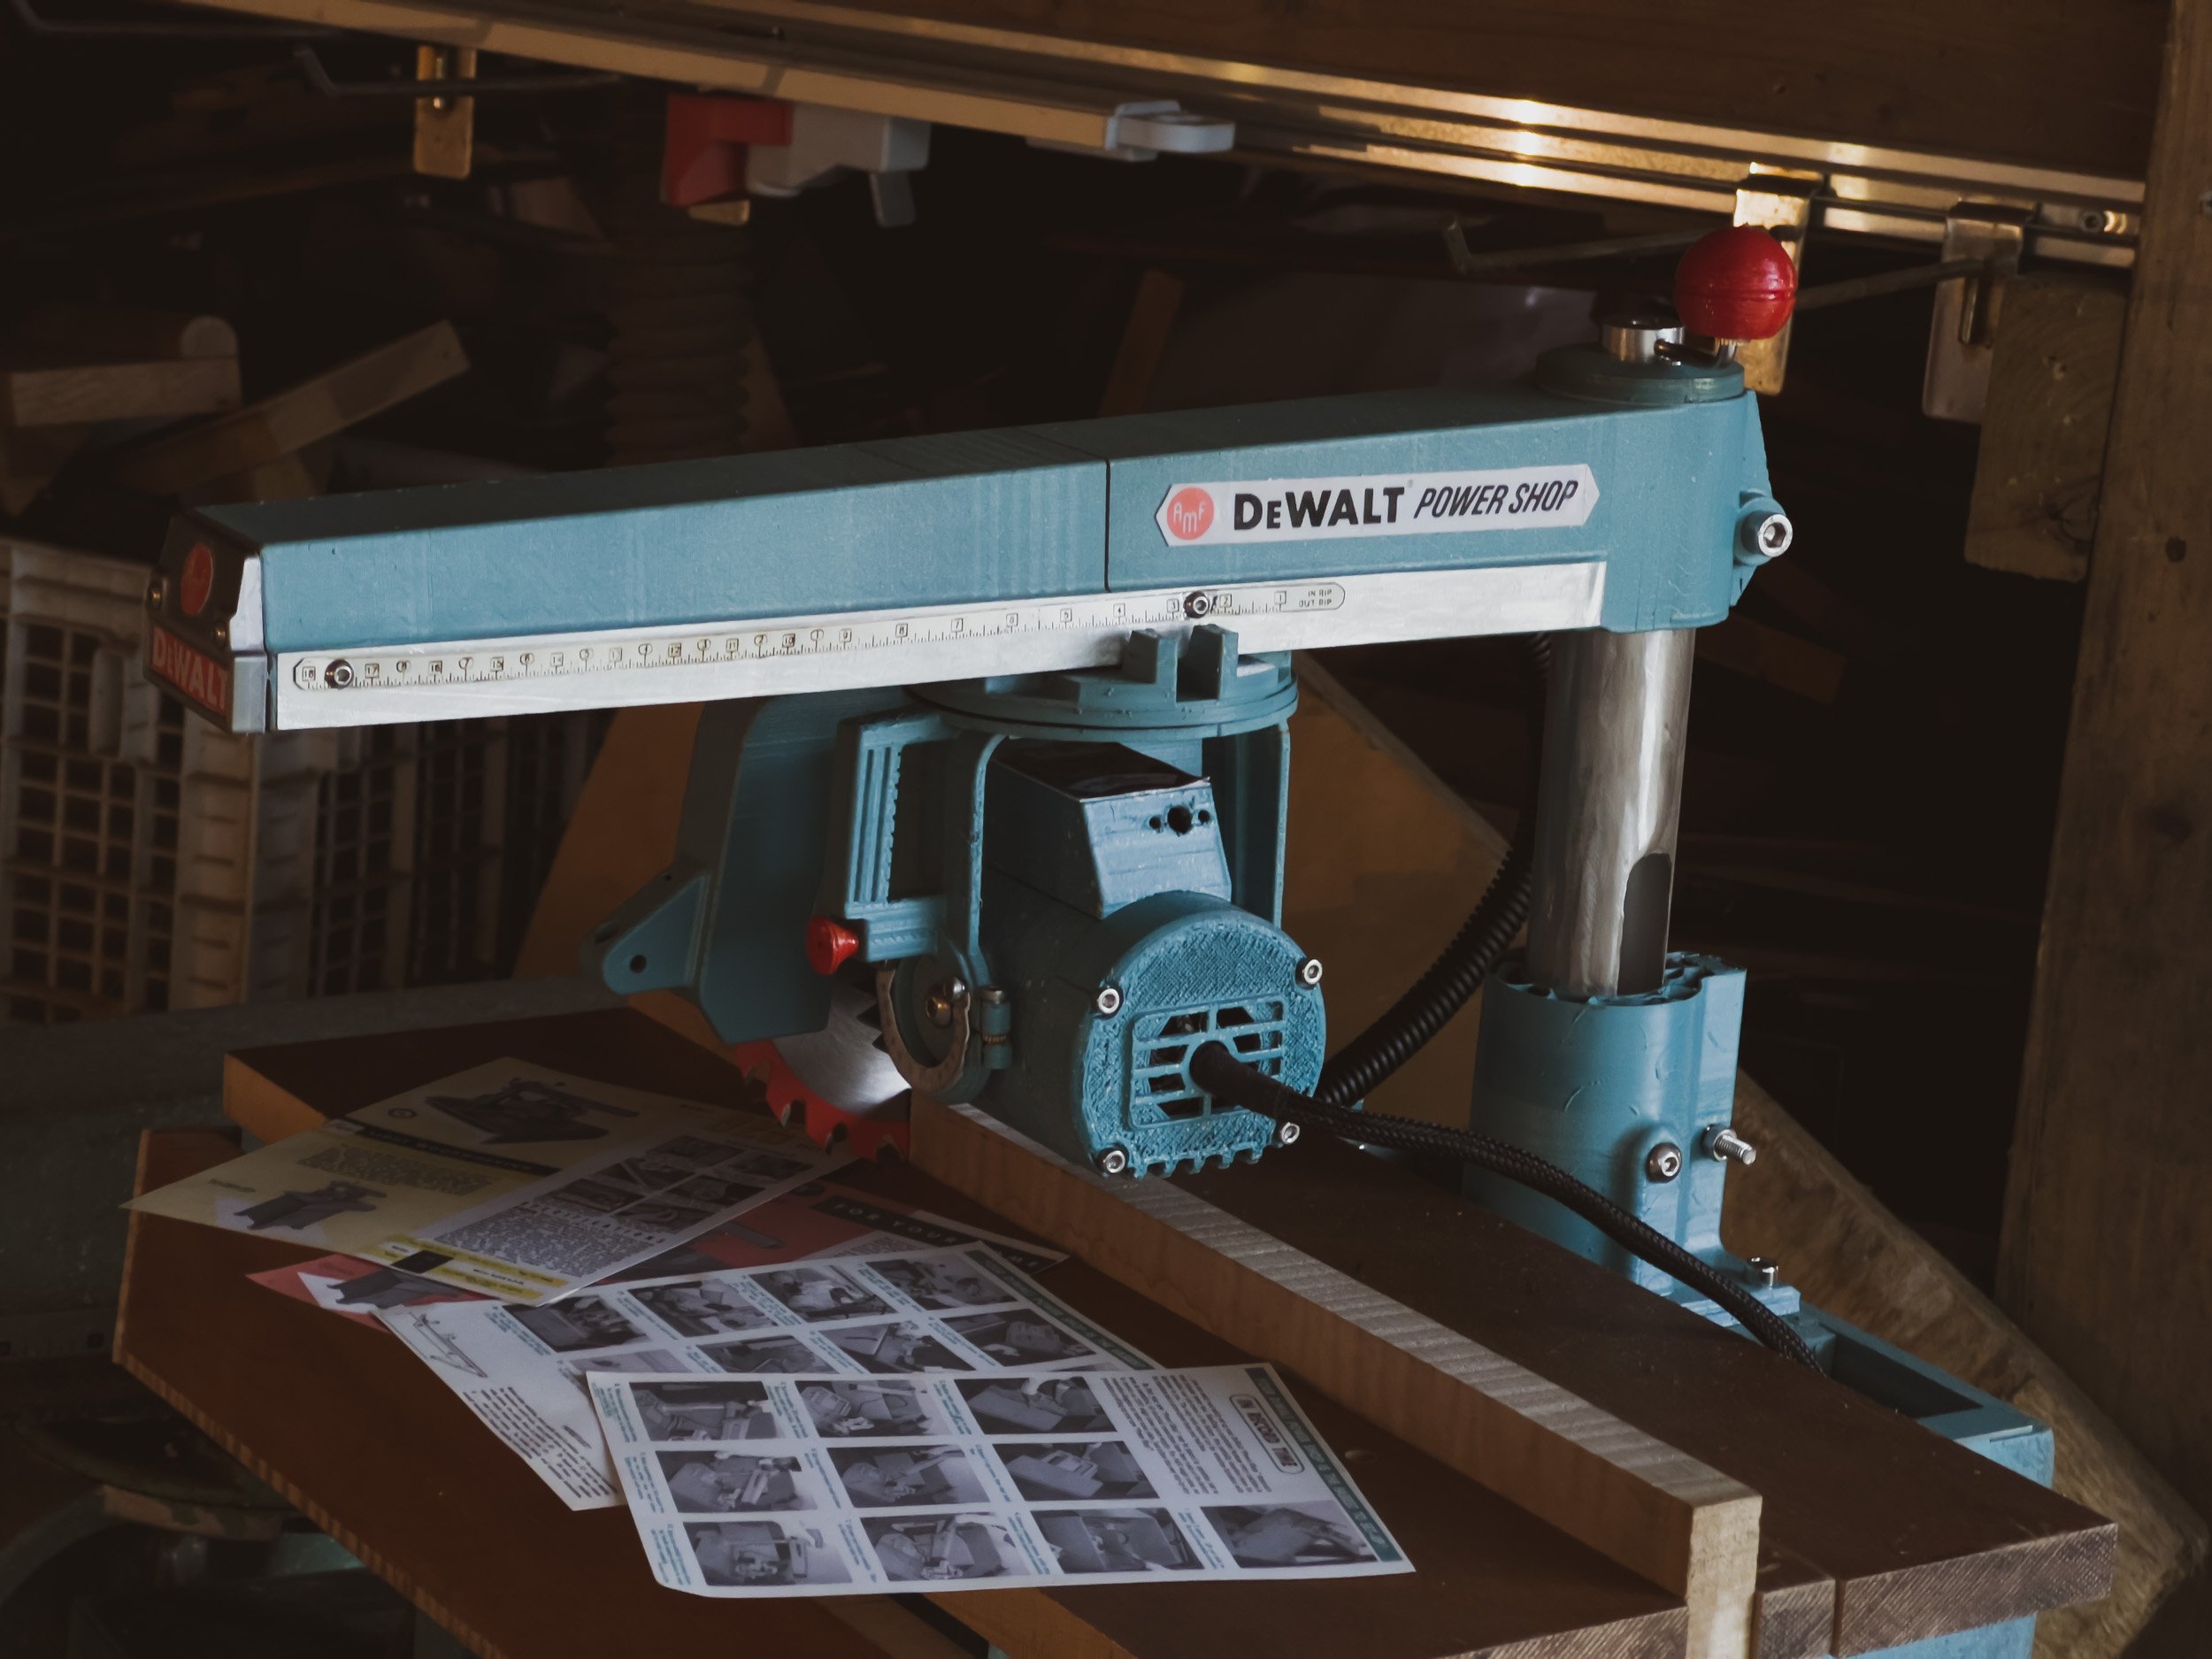
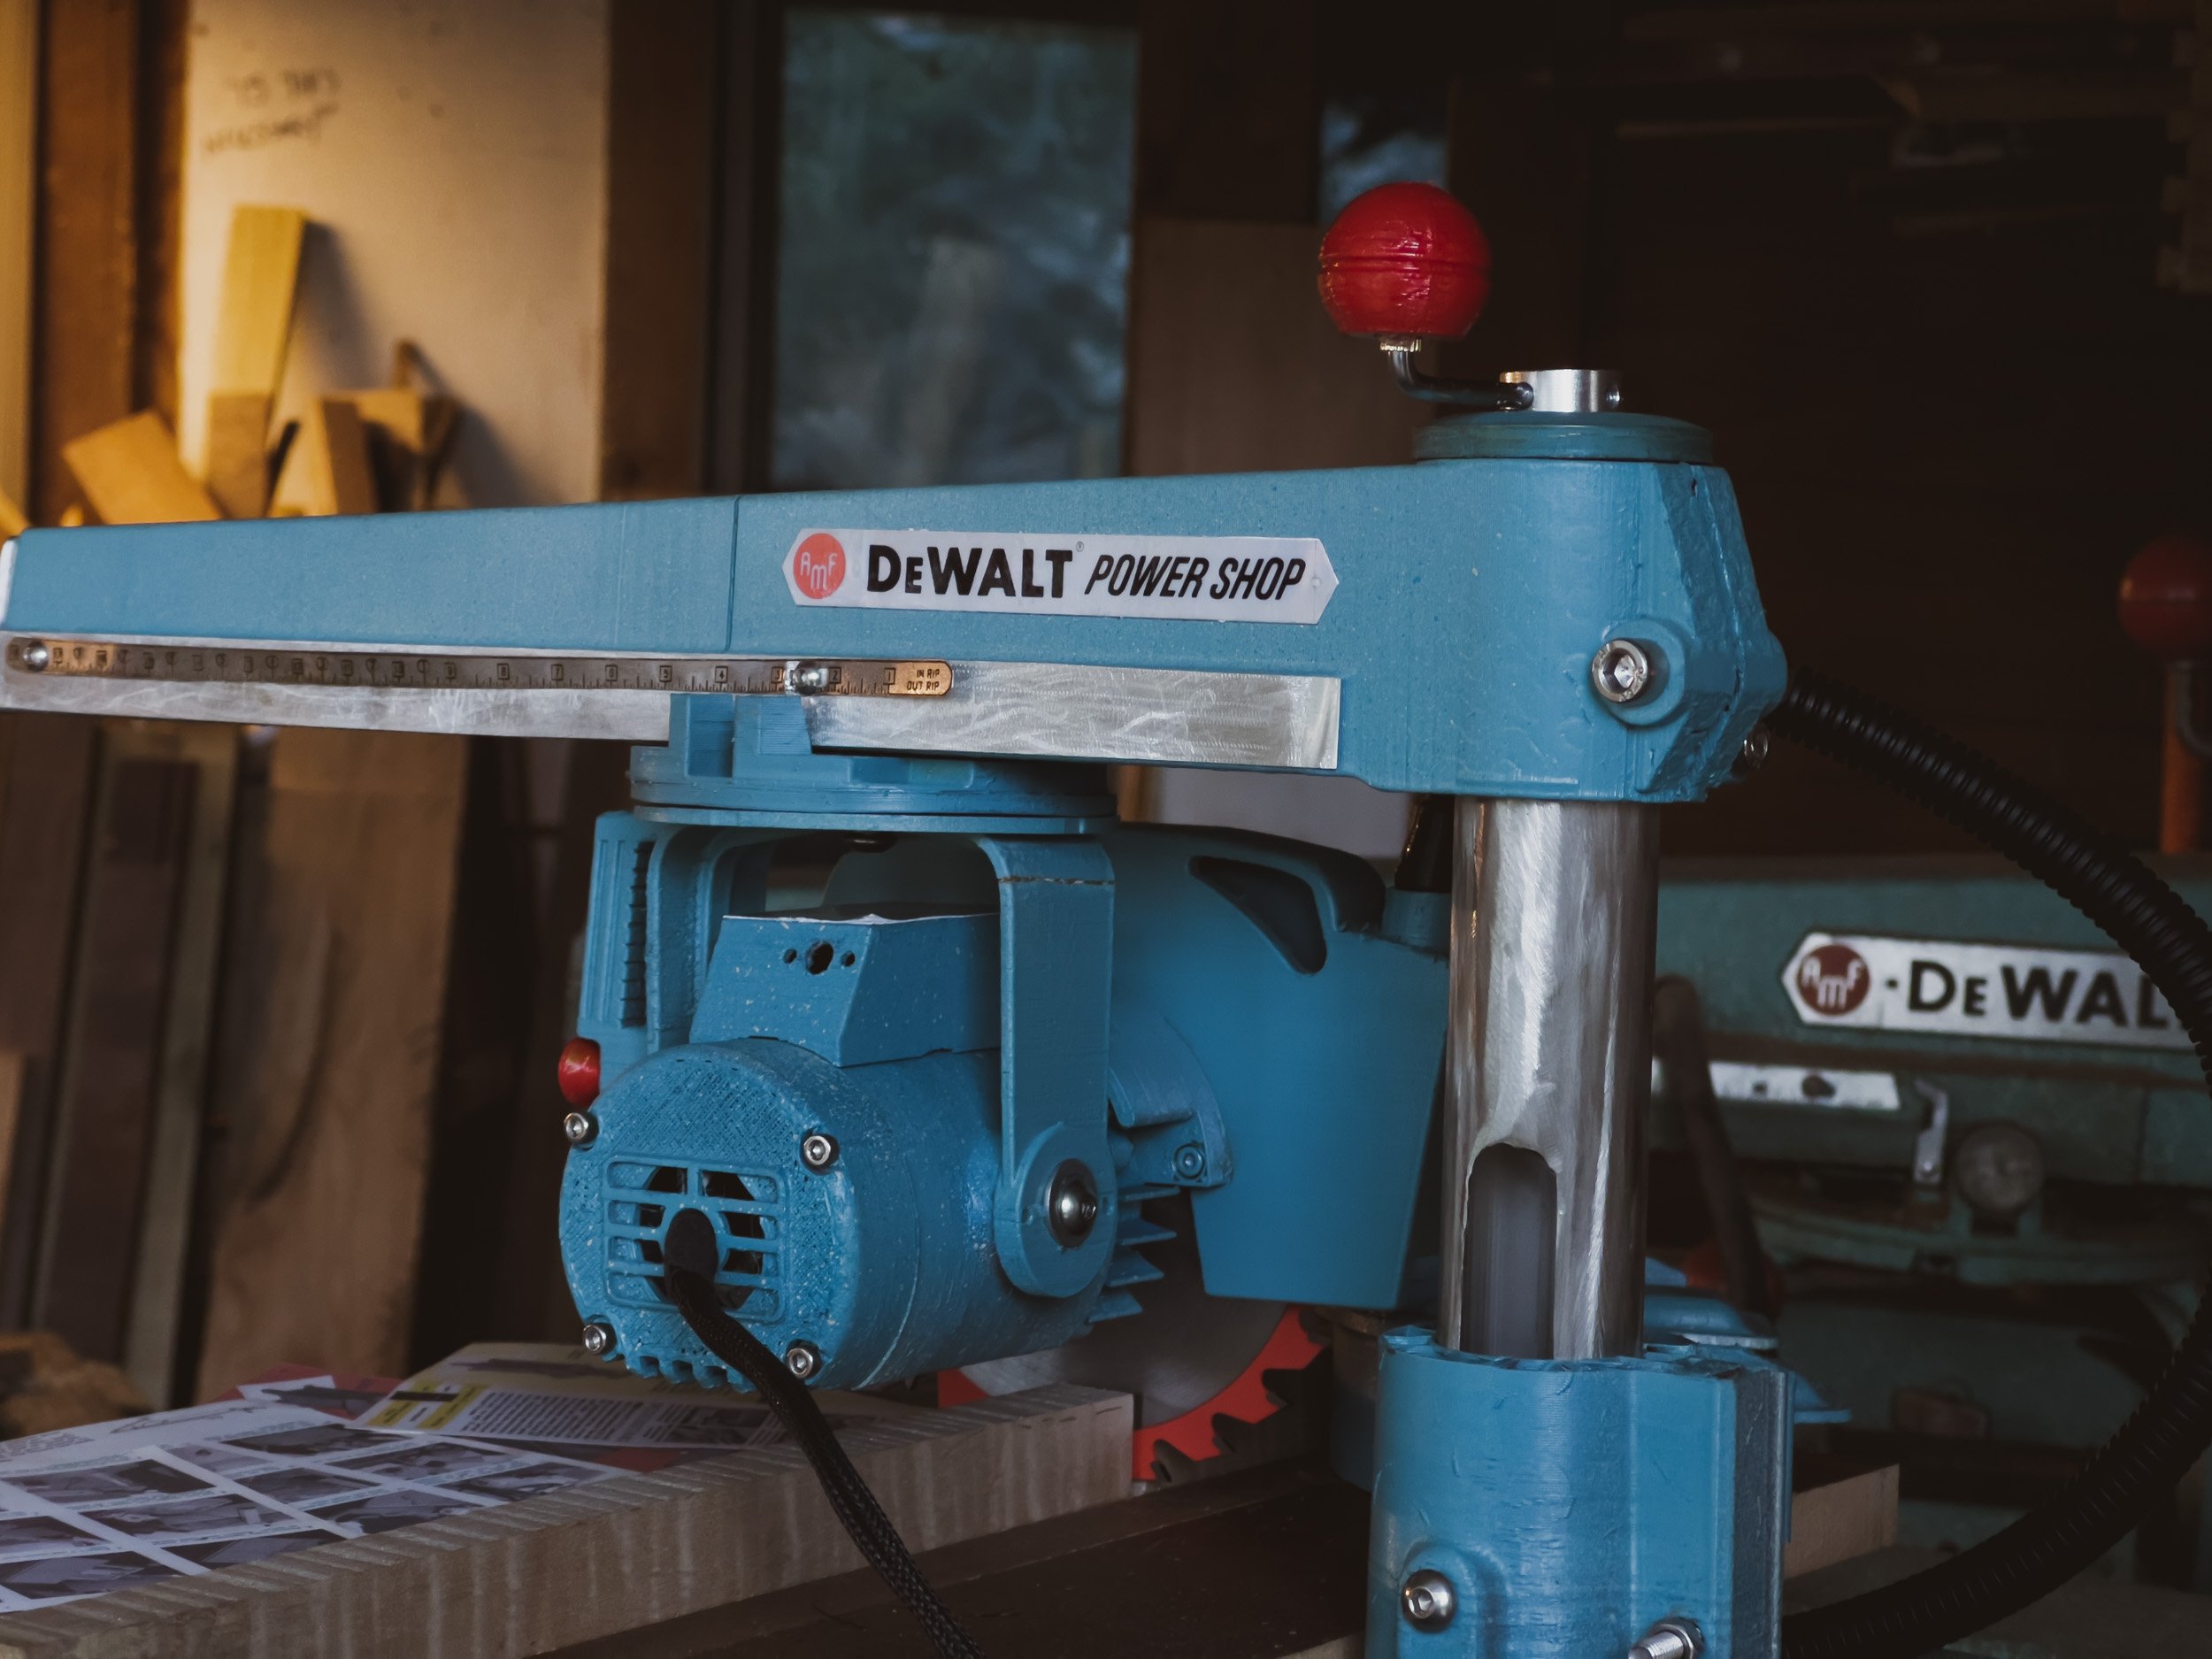
Then a few days later, I walked by the paint aisle in some store and noticed a Rust-Oleum color I’d never noticed… Vintage Teal, so I bought that — fast forward about a week, and the little blue DeWalt was done.
One thing to note…
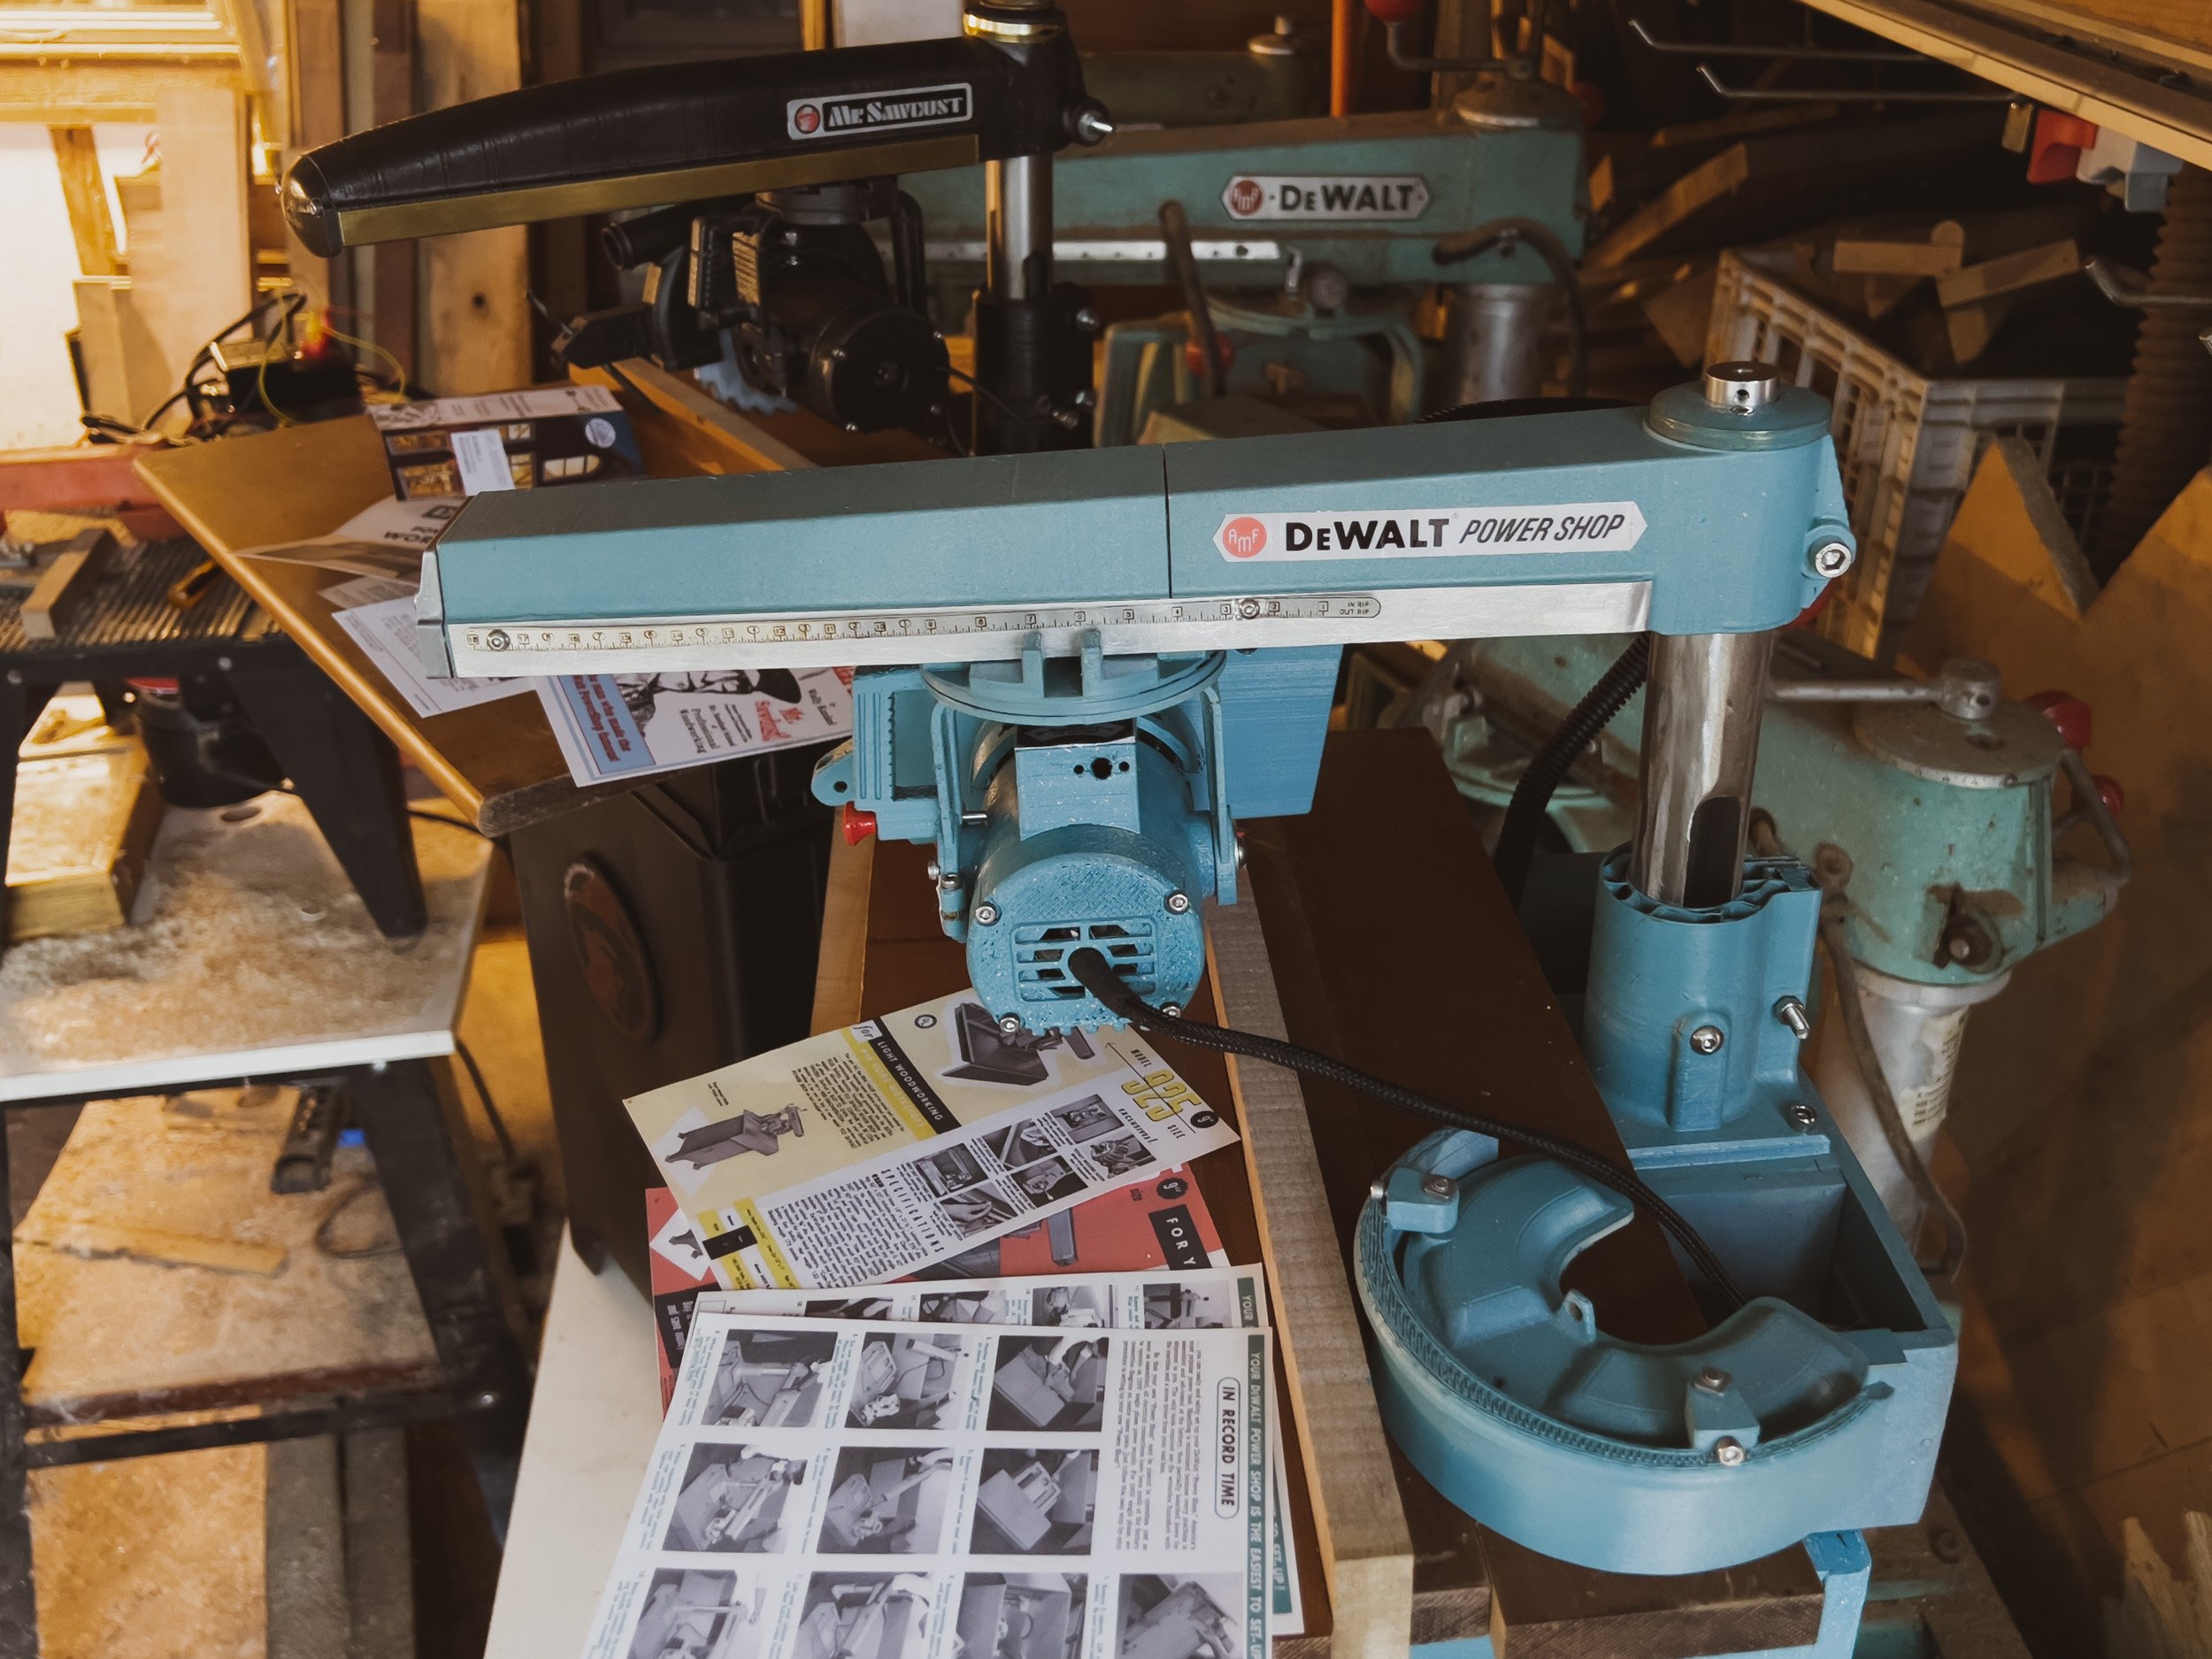
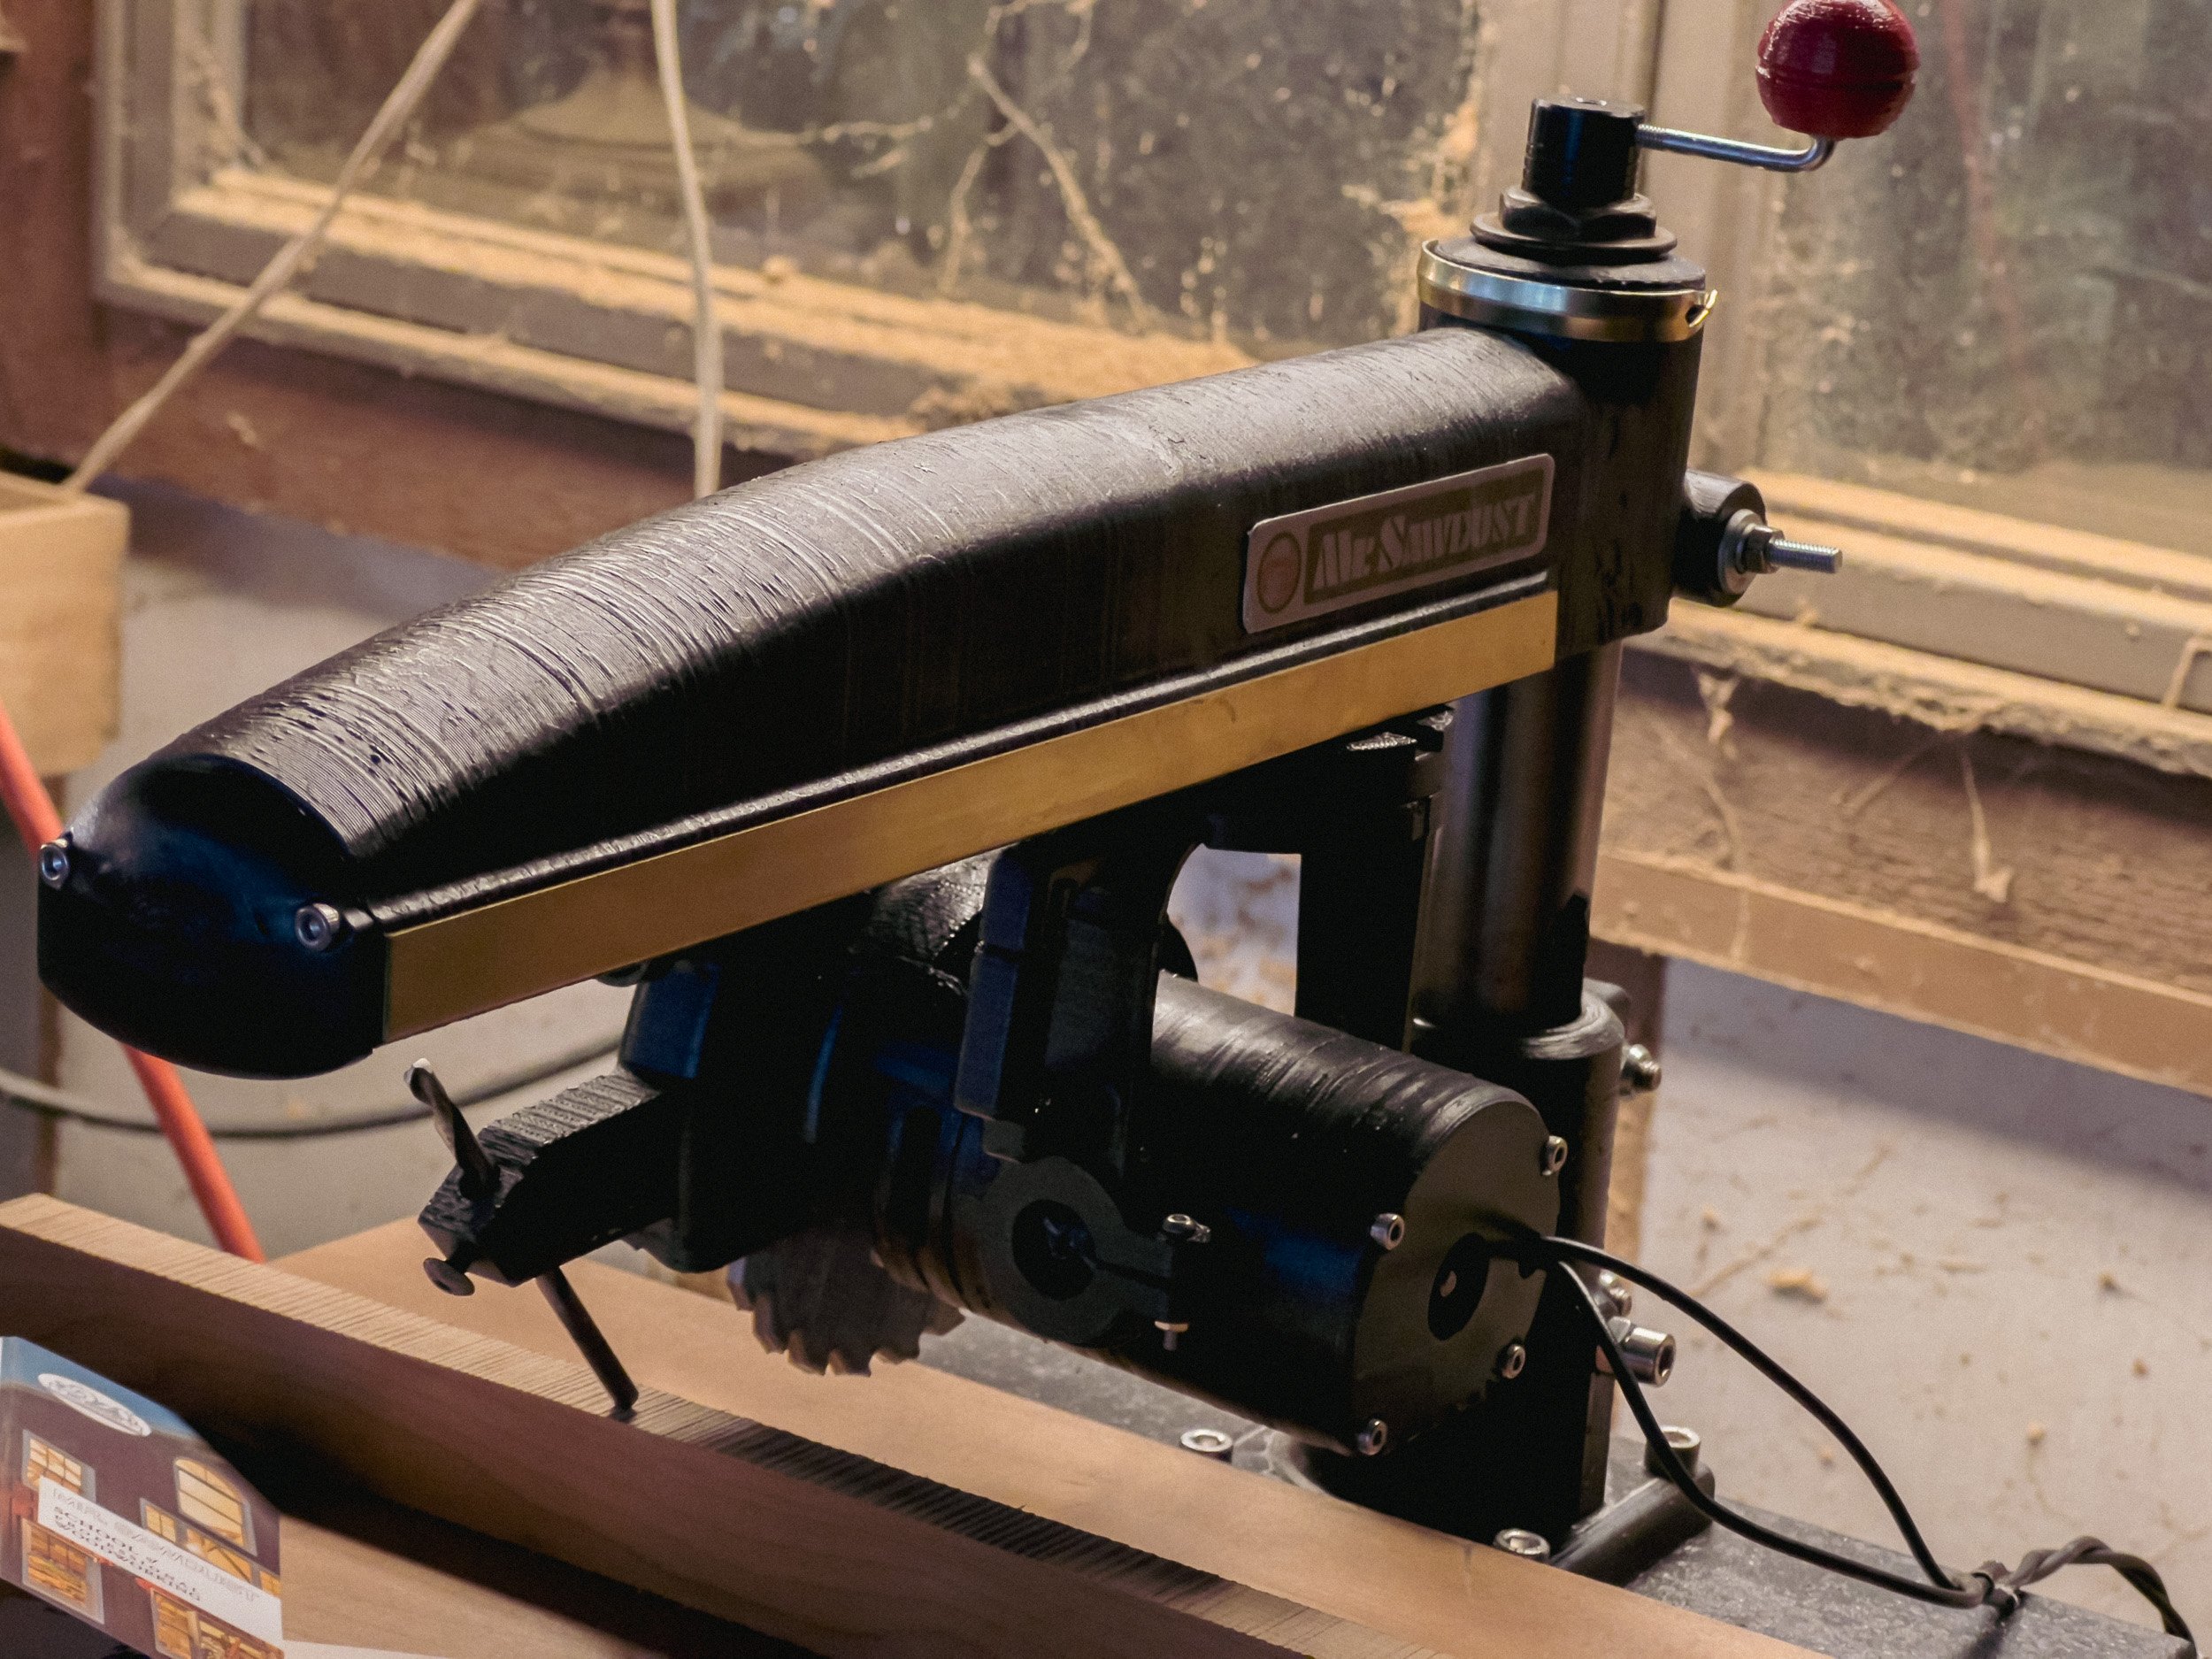
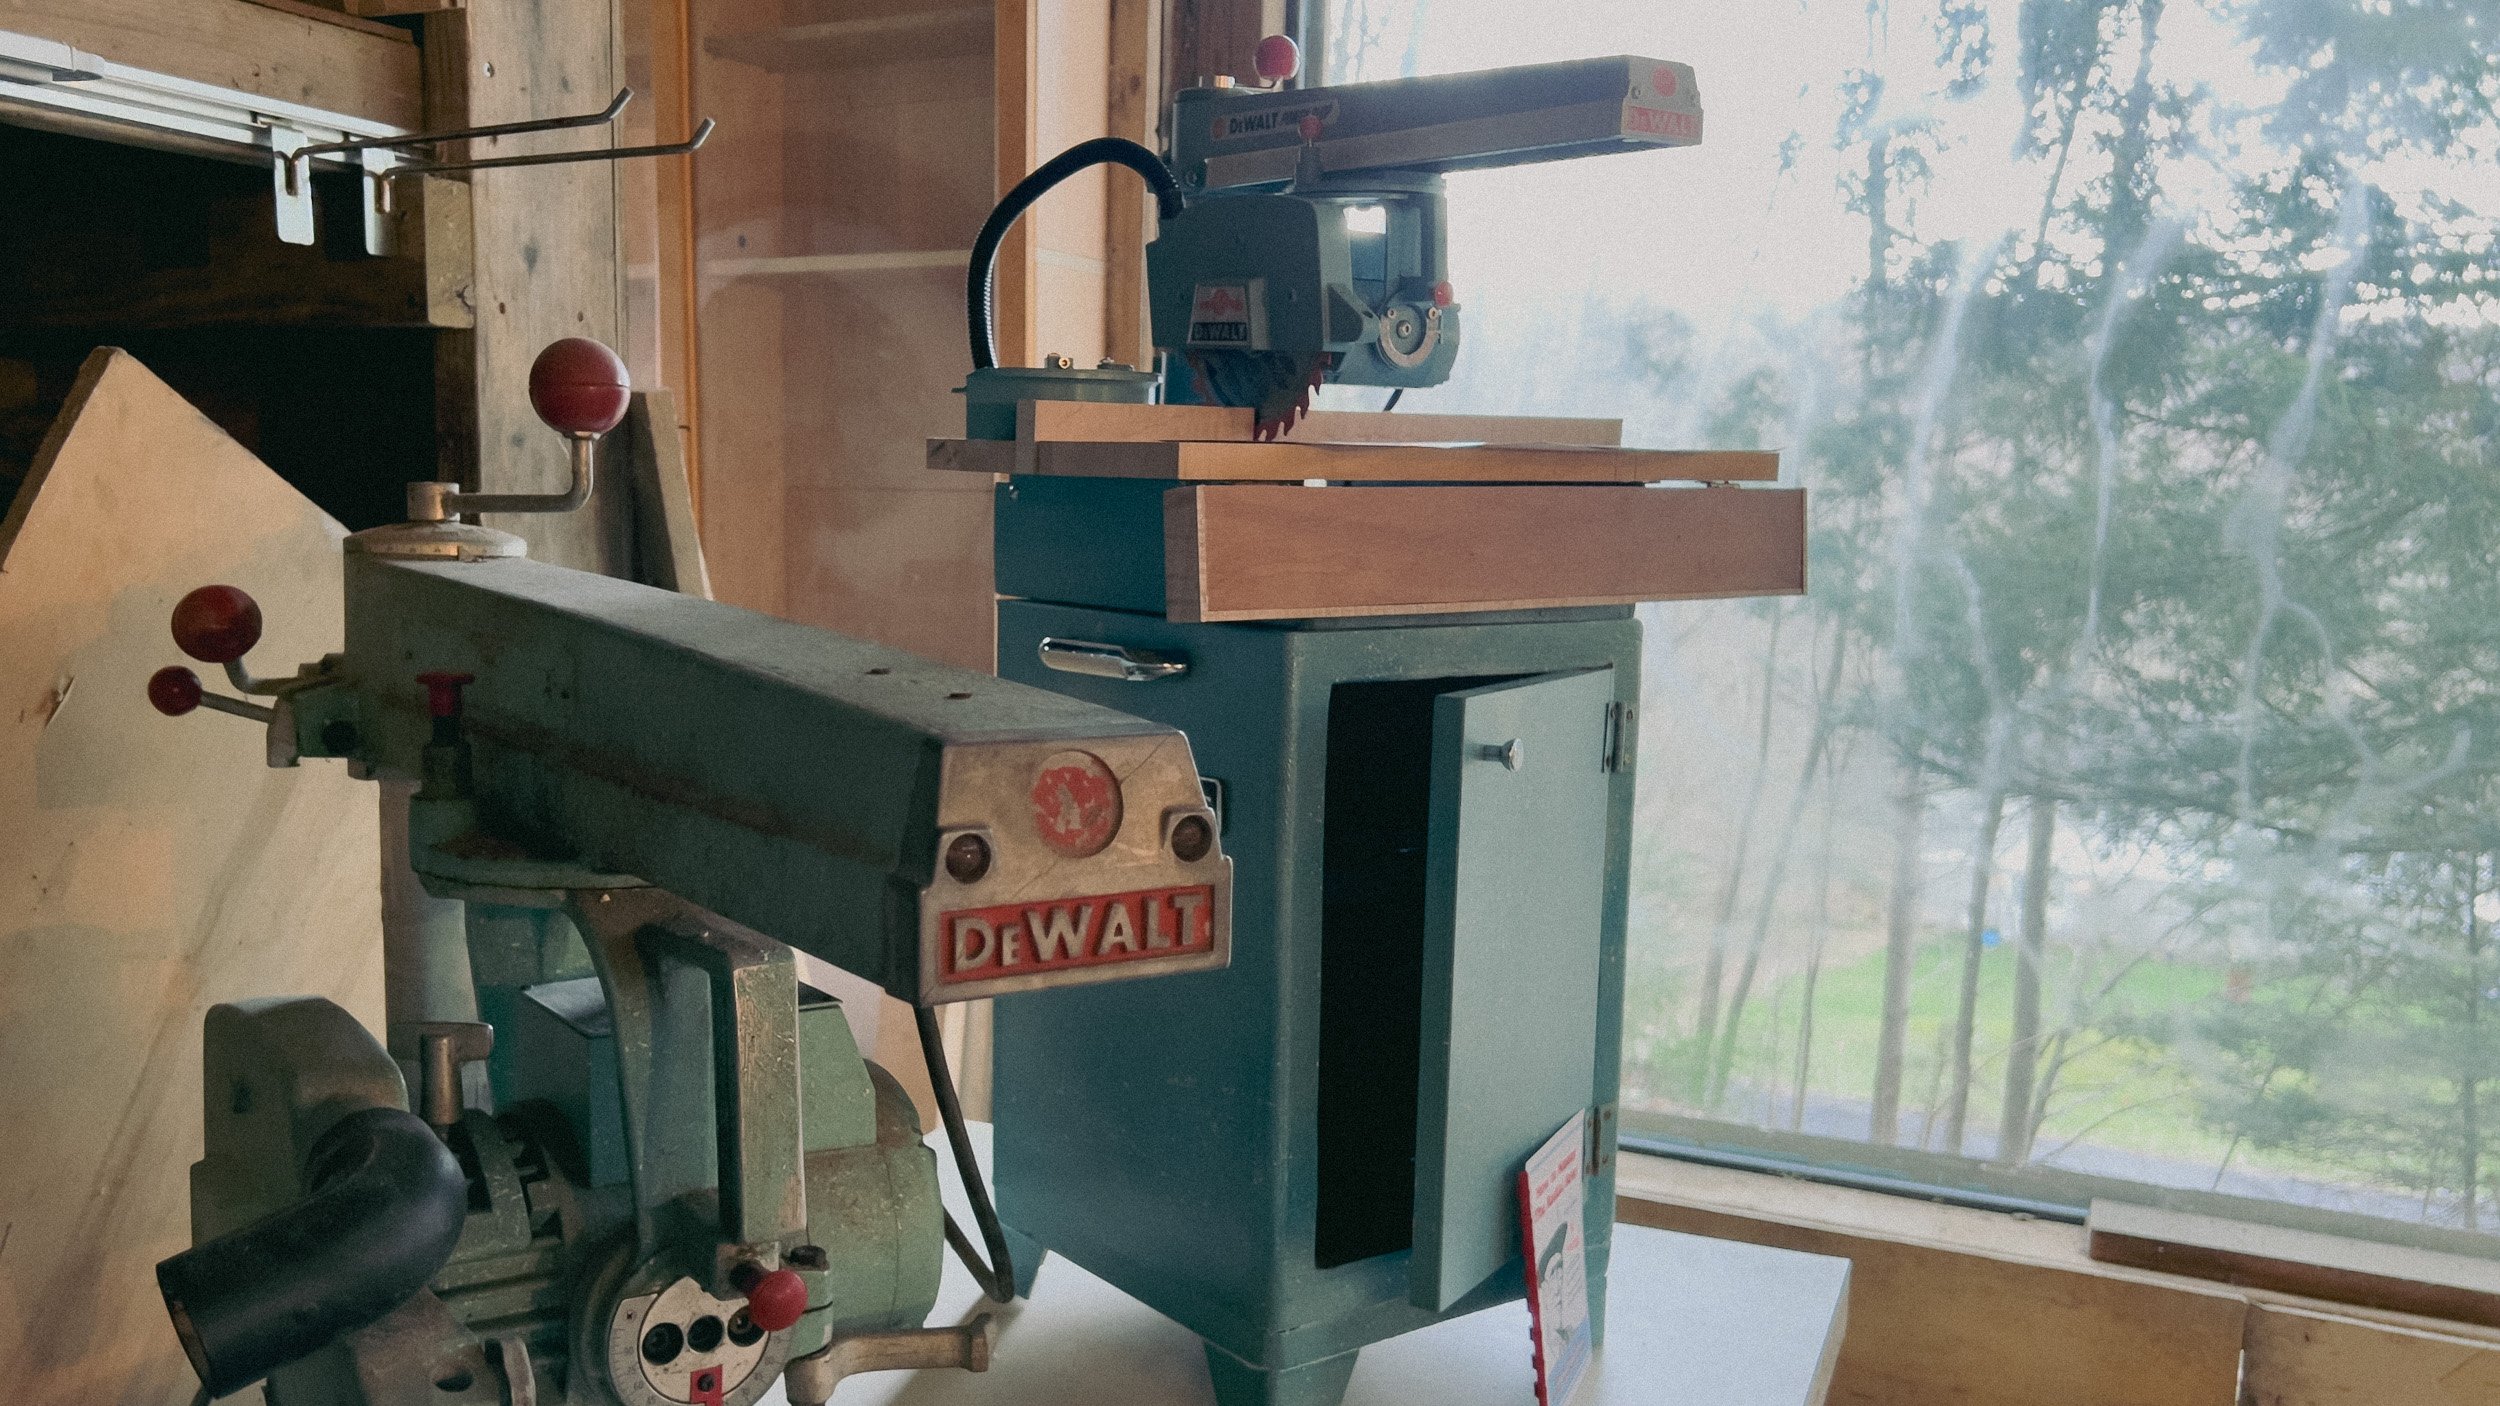
Purists will notice this is mostly a 925… with a 1030 blade guard, and possibly a few other details. I also realized this after modeling from a few confused reference photos. So maybe it’s like a… Model 977 ½. Close enough, right?

More photos from along the way…


There’s something Carl Sagan once said — and I cannot remember the last time I went more than 24 hours without hearing it in my head: “If you wish to make an apple pie from scratch, you must first invent the universe.” My subconscious serves up his voice saying that every time I find myself (hours/days/weeks)-deep into doing something I naively told myself “shouldn’t take too long”.
I know this is absolutely not what Mr. Sagan meant, but I internalized it as a slightly comforting reminder that — often to do something quick and simple requires you to first get through an entire chain of lengthy, complicated things.
If I wished to make this little saw from scratch, I first had to build the entire real-world saw digitally.
To the best of my knowledge, nobody has ever properly modeled one of these beautiful machines. At least, not in any way that I’ve been able to unearth. There’s a few half-assed SketchUp models, but none approaching completeness. Understandable, considering they’re no longer in production, and all the original, master technical drawings likely only exist in a dusty archive/storage room inside some DeWalt office. In fact, someone snapped this photo inside a DeWalt legal office at some point, and I imagine there exists a serious archive full of these drawings, somewhere…
Patent drawings are useful to a degree, but I’ve never managed to find thorough “masters” for an entire model. Patents generally detail specific “patentable” aspects of a machine. Again, sometimes useful and almost always fascinating – but incomplete for this purpose.
I’d imagine Original Saw Company maintains some serious models for their current-generation saws, but even if I magically had access to that, it would only be a solid mechanical reference. It wouldn’t get me what I was after.
As a sidenote, Wallace Gardner’s drawings from this era (like this one) are some of the more beautiful technical illustrations I’ve come across.Fusion
This little project was basically my way of deceiving myself into getting fluent working inside Fusion 360. It was always one of those daunting engineering/design tools that always managed to make me feel quite stupid whenever I tried to do anything.
Fast forward a few months… and it’s now become the single most enjoyable tool I can think to launch. It’s never not running on my Mac. It’s unreal just how powerful parametric modeling is, now that I’ve gotten my head mostly wrapped around it. These days, if there’s something I’d previously modeled in SketchUp, I generally only open SketchUp long enough to get that thing exported out so I can bring it into Fusion.
Taking measurements
The slightly high-tech way…
Being a complete data nerd, I did some rough photogrammetry scans of my MBF, which are particularly useful when it comes to getting something modeled. That collection of 3D scans is shared over on SketchFab (also embedded alongside here). As tempting as it seems to simply start with the 3D model produced from these sorts of captures, in reality it’s more trouble than it’s worth. You’ll spend as much time breaking apart and cleaning up the raw model as it would take to start from a blank canvas. So while I did model everything from scratch, these scans are useful purely as a sanity check to take dimensions from, and reference along the way.
The simple, low-tech way…
Some details are just easier measured directly. Something like the MBF arm’s internal “ways” profile, or simple elements like the rollerhead C-clamp lend themselves to tracing right off the machine and scanning.
Sometimes you can just put parts directly onto a scanner bed to get something to start from…
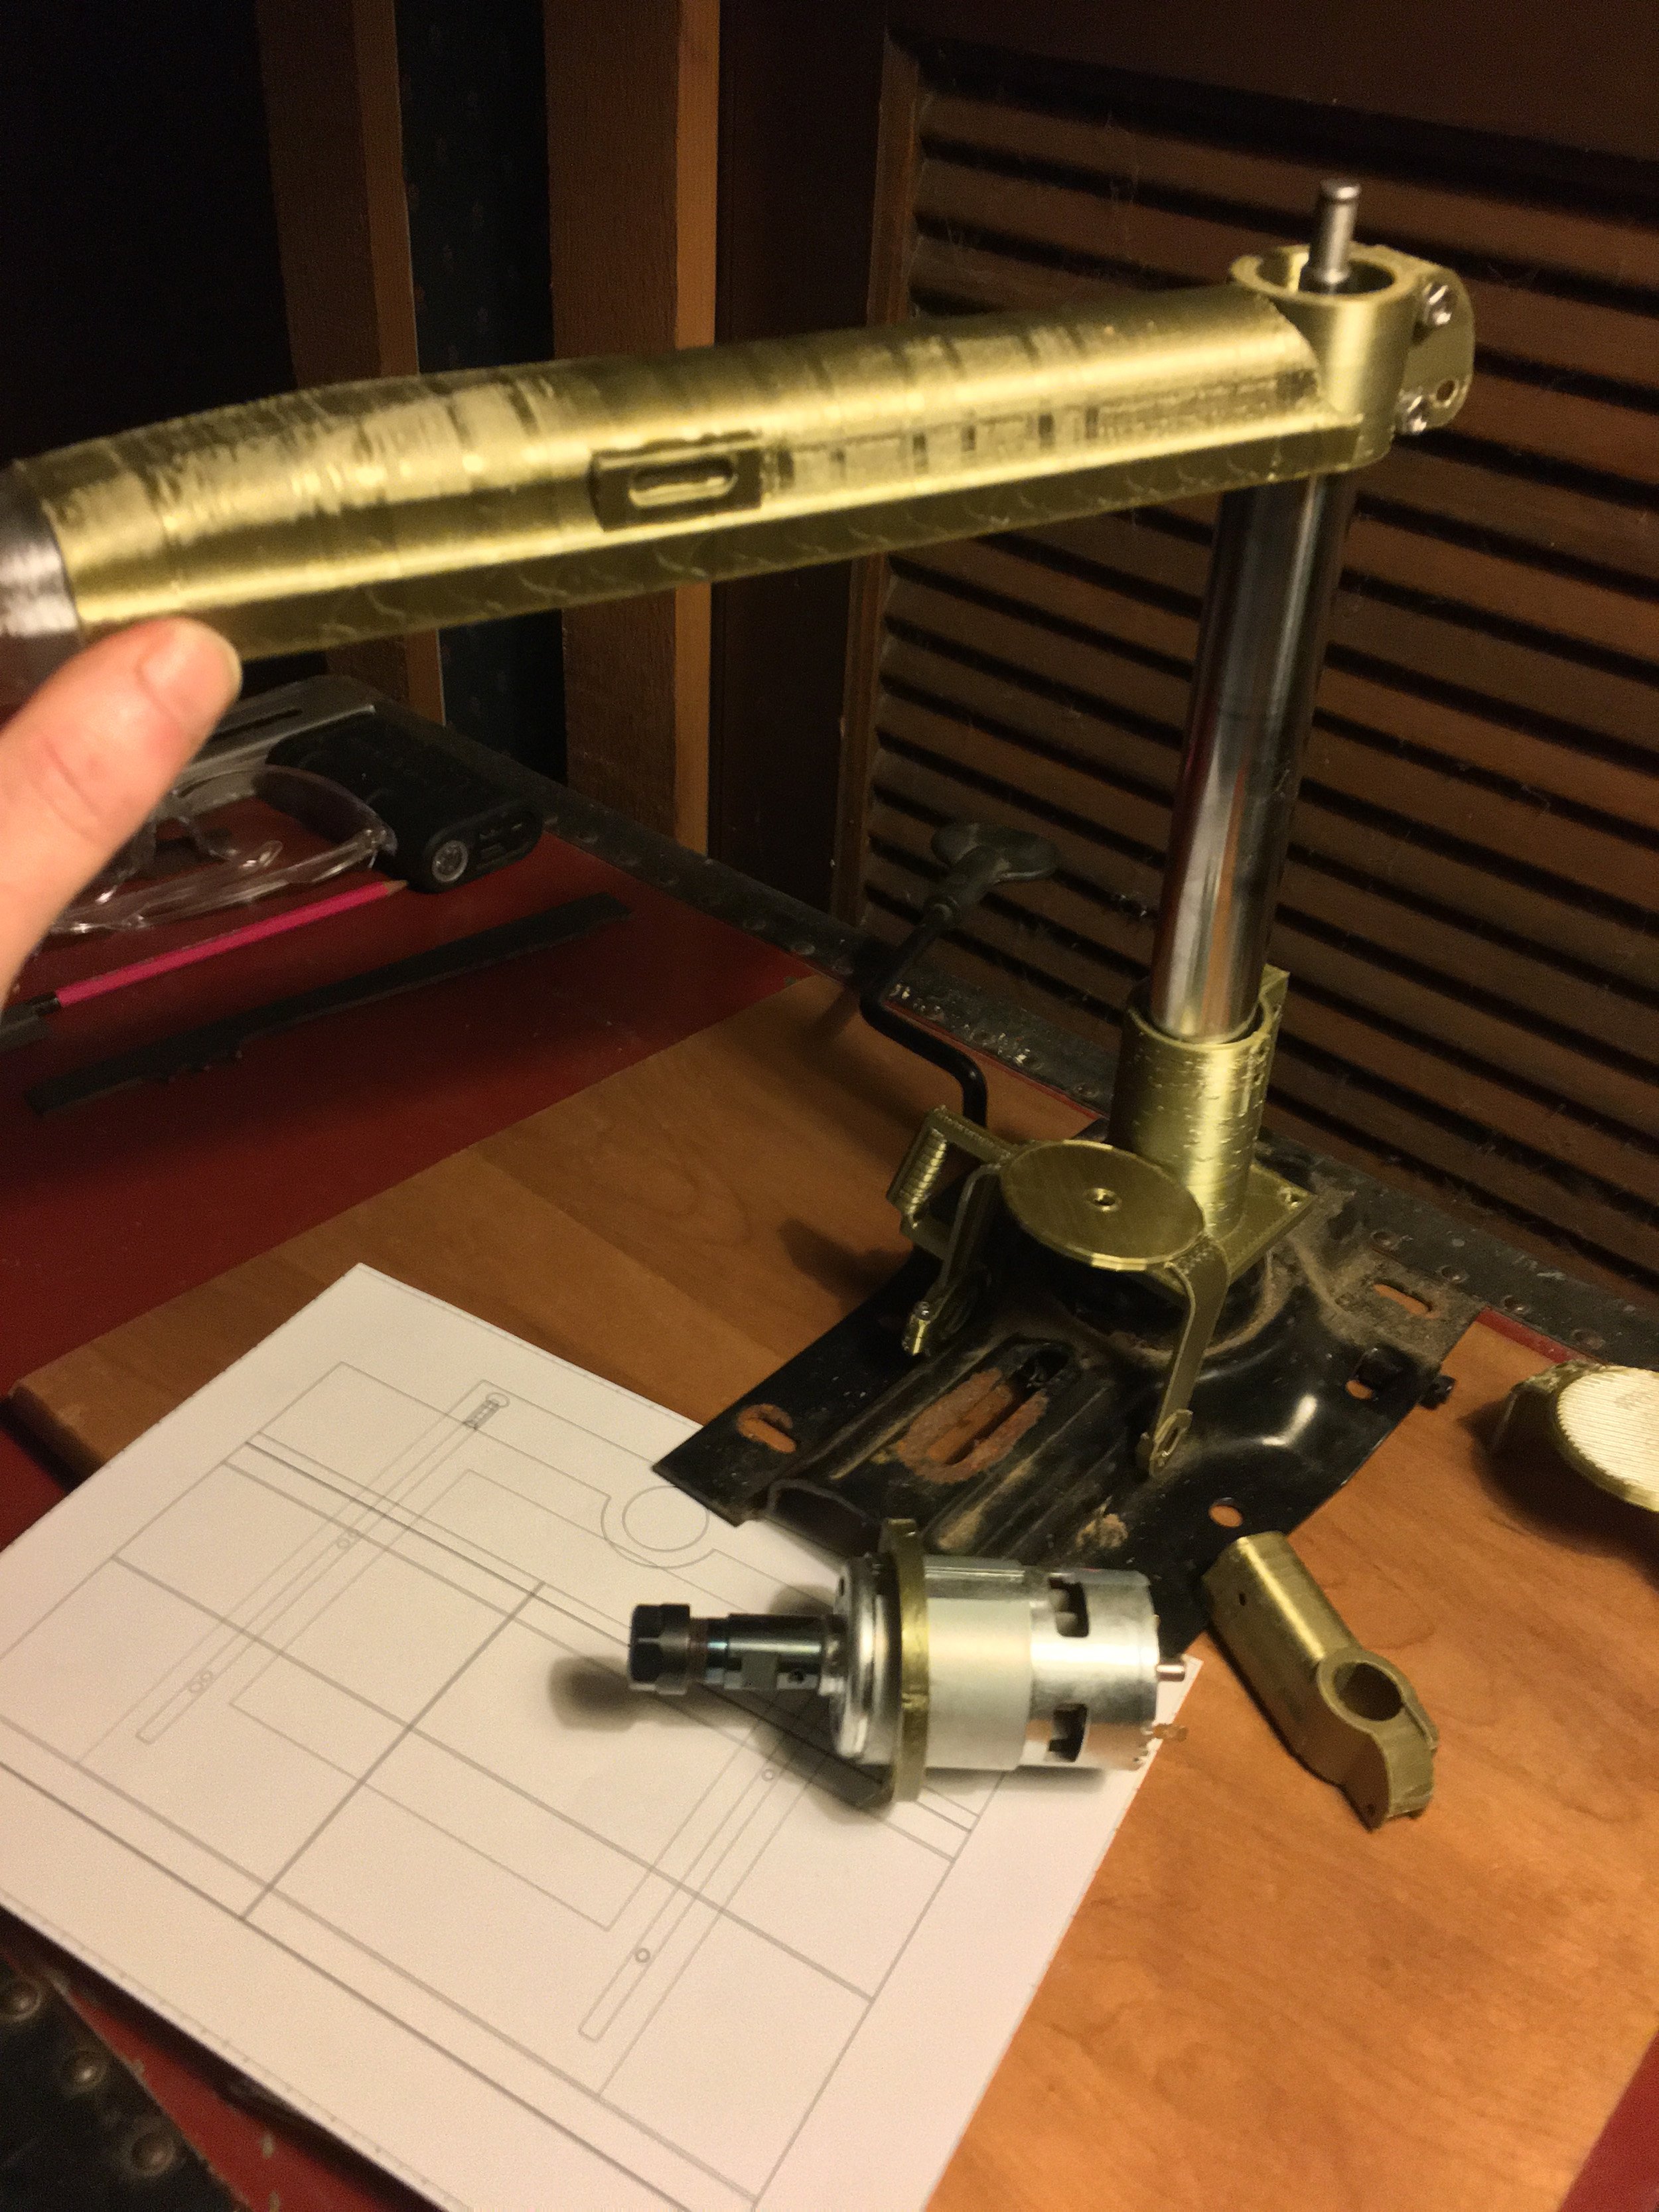
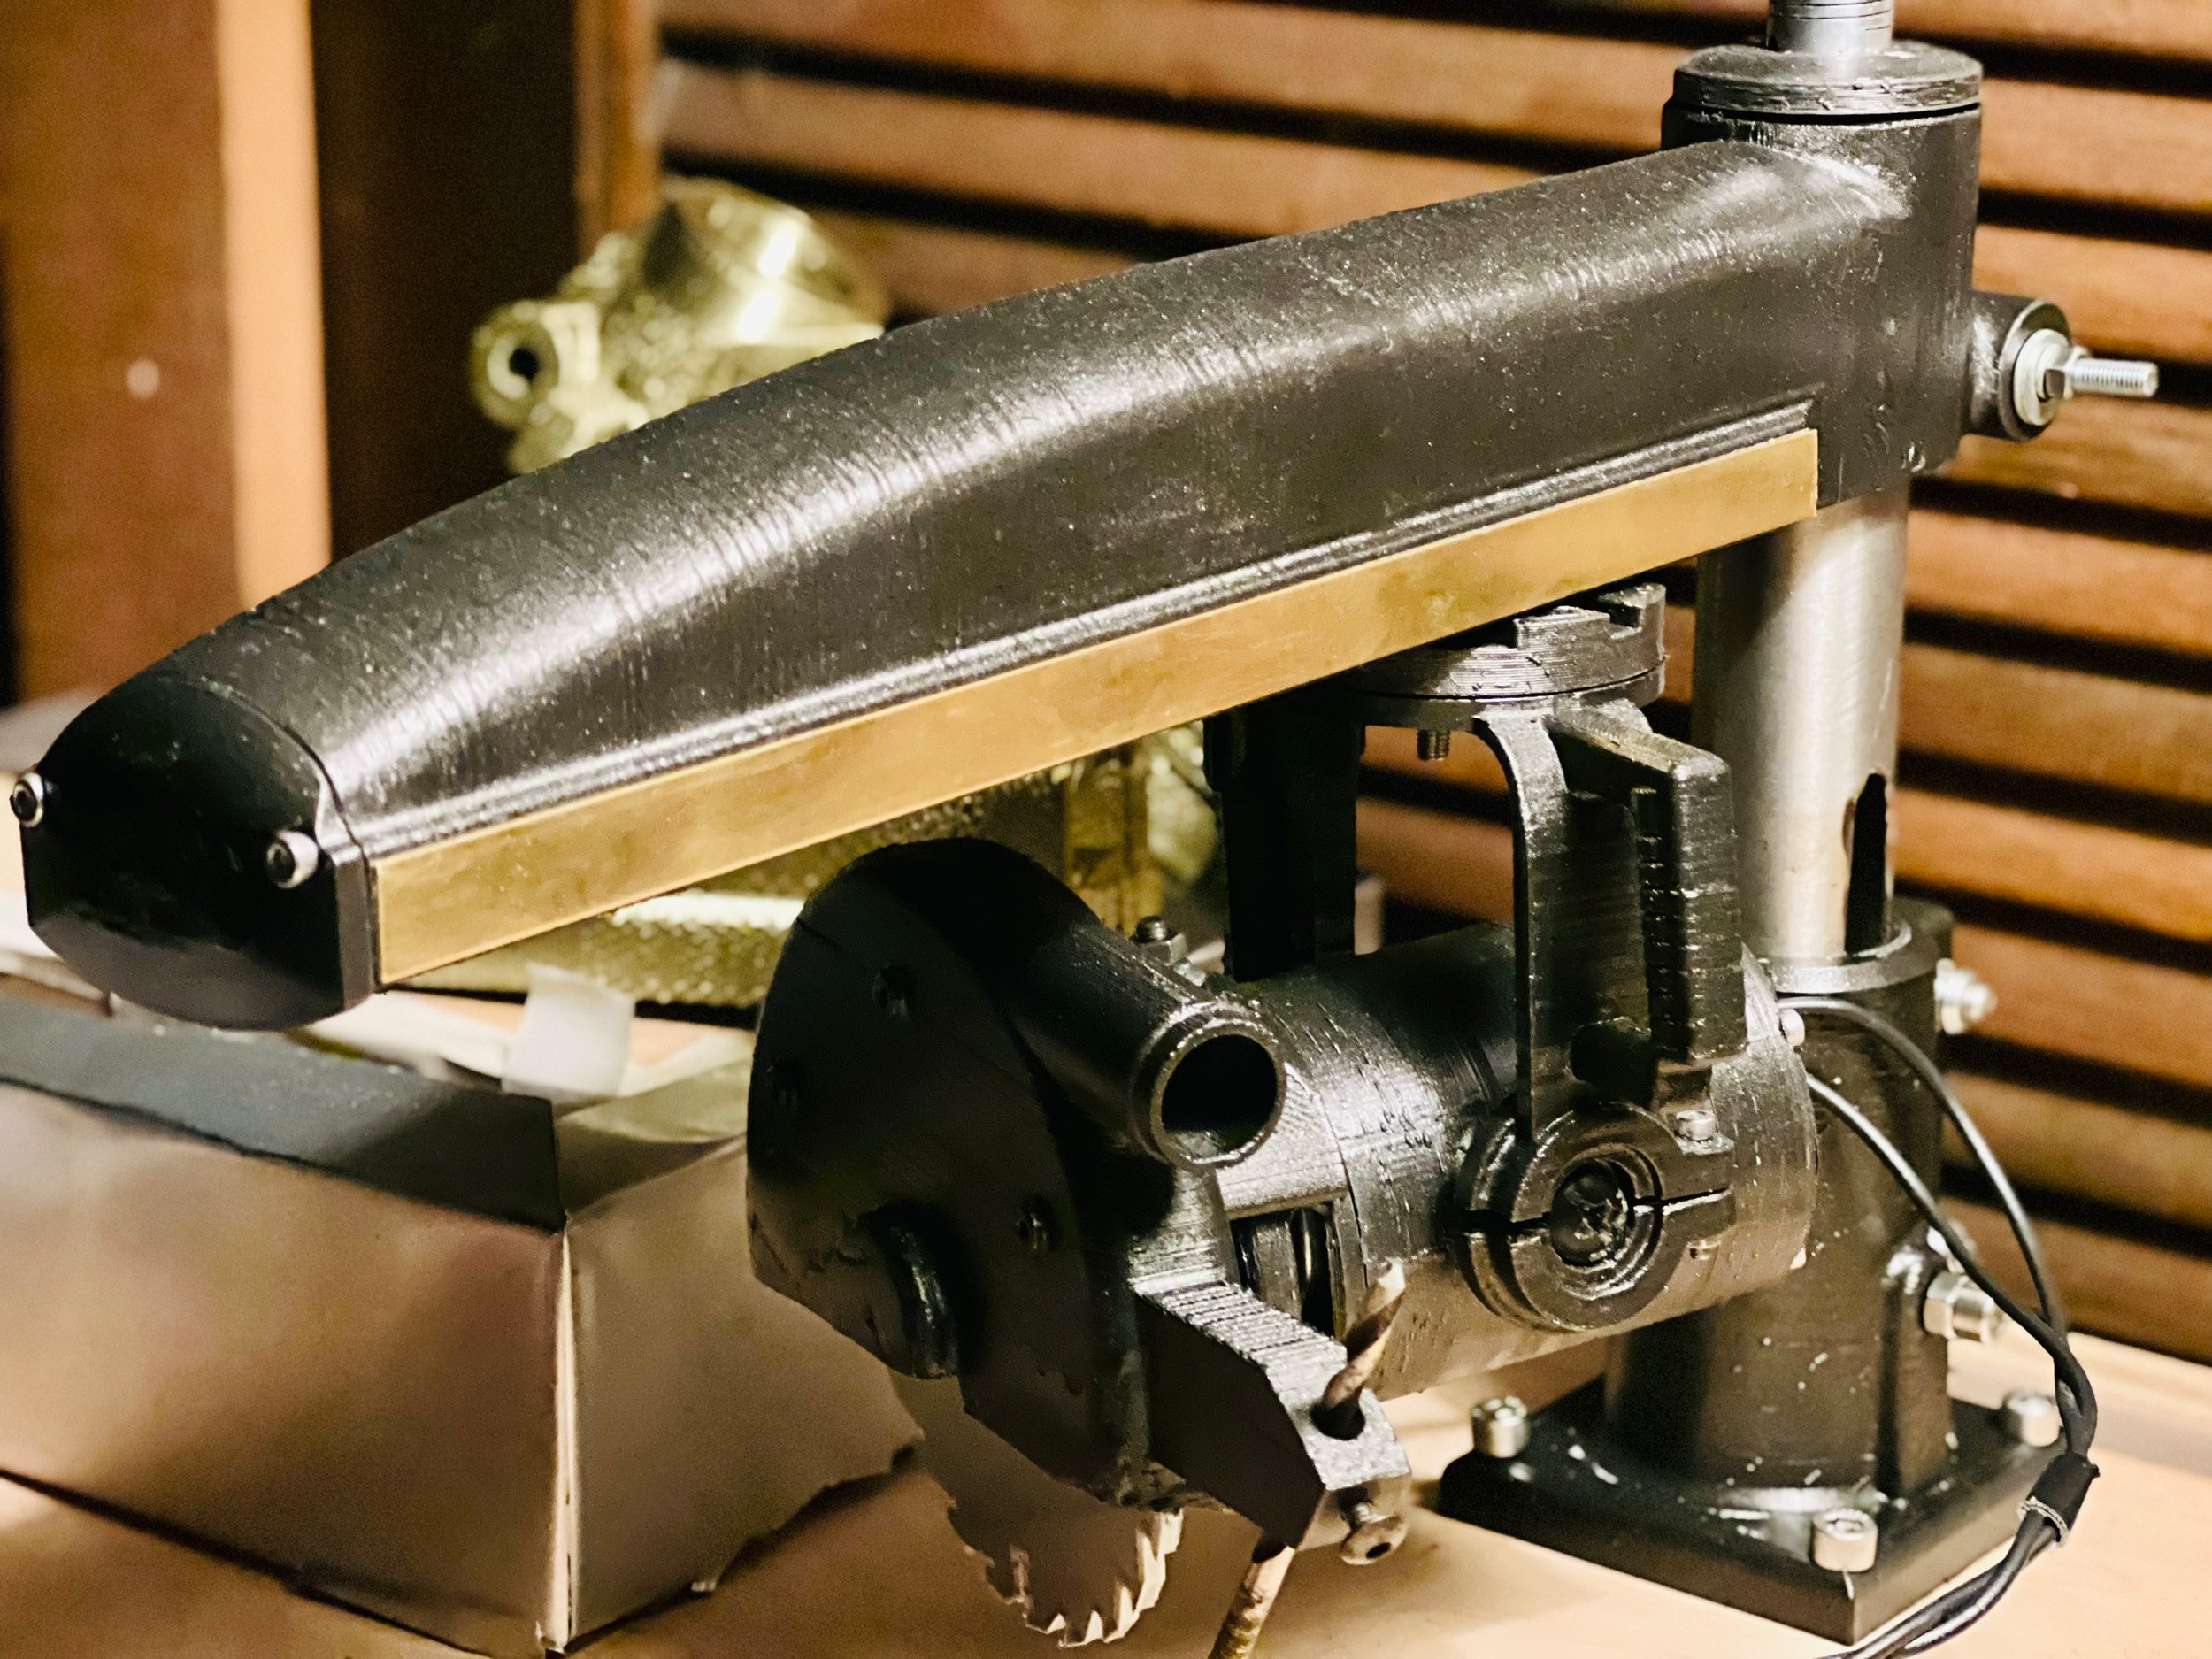
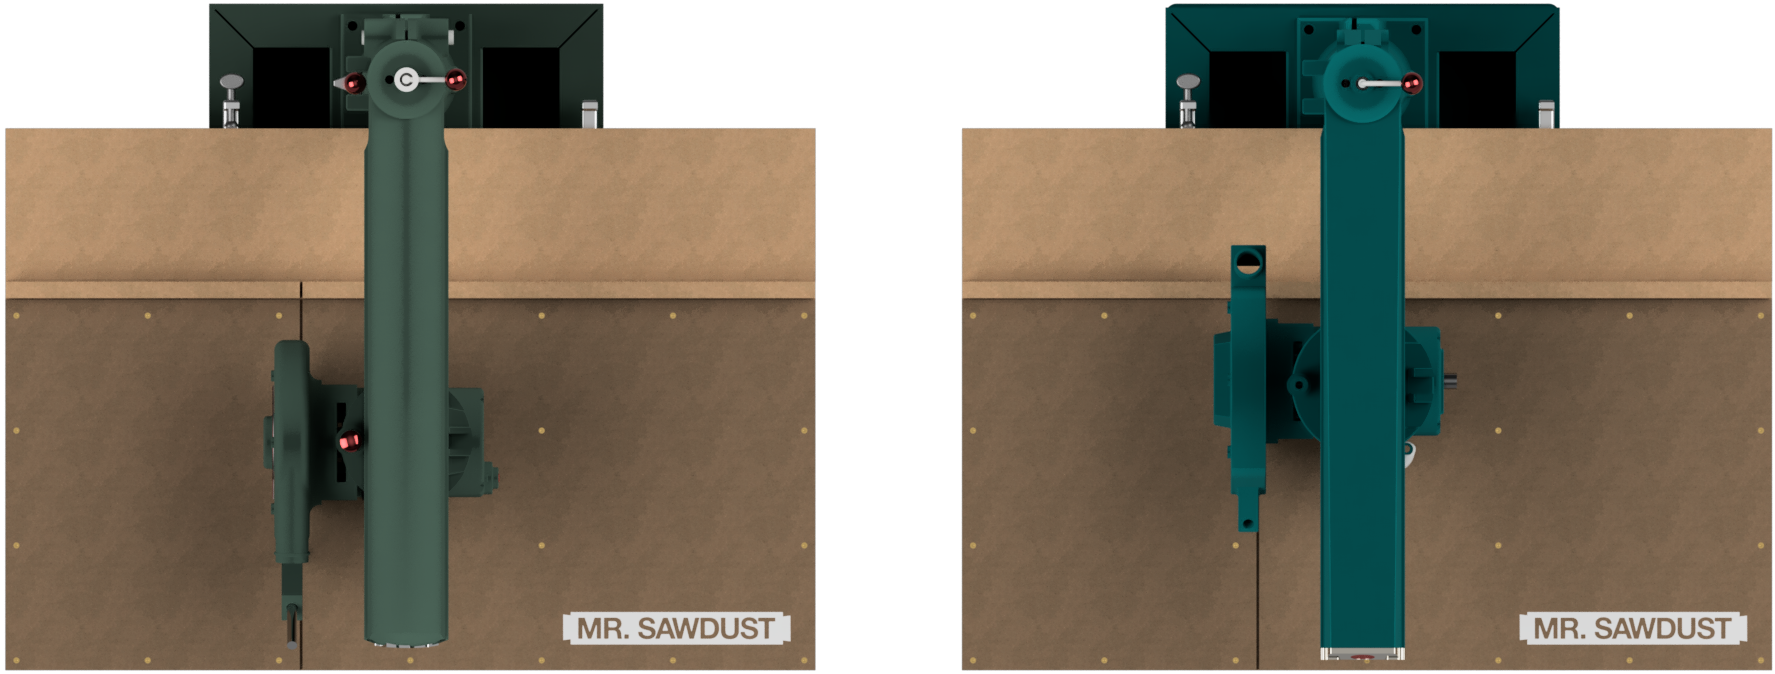
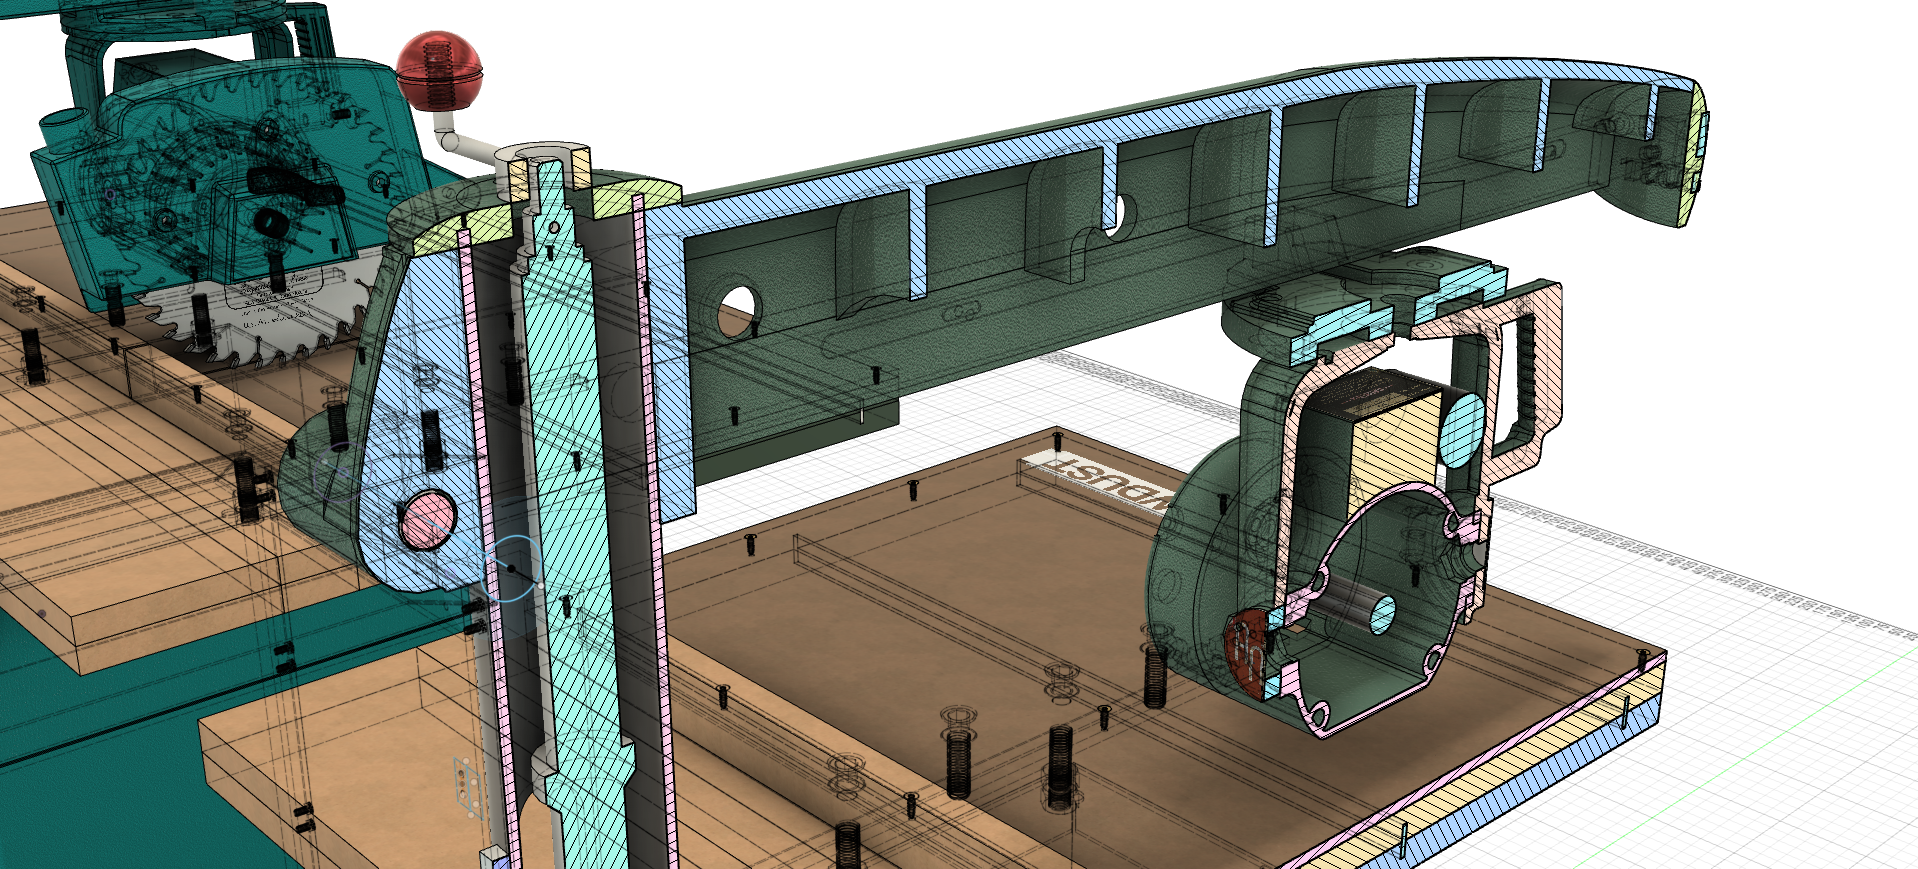
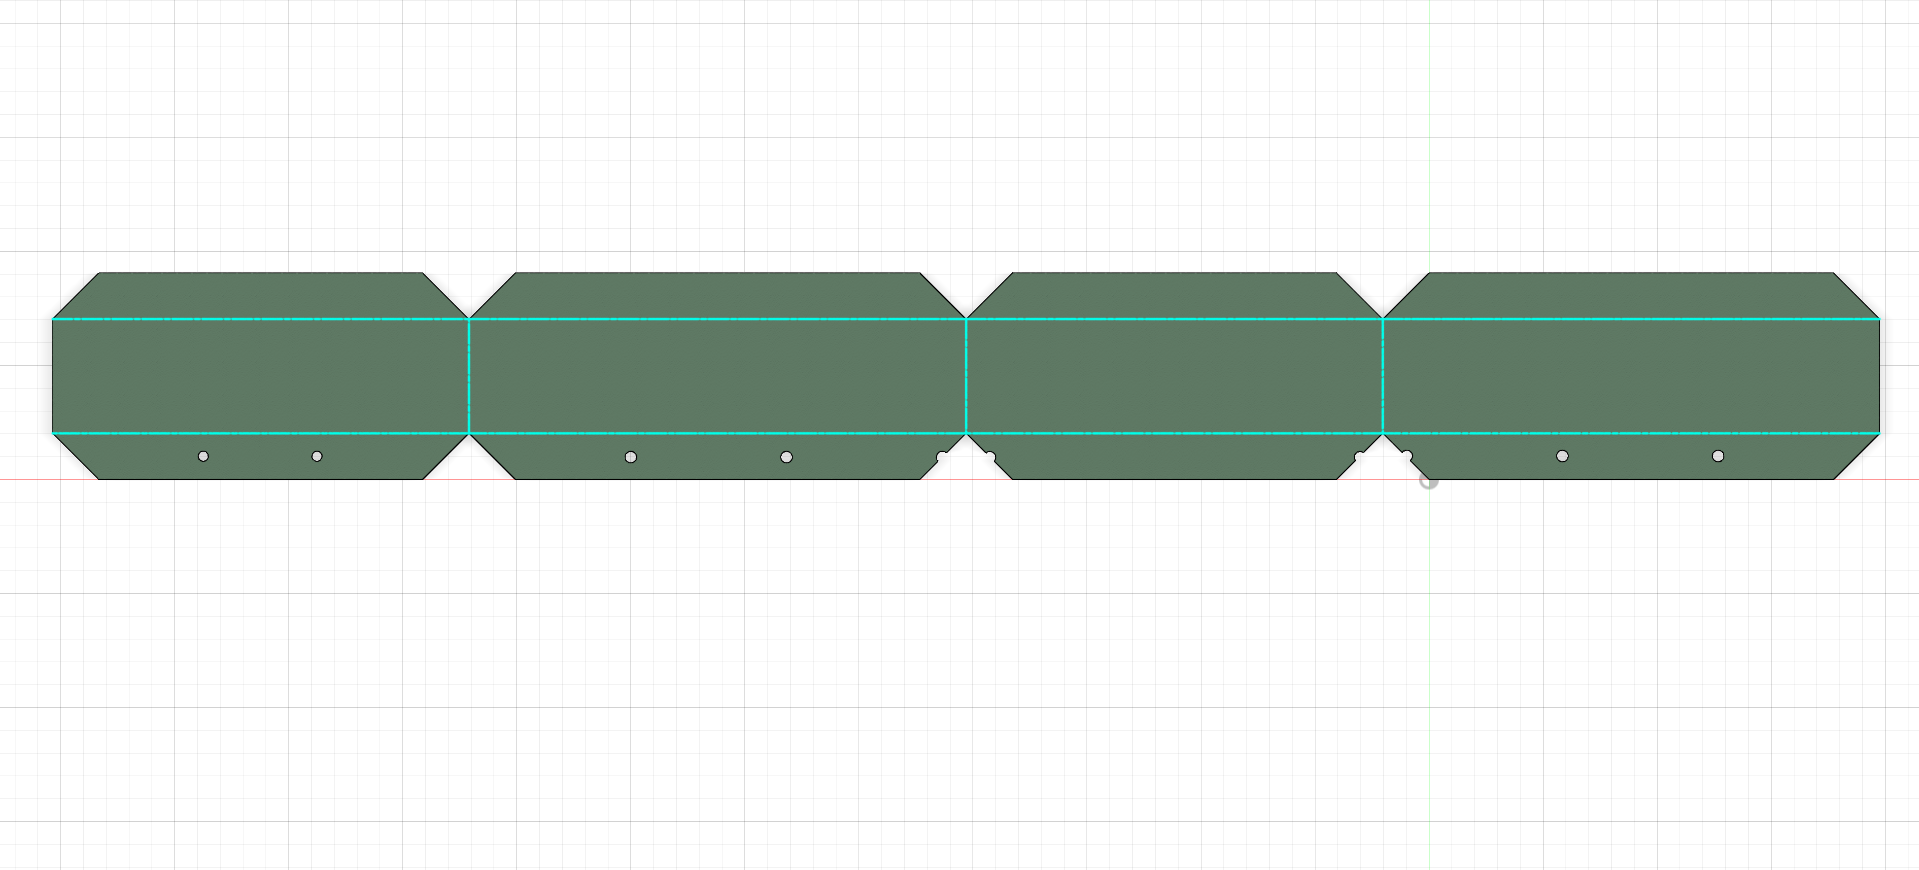
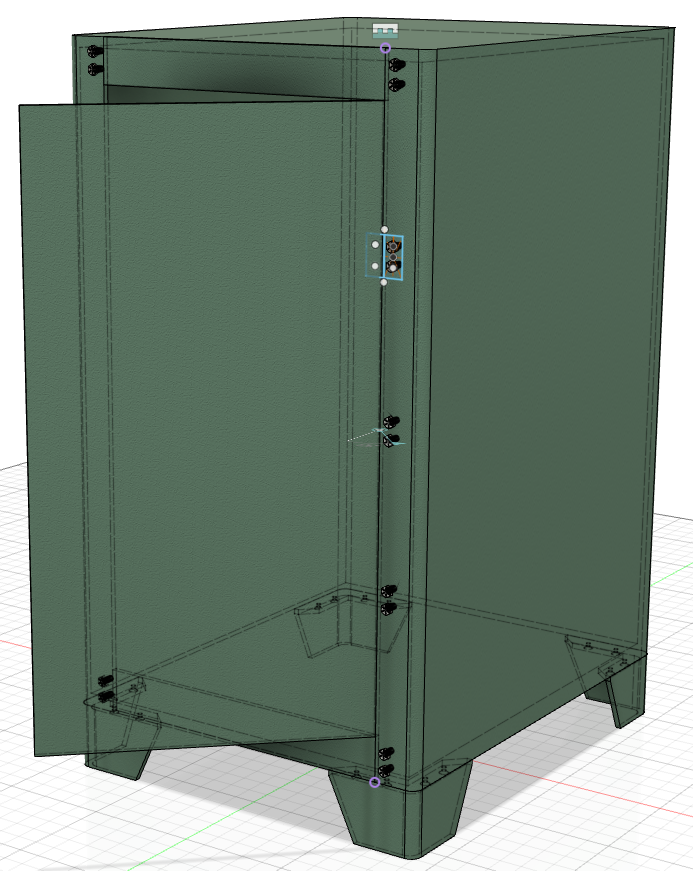
The MBF Arm
It’s genuinely embarrassing how long it took to work out how to model the contour of the round-style arm. Once I stopped just trying to hack together the form by combining primitive objects — and actually thought about the structure, it made perfect sense. Obvious, even.
How embarrassing? One old SketchUp screenshot should give you an idea…

One illustration buried in an original manual pointed me in the right direction — it’s just a matter of lofting between two profiles — from the front/nose to the rear, where the arm curve meets the column collar — using the upper curve as a guiderail.
In contrast, the 925 (and all other square-arm models)… that took about as long to 3D model as it took to drink a cup of coffee.
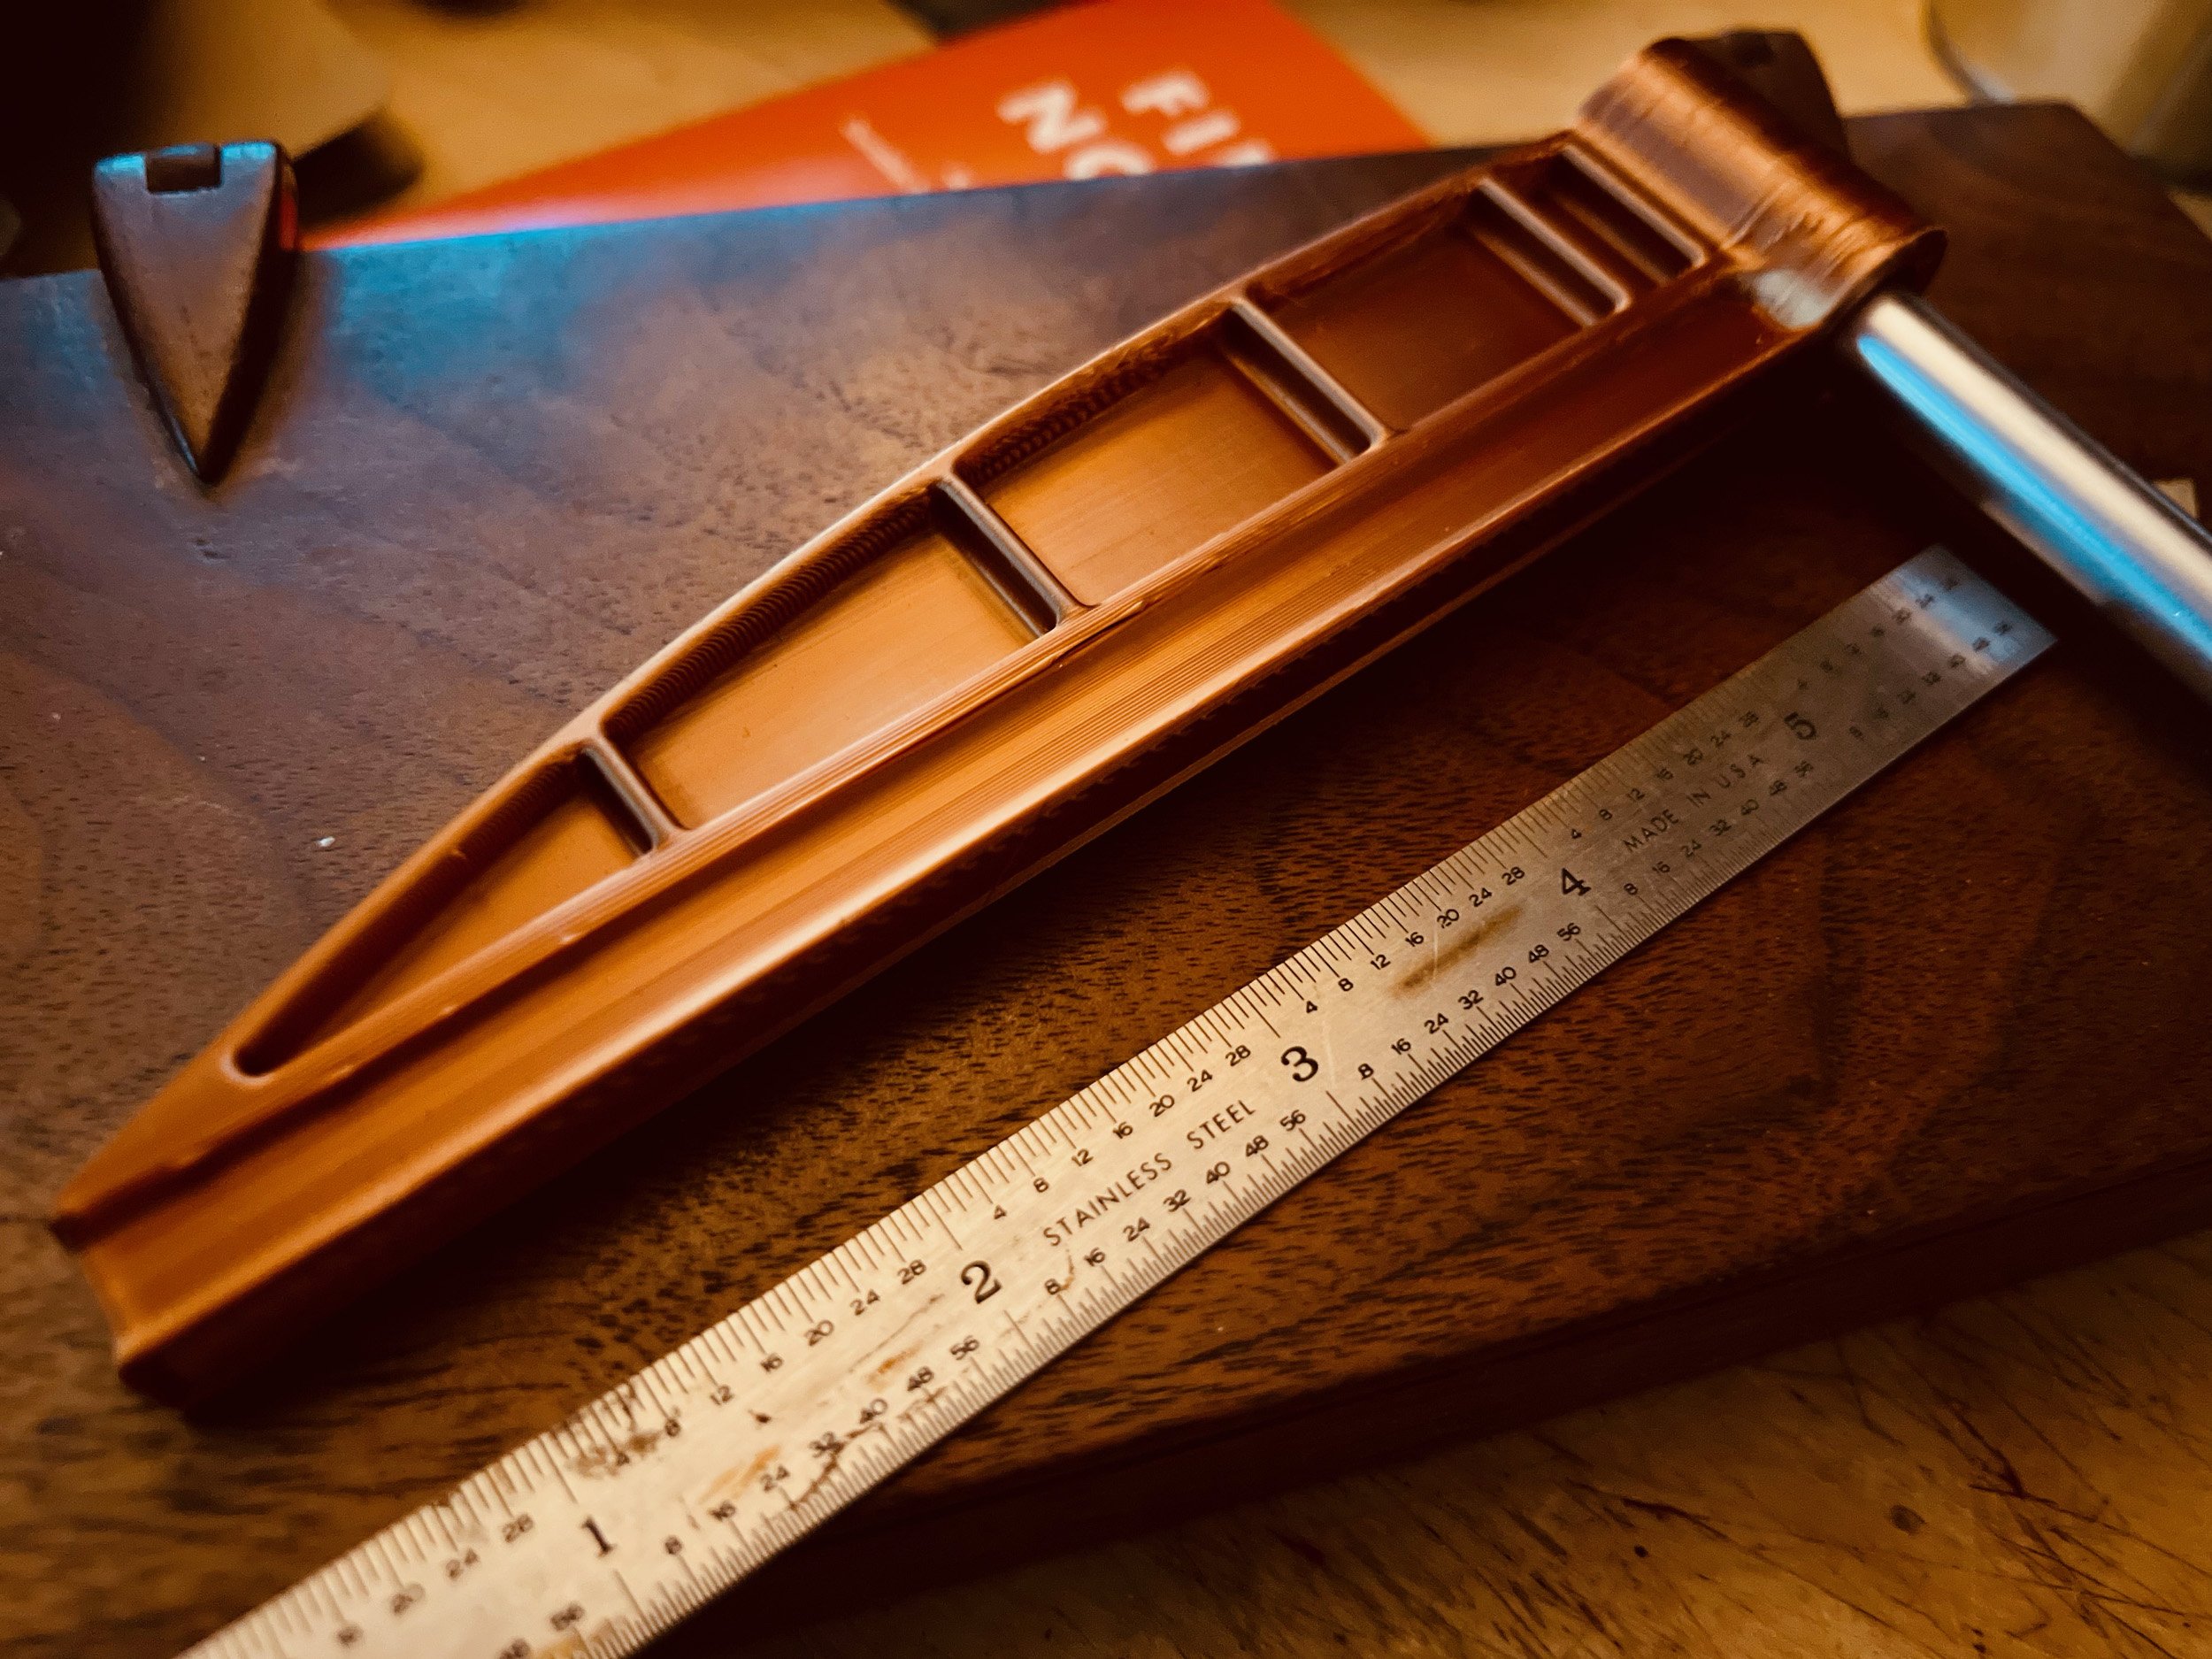
Once you have the solid form, it’s just a matter of cutting out the rollerhead ways.
GIven, all of this is kindergarten work to someone who knows their way around these modeling tools… but for me, I’ll take these small wins as often as I find them.
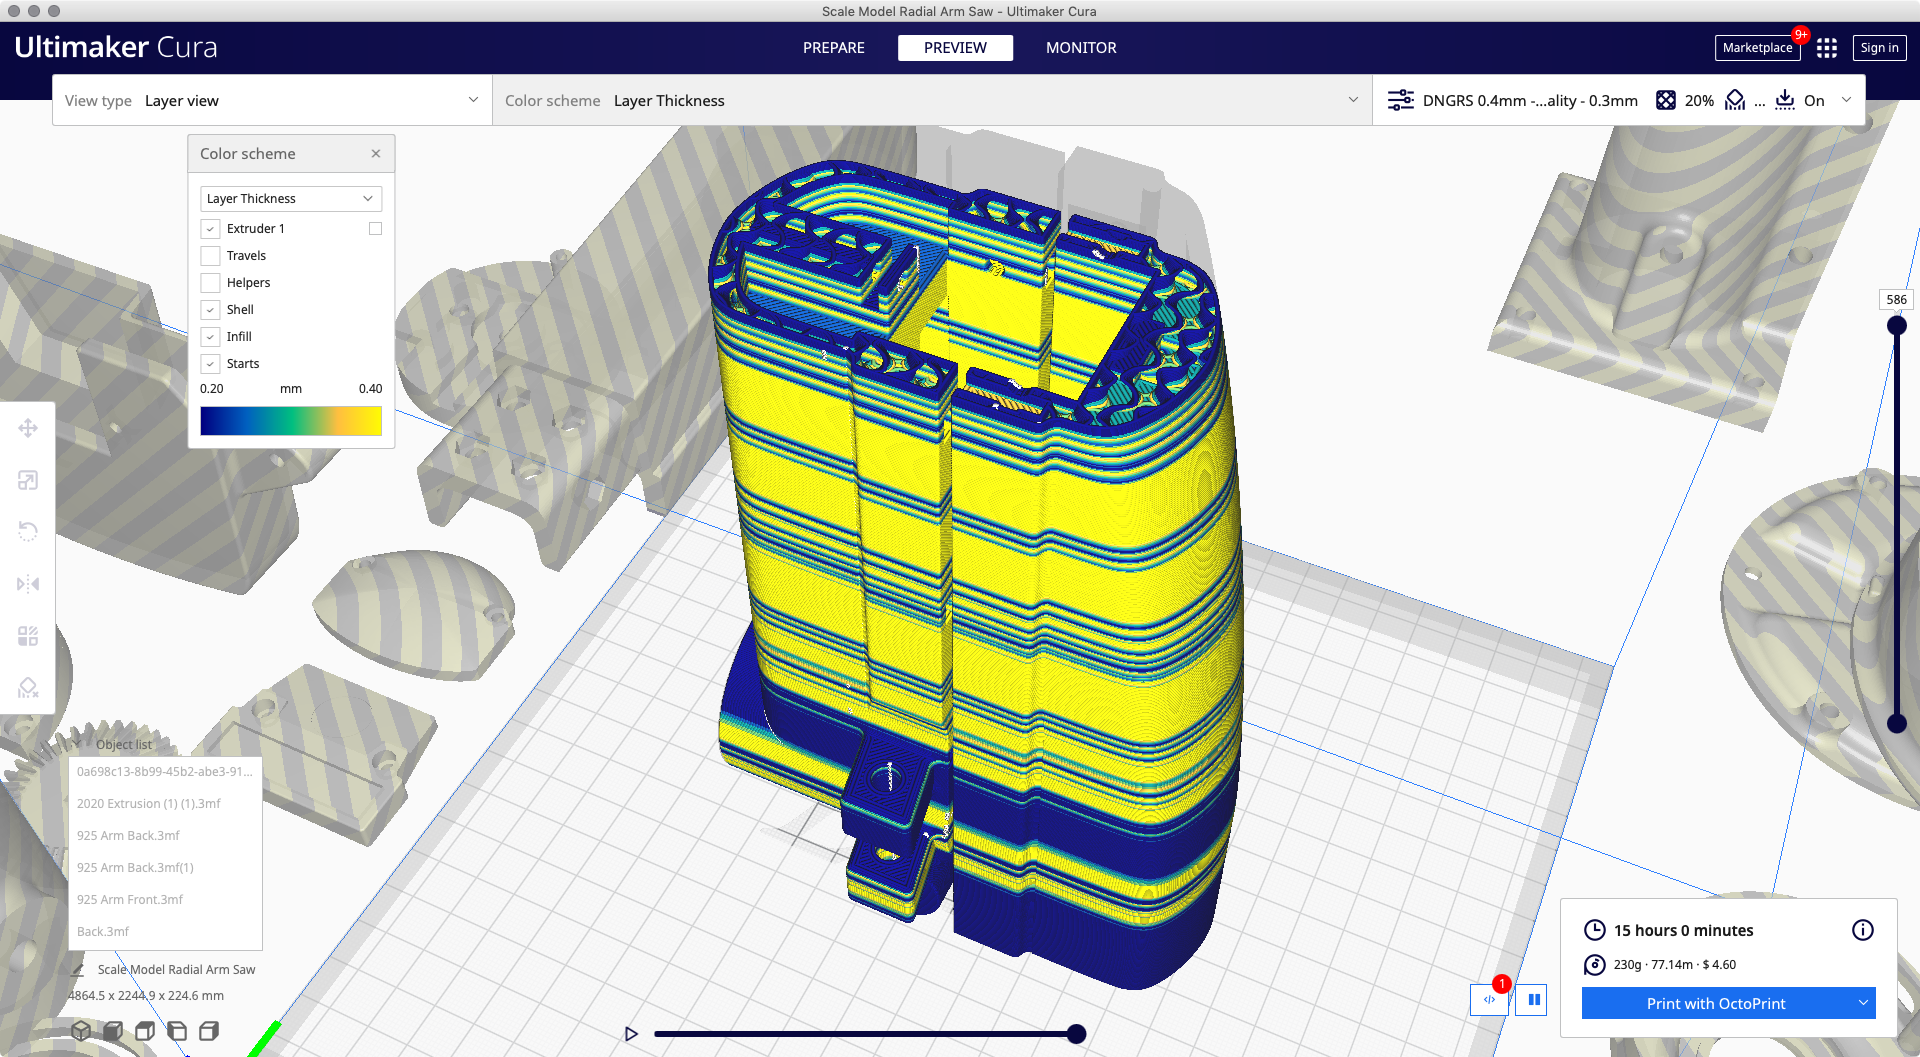


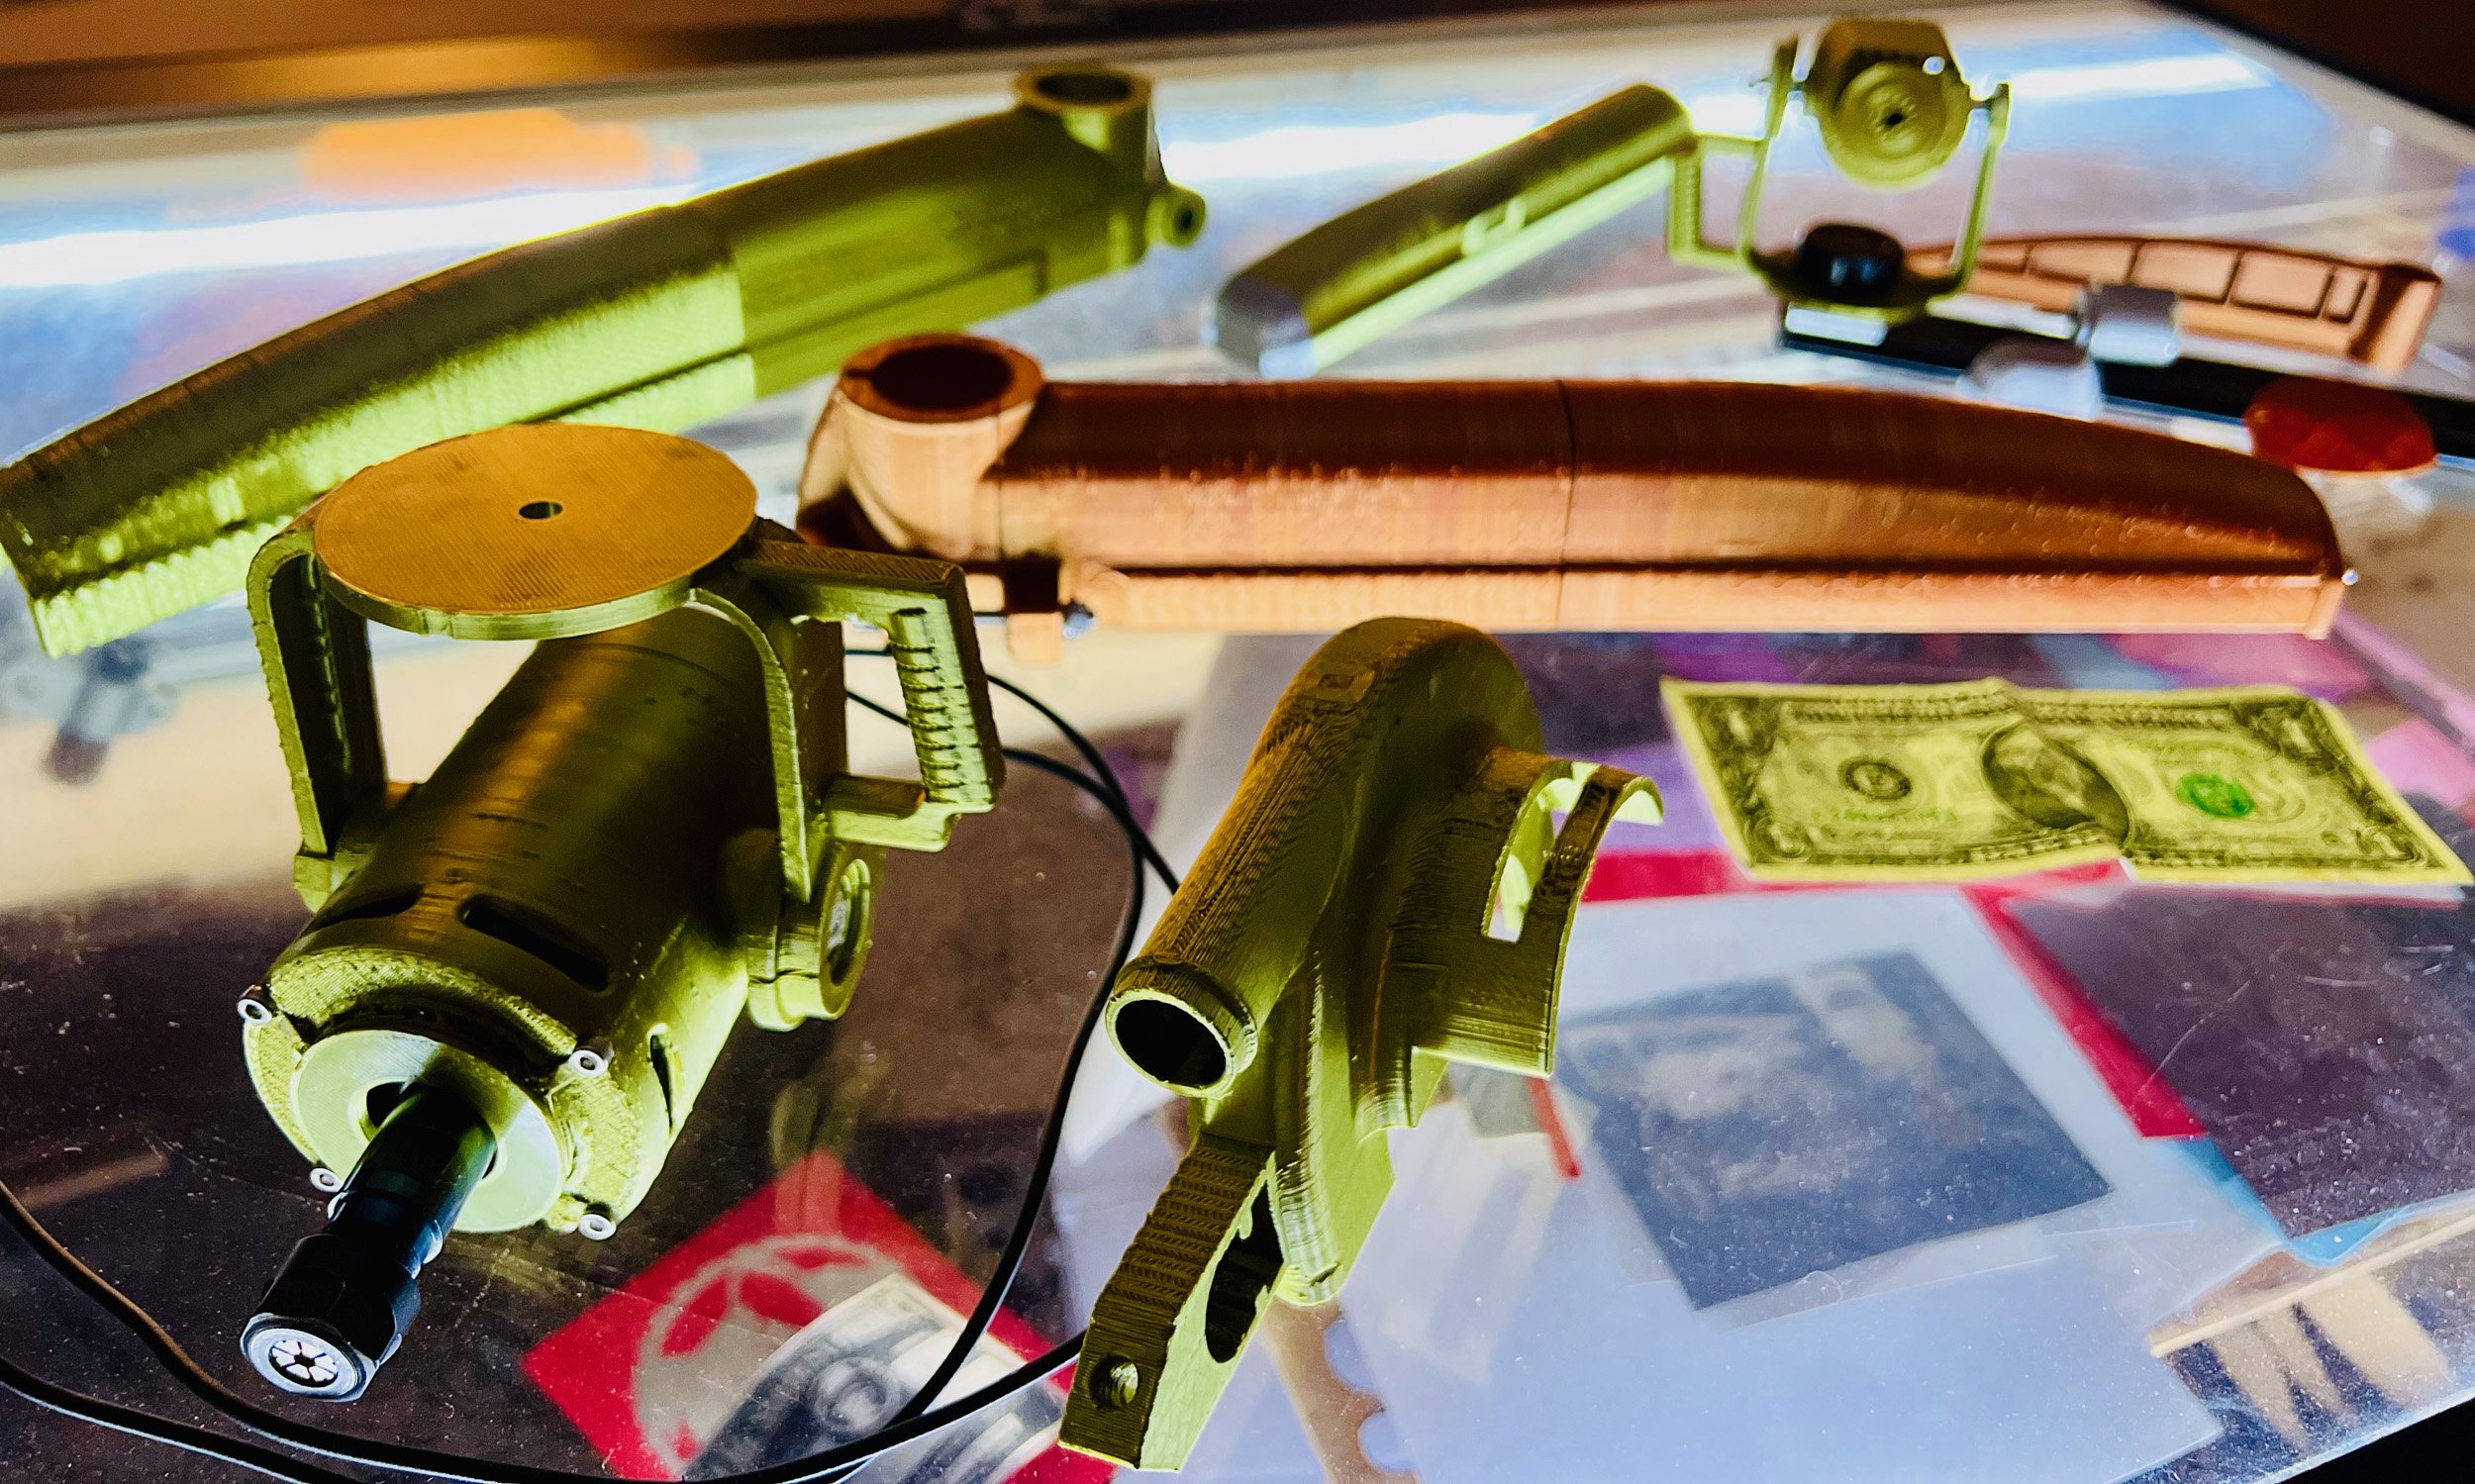
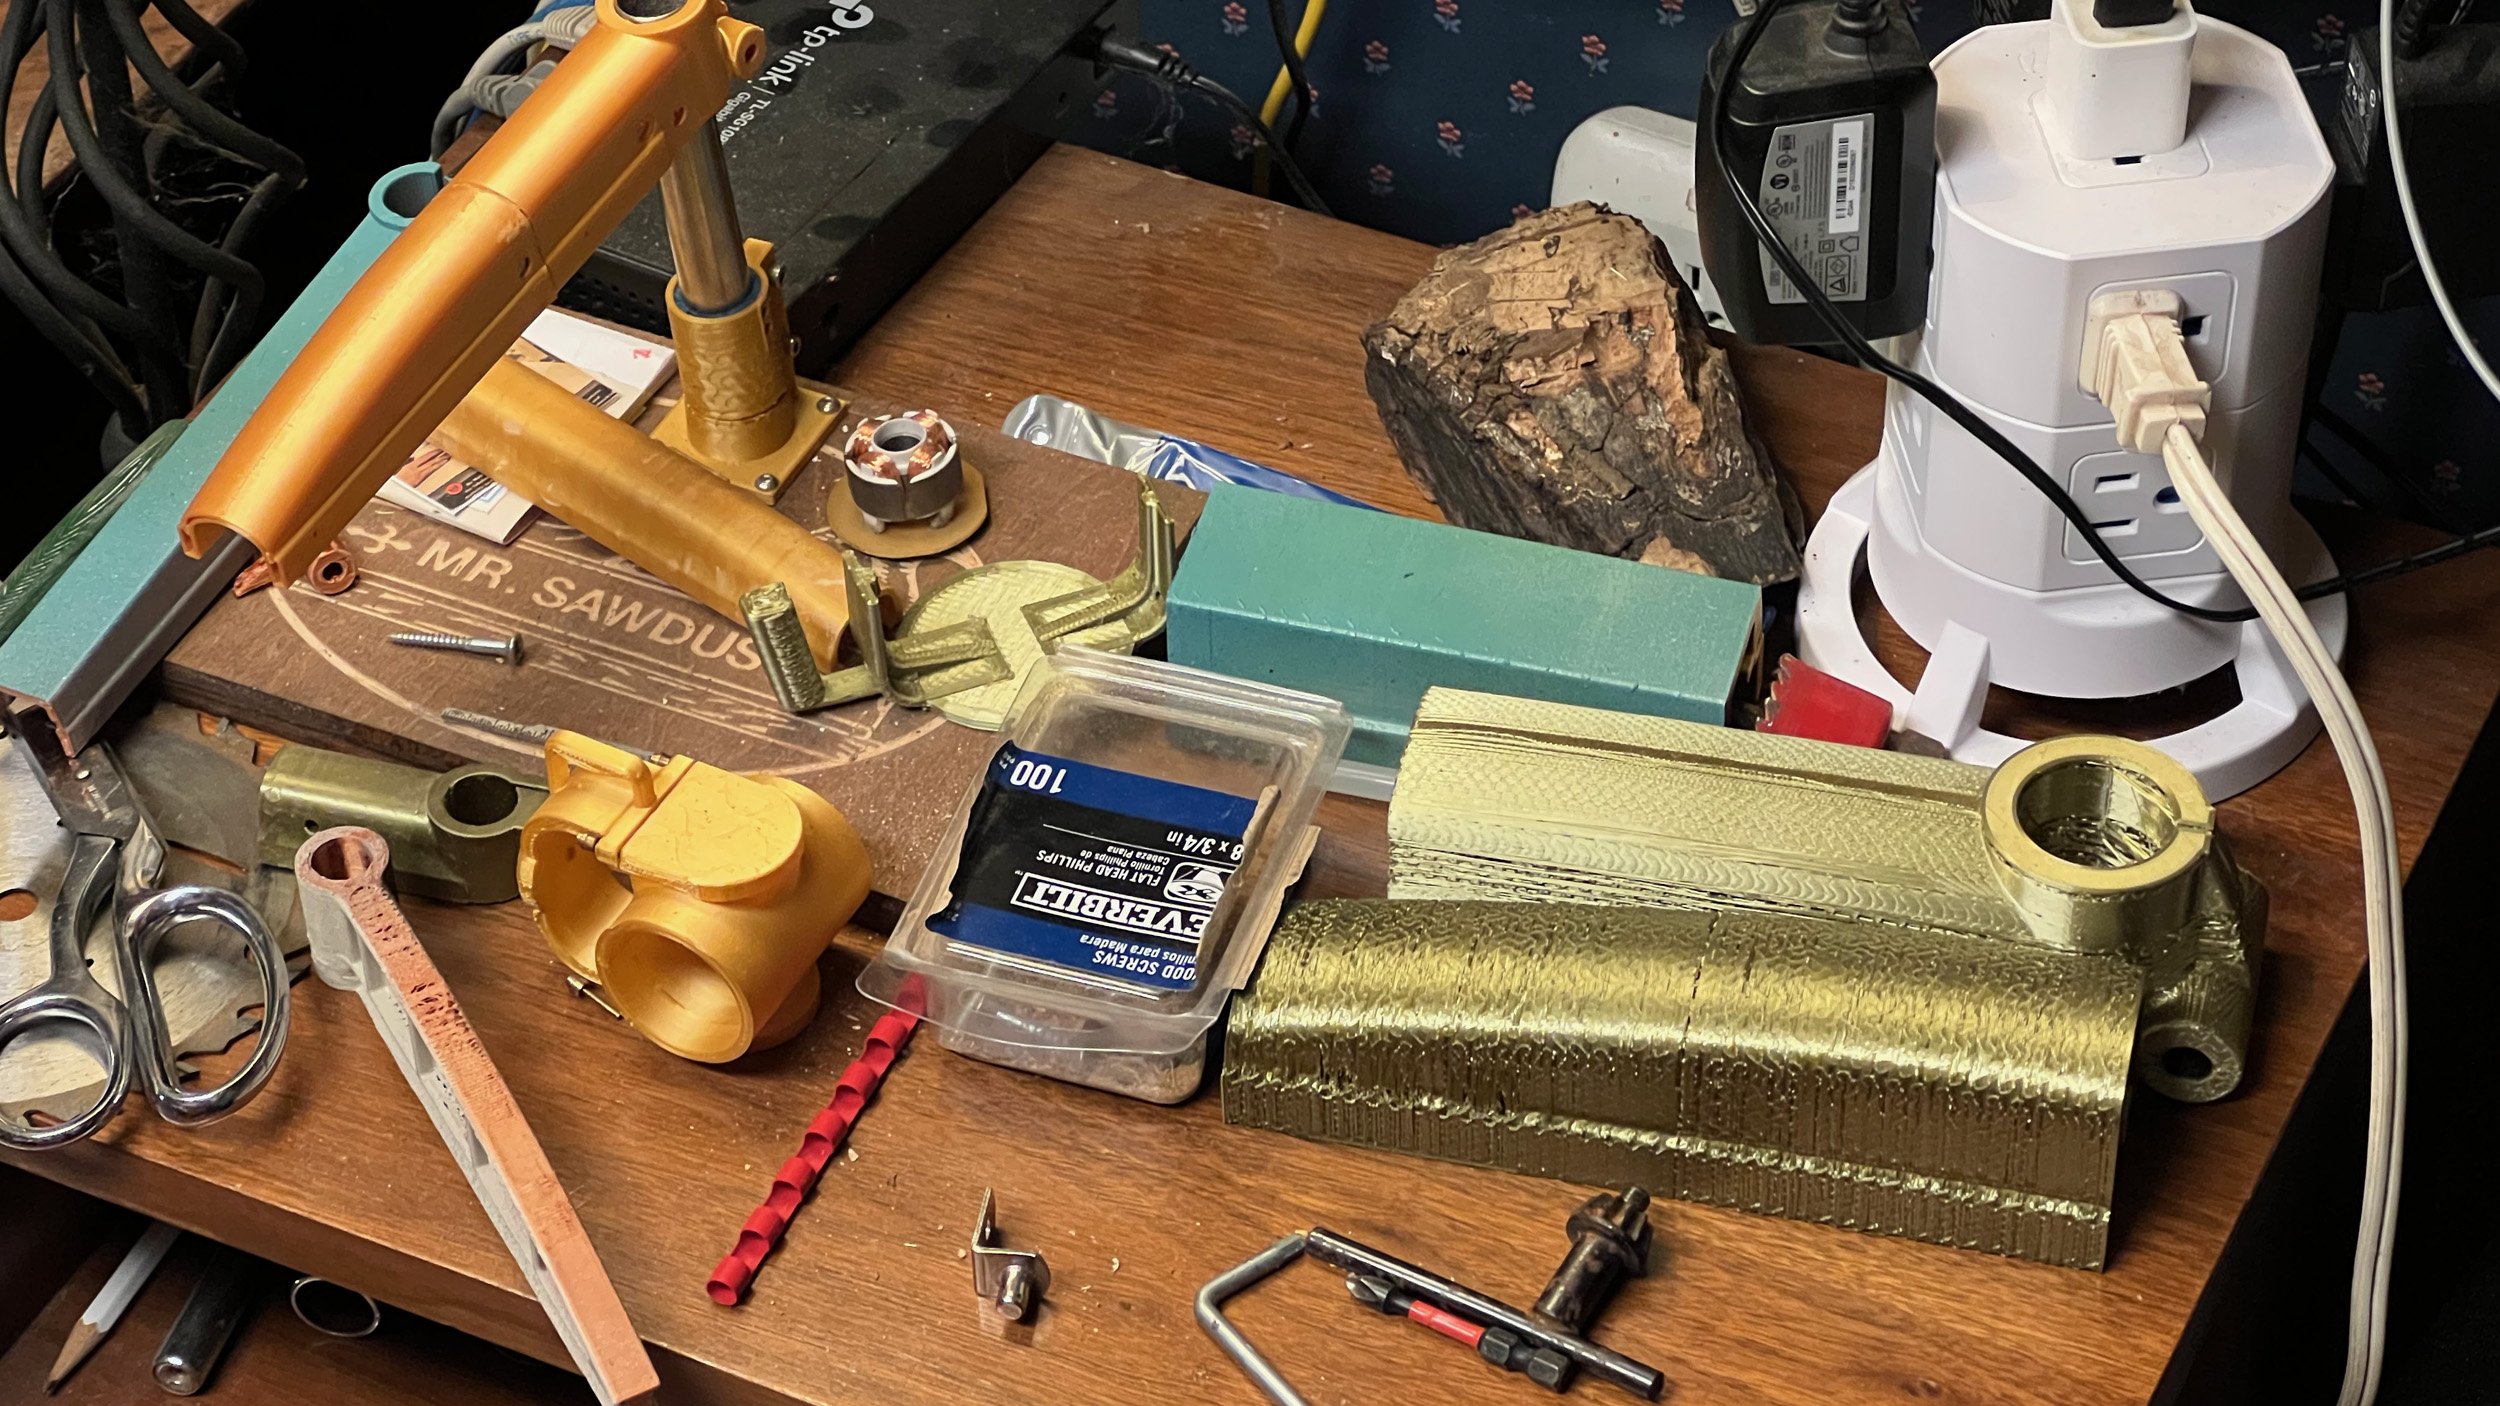
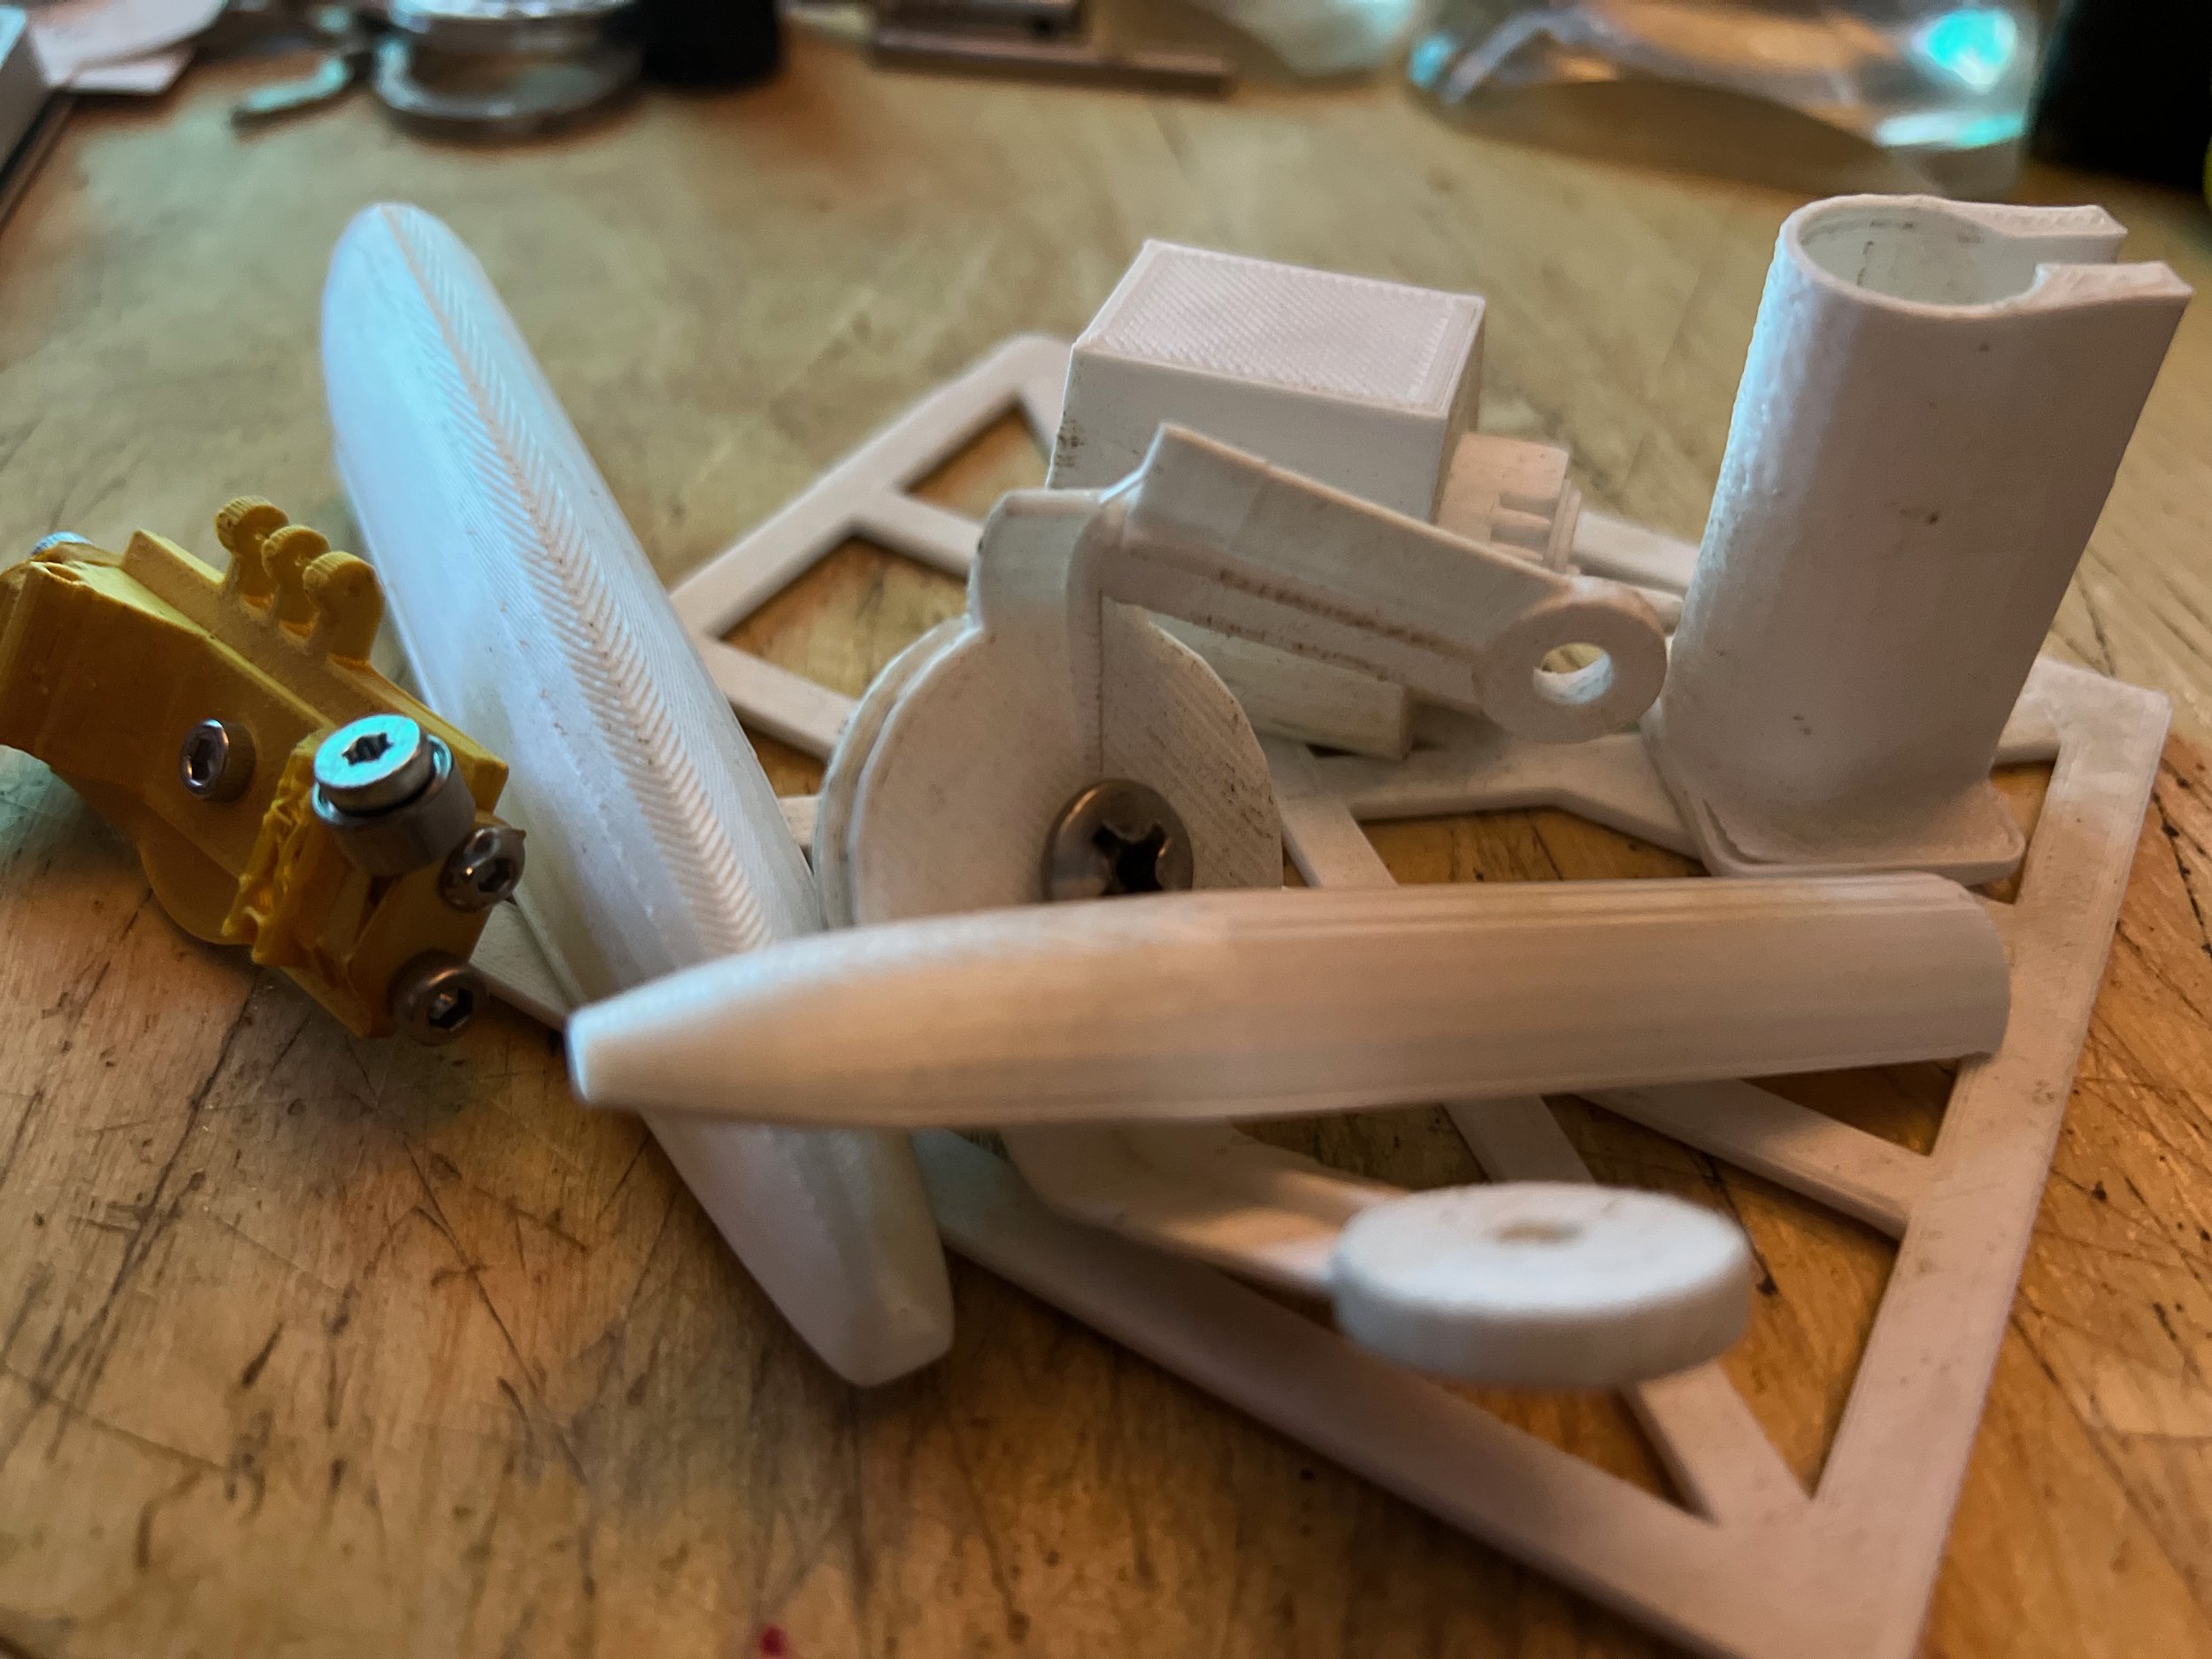
Overall, printing all these components isn’t the most exciting thing to dwell on, so I’m not going to, except to mention a few details…
Everything was printed with a fat 0.8mm/1mm nozzle at a layer height ~0.2mm. That size nozzle tells you I’m impatient, while that layer height tells you I was still trying to get reasonable detail. This is a bit stupid and contradictory, but worked well enough for these first models and showed me exactly where and how to optimize the prints.
For instance, I kept the infill at 20% for almost everything, which works just fine, except on the parts where it matters… as evidenced by how many snapped motor yolks I have laying around. This is one of a few parts I’d switch to printing at 80% or 100% solid infill. There’s good reason the real machines are built from solid cast-iron.
If I were to make a set of all these components, and wanted to get everything super clean and detailed, I’d tweak these variables and deal with longer print times. I’d also take time to use a high-fill primer then sanding away any evidence of it ever coming off a 3D print bed.
One scenario where I’d want to get the prints “as close to perfect” is if I were creating “masters” to be used for silicone molds (resin casting) or sand molds (metalcasting).
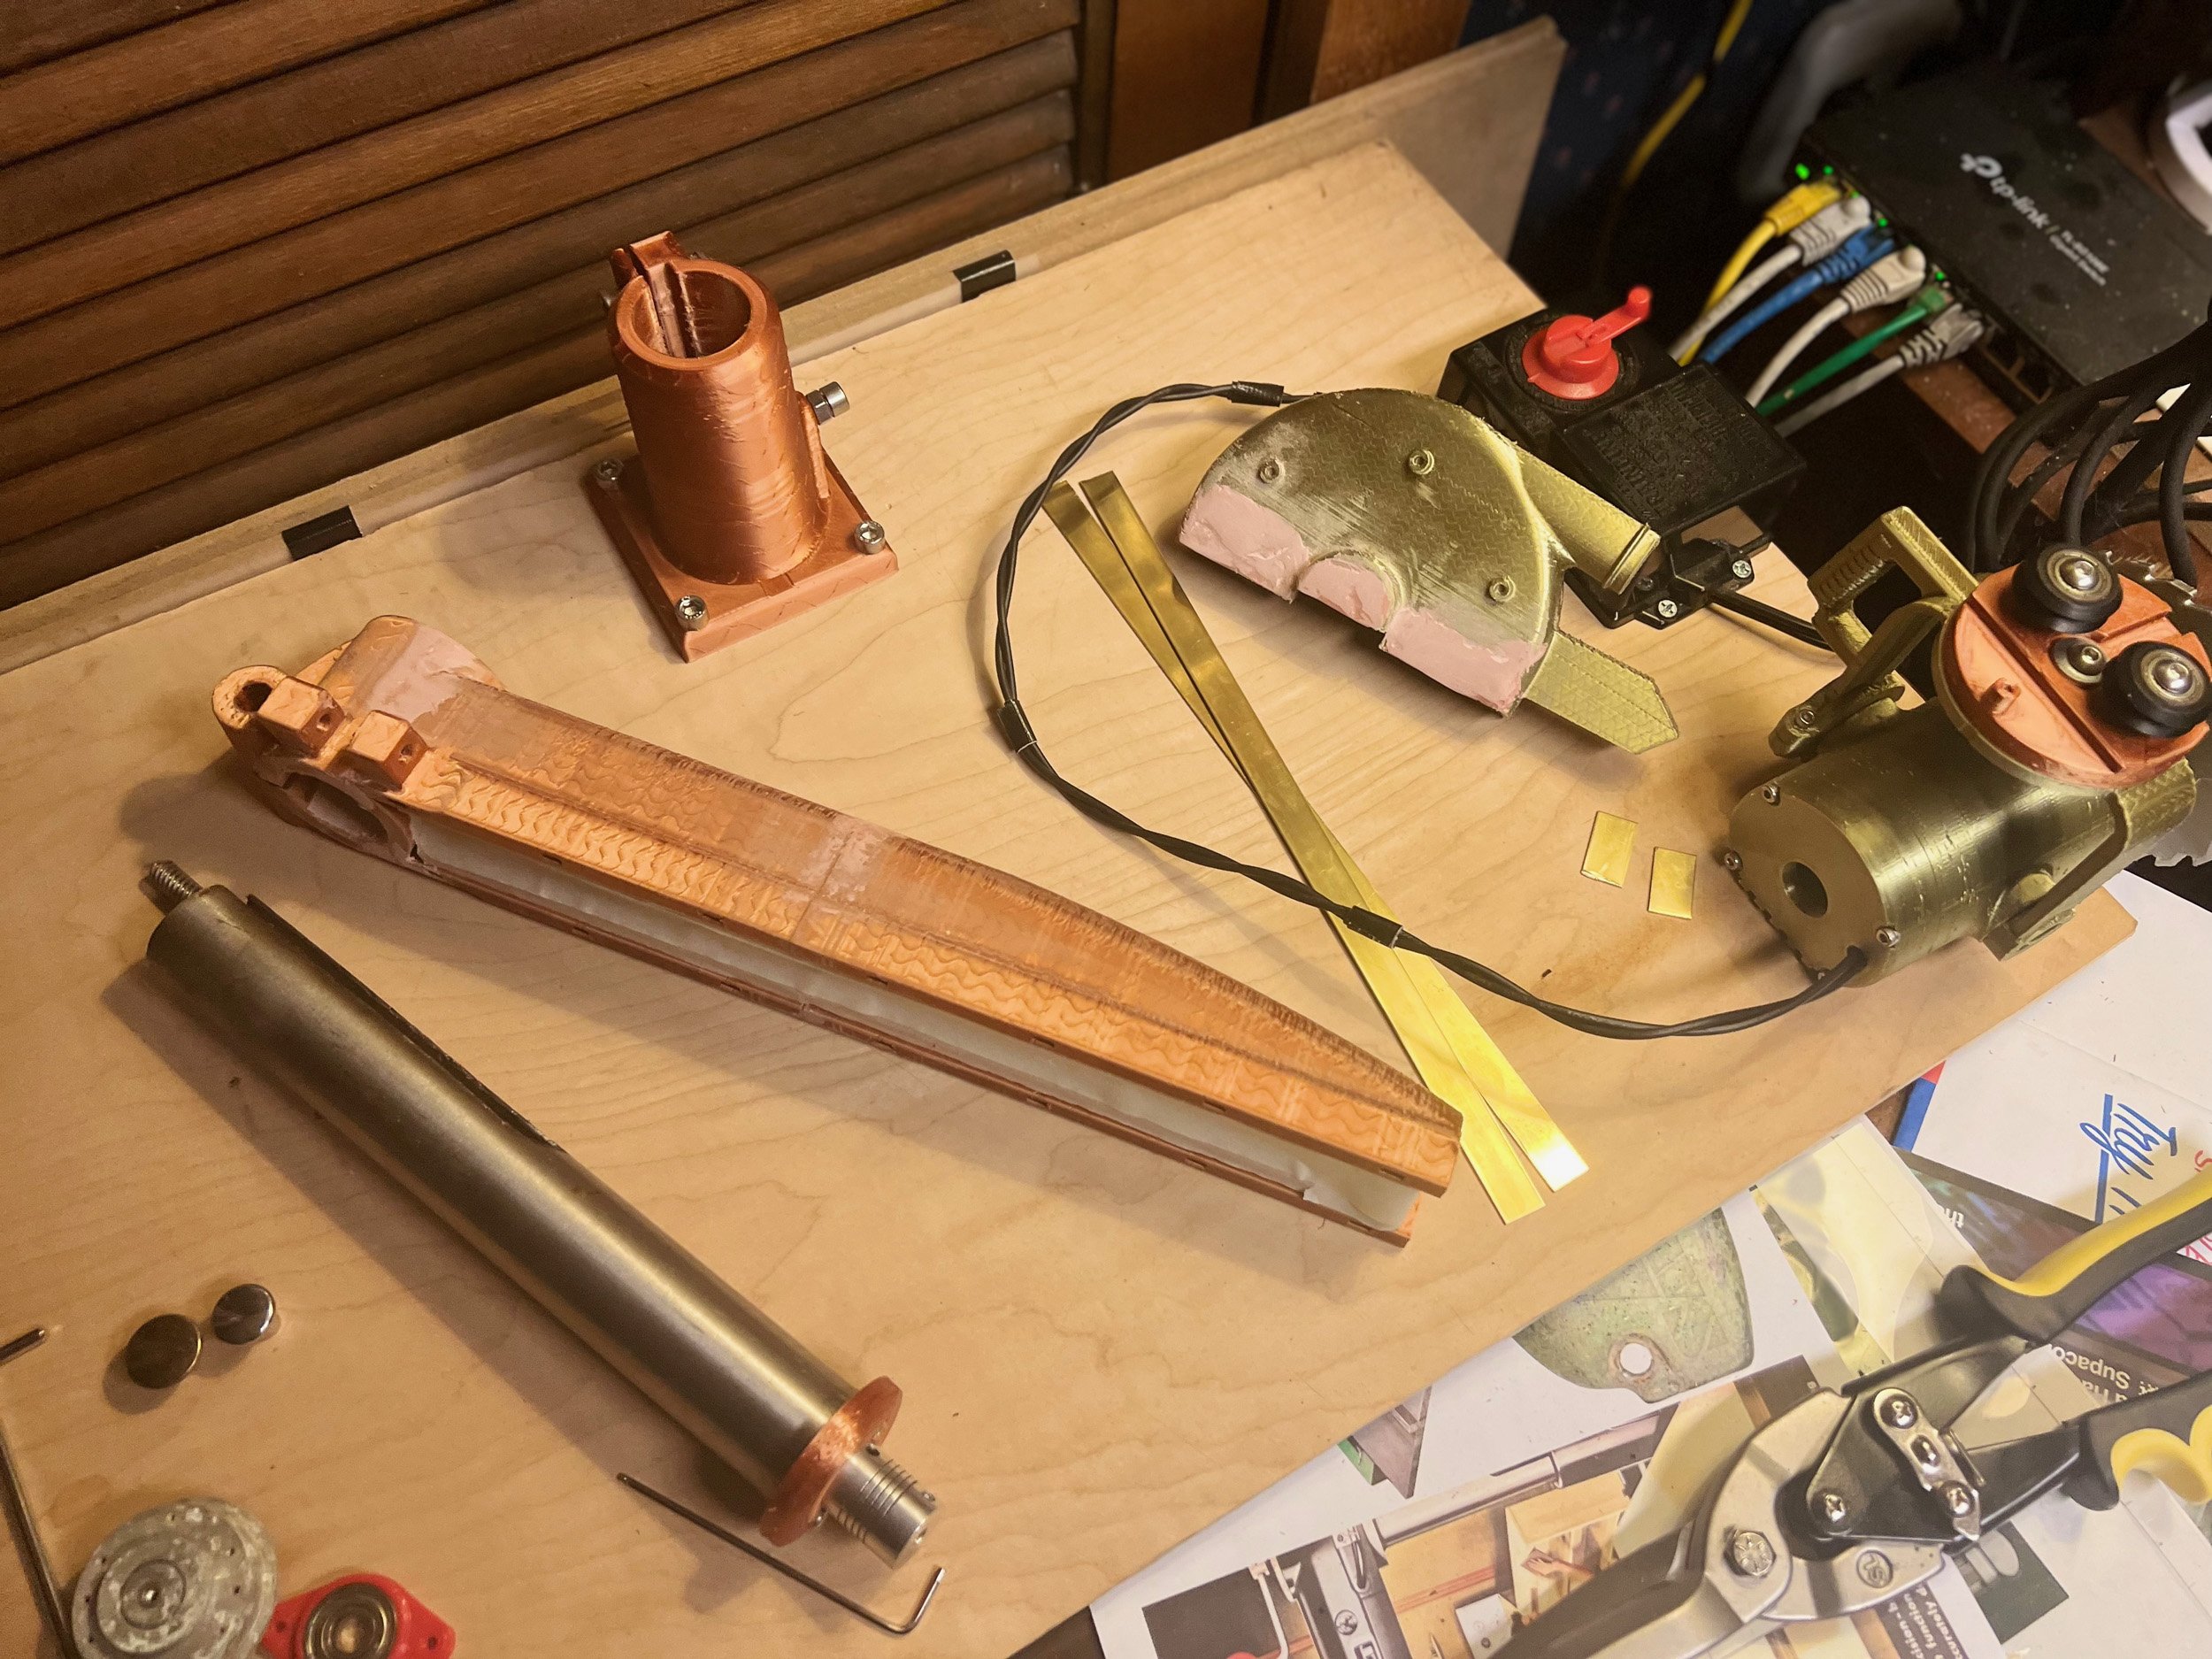
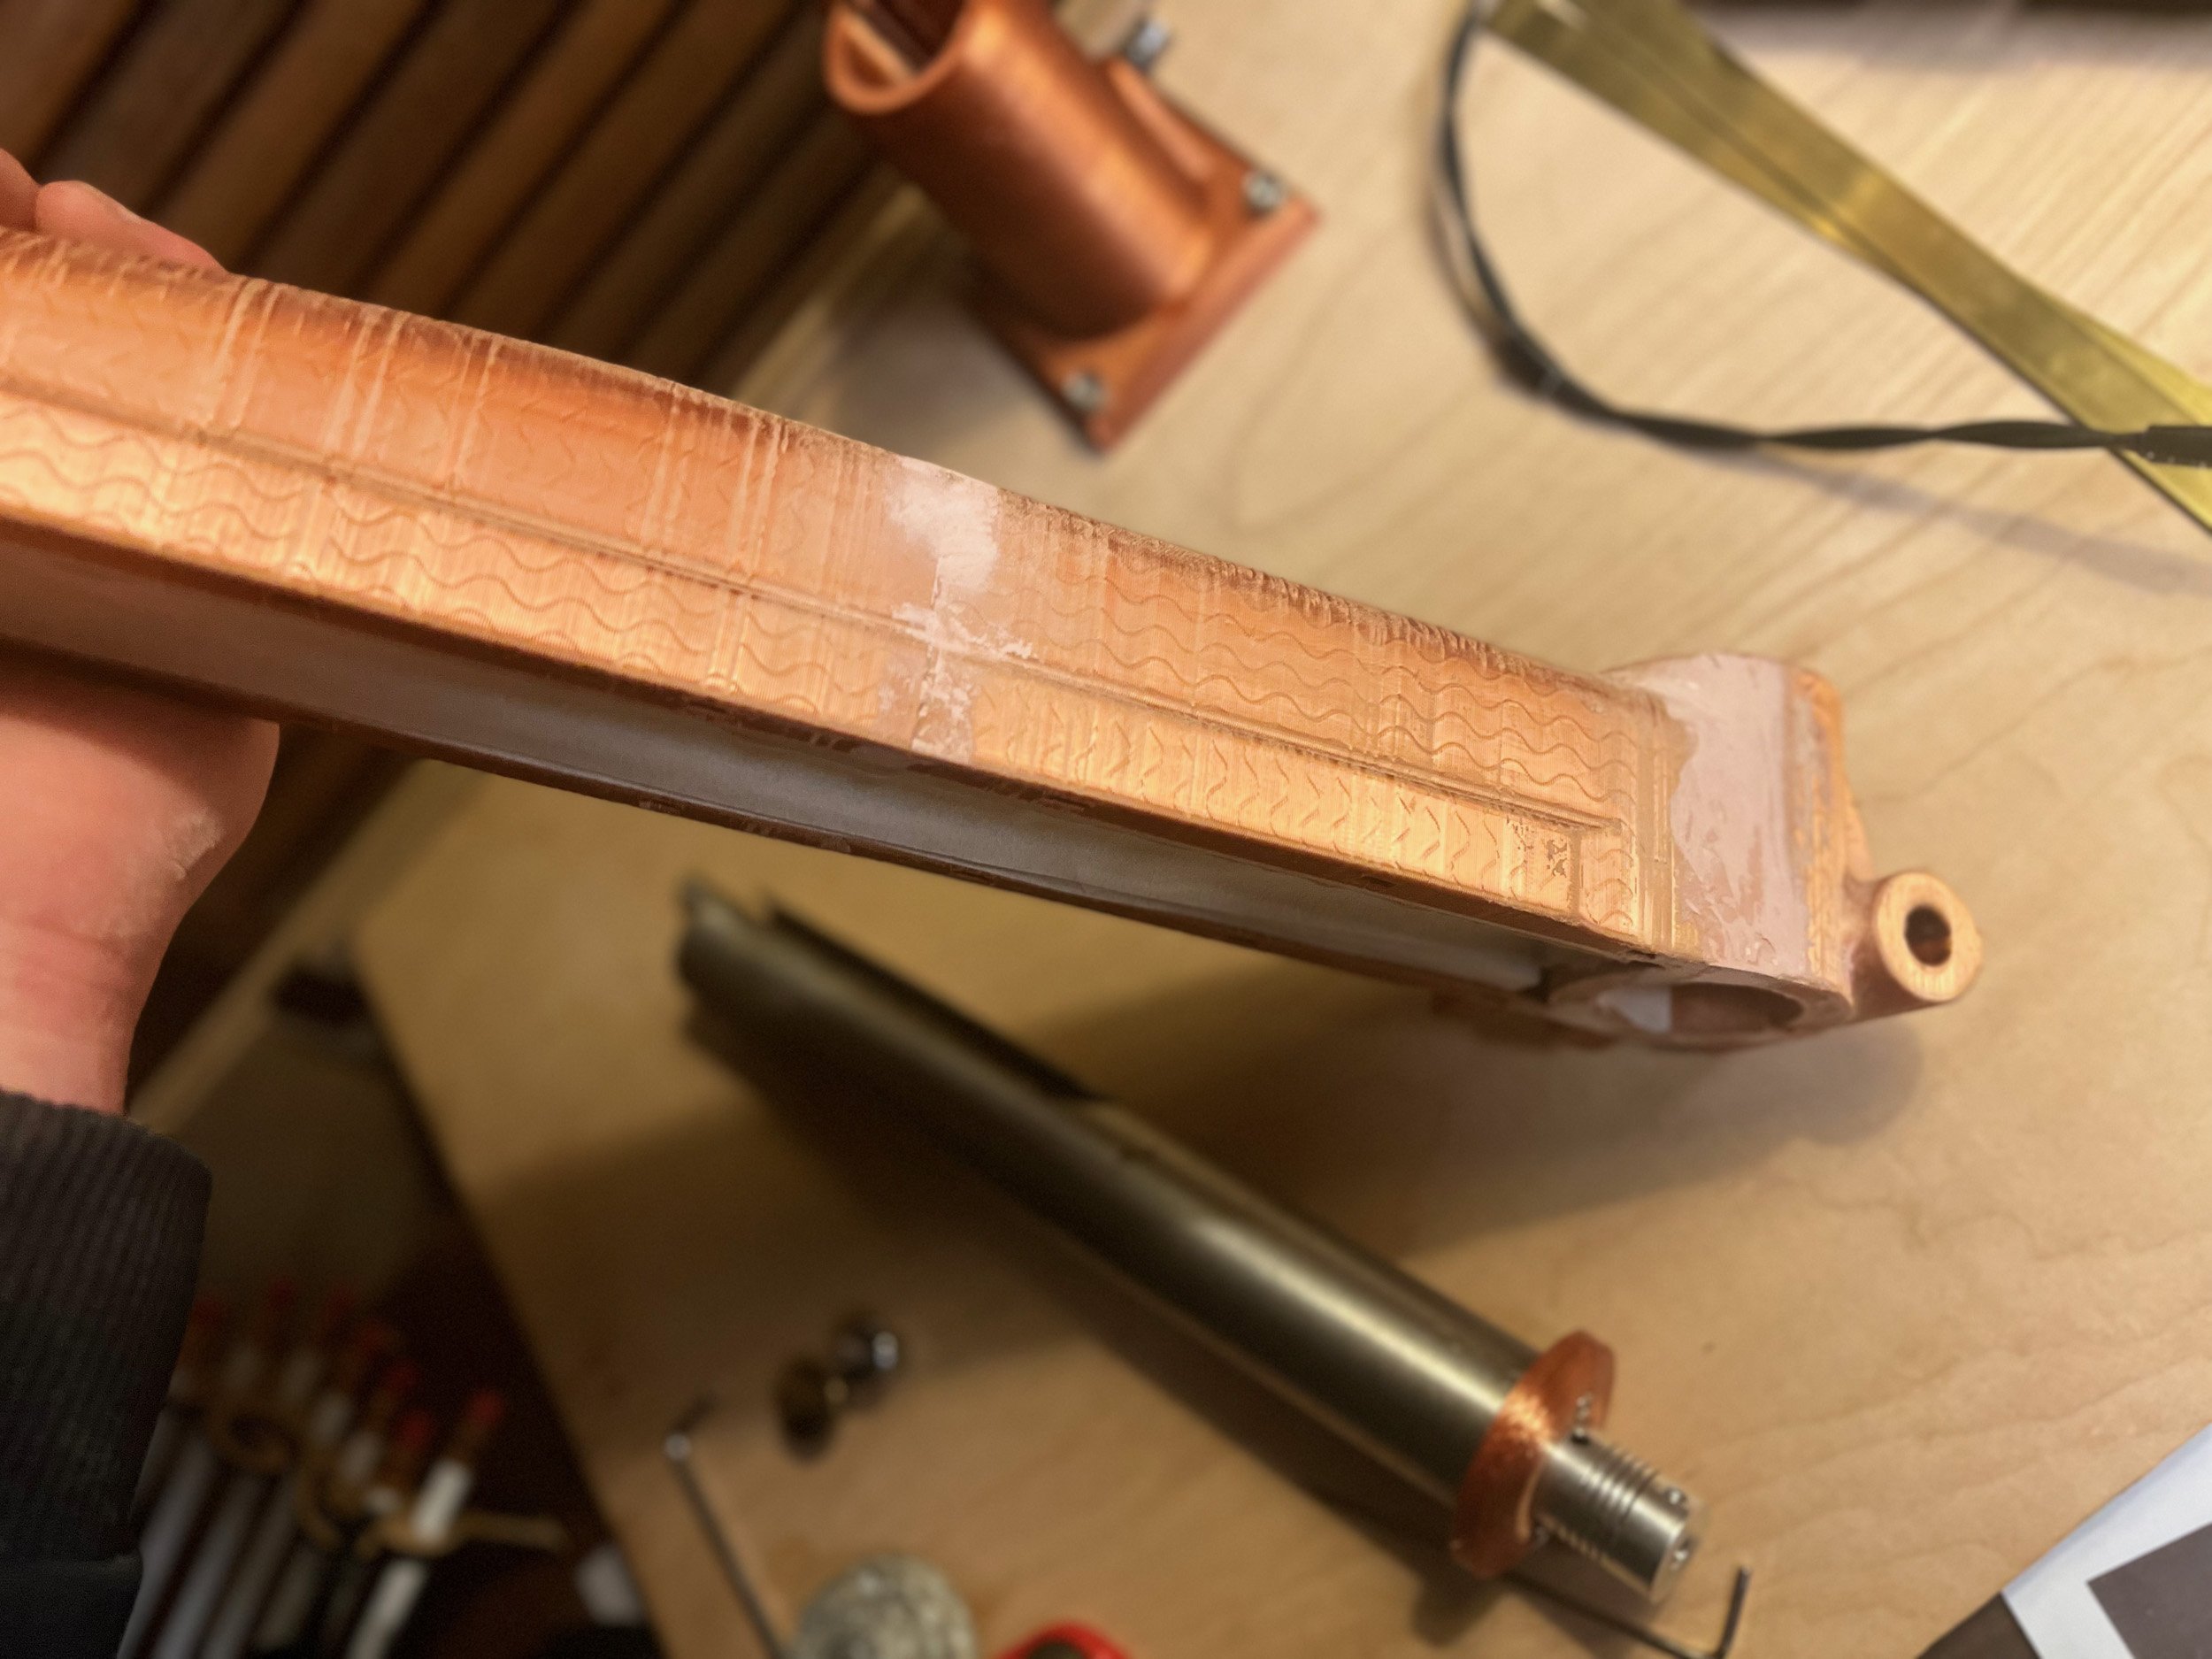
Making the arms
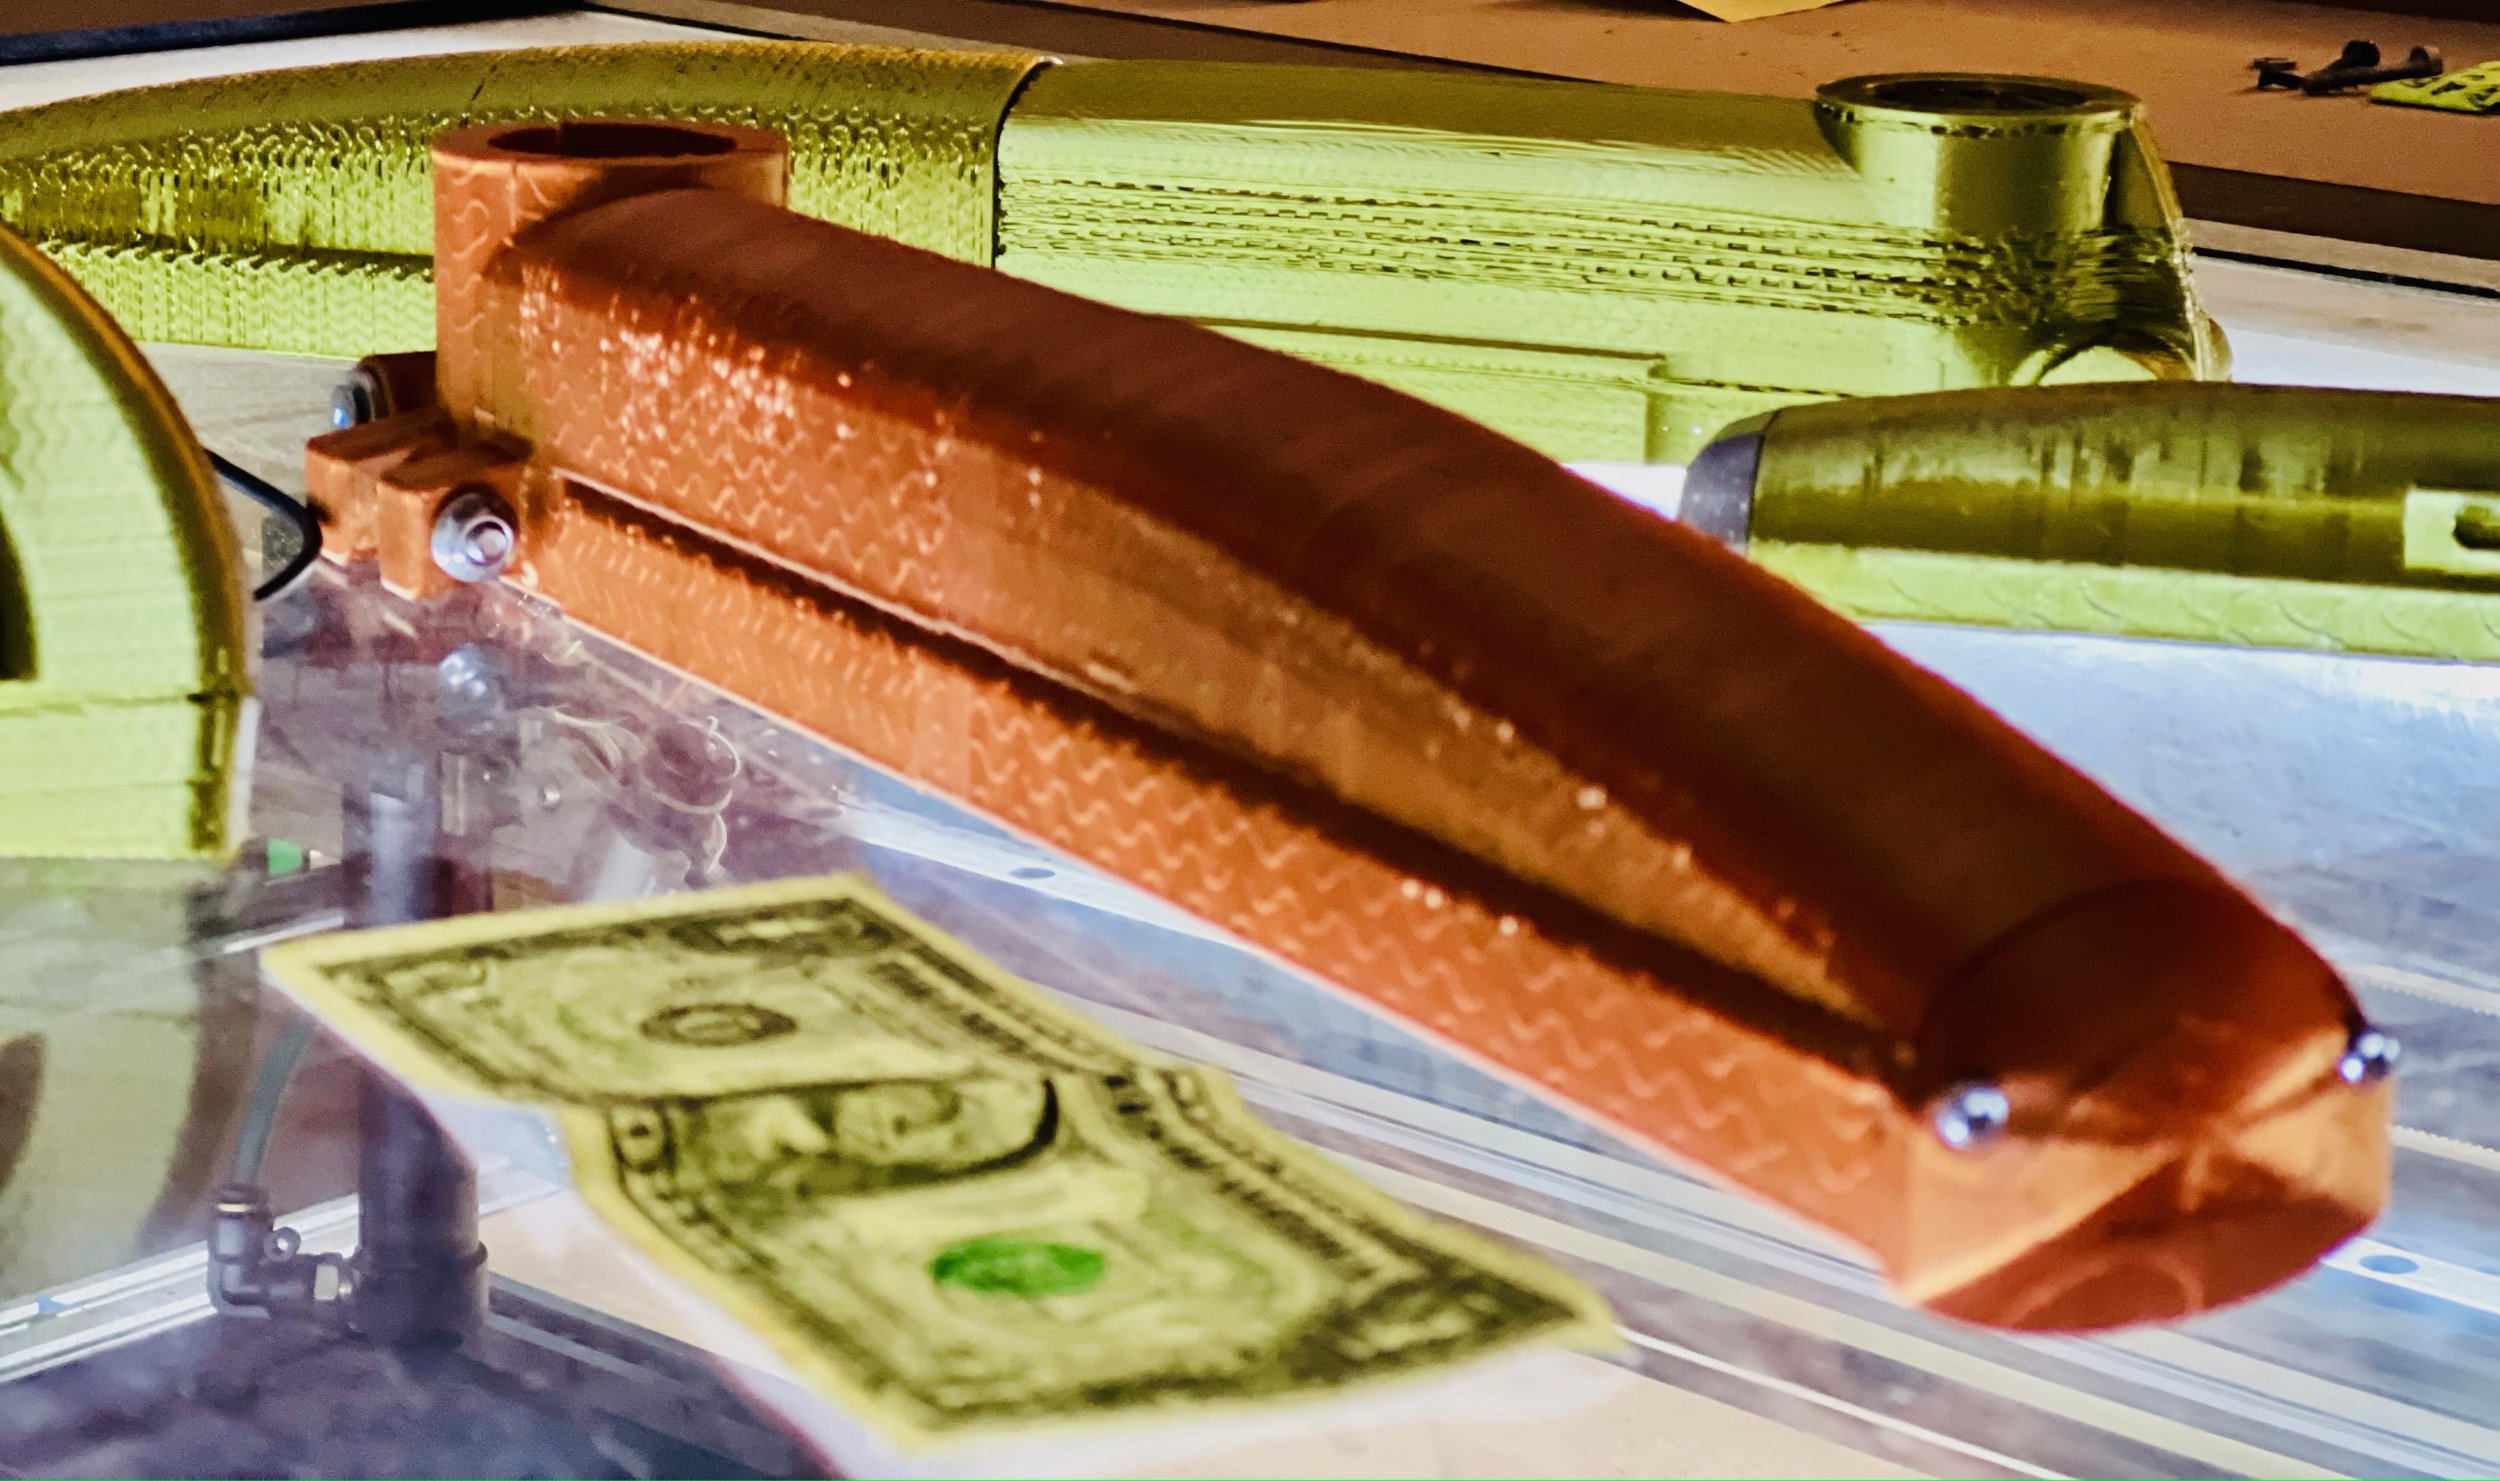
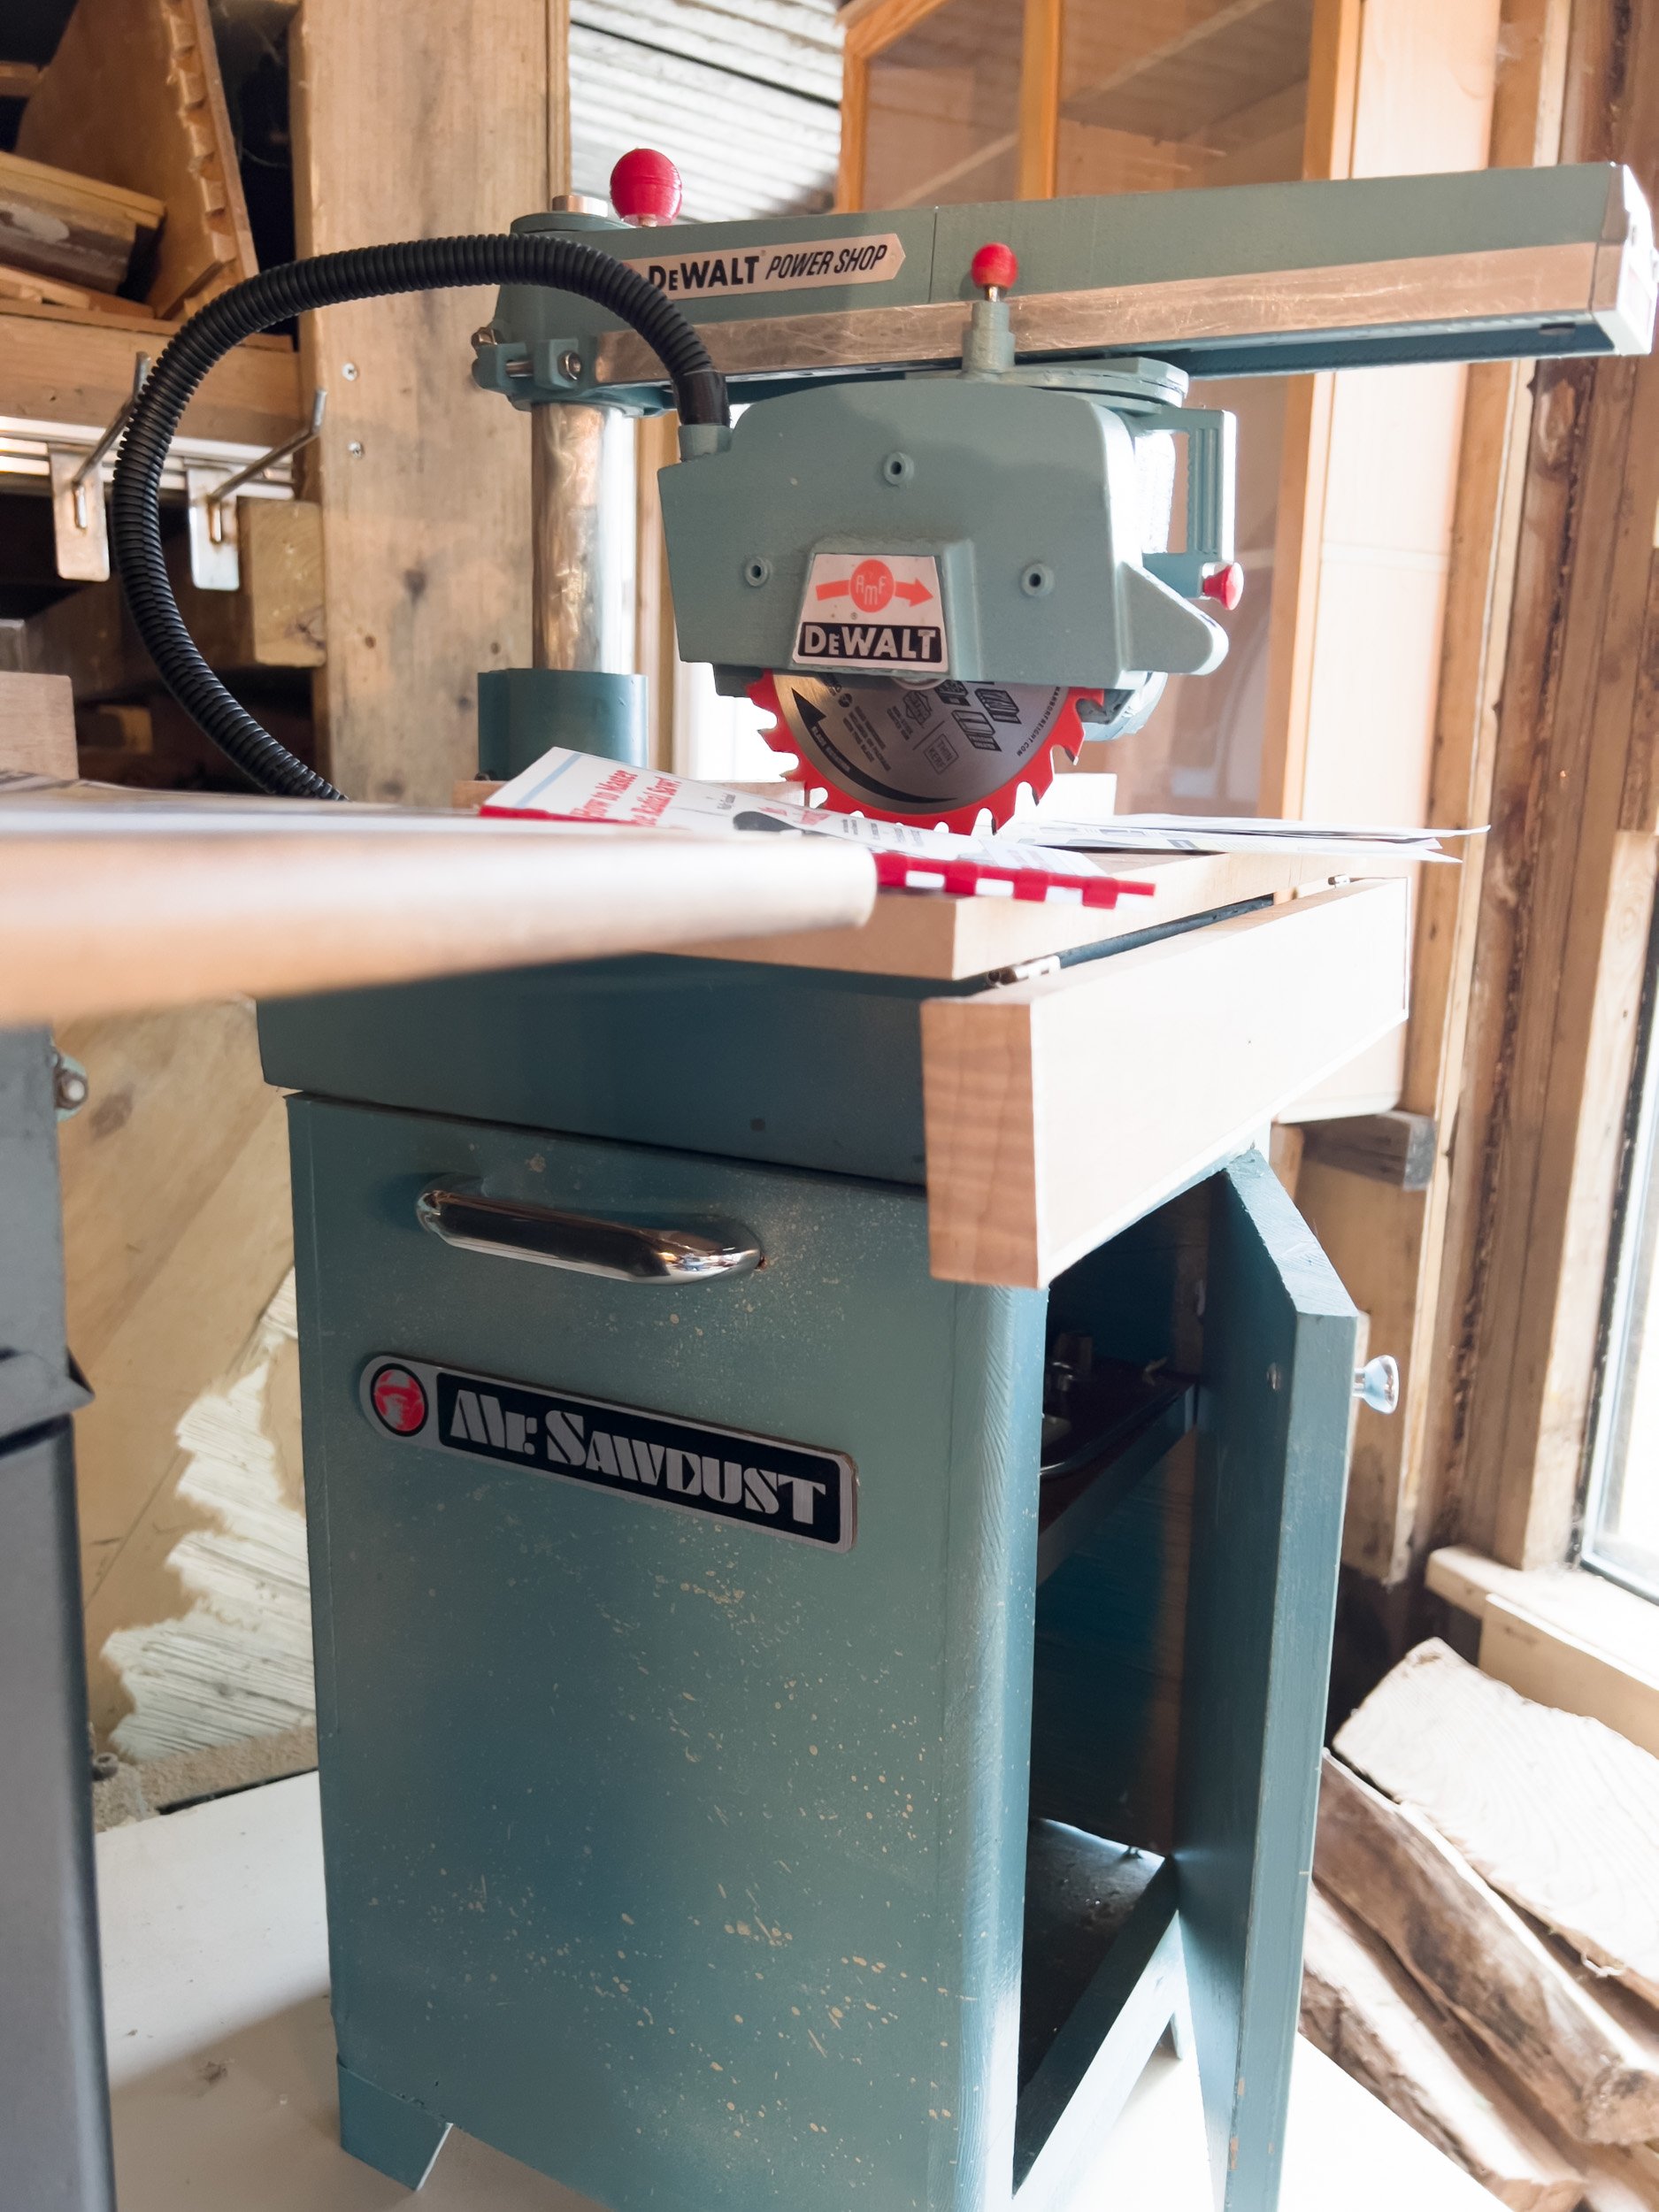
One frustrating reality — and it’s what I get for insisting on making this 1:2-scale — is my Ender 3 printer volume isn’t tall enough to print a full arm. So, dealing with that meant joining two parts. On the MBF, superglue did the trick, then the seam filled/sanded with Bondo body filler. On the 925, I made my life a bit easier and took a minute to model an internal structure that let me marry the segments with M3 bolts. That created a surprisingly rigid full-length arm, and just felt a bit more like a well-considered solution. I didn’t fill/hide the seam on this first model so I can still take things back apart if needed.

To loosely quote Eames, “Details are not the details. Details make the design.” Even though I’m only scratching the surface here, I’ve at least started on all the small bits you only ever notice when you completely break down or study a machine. Guys who regularly dismantle and rebuild these saws know exactly what I’m talking about.
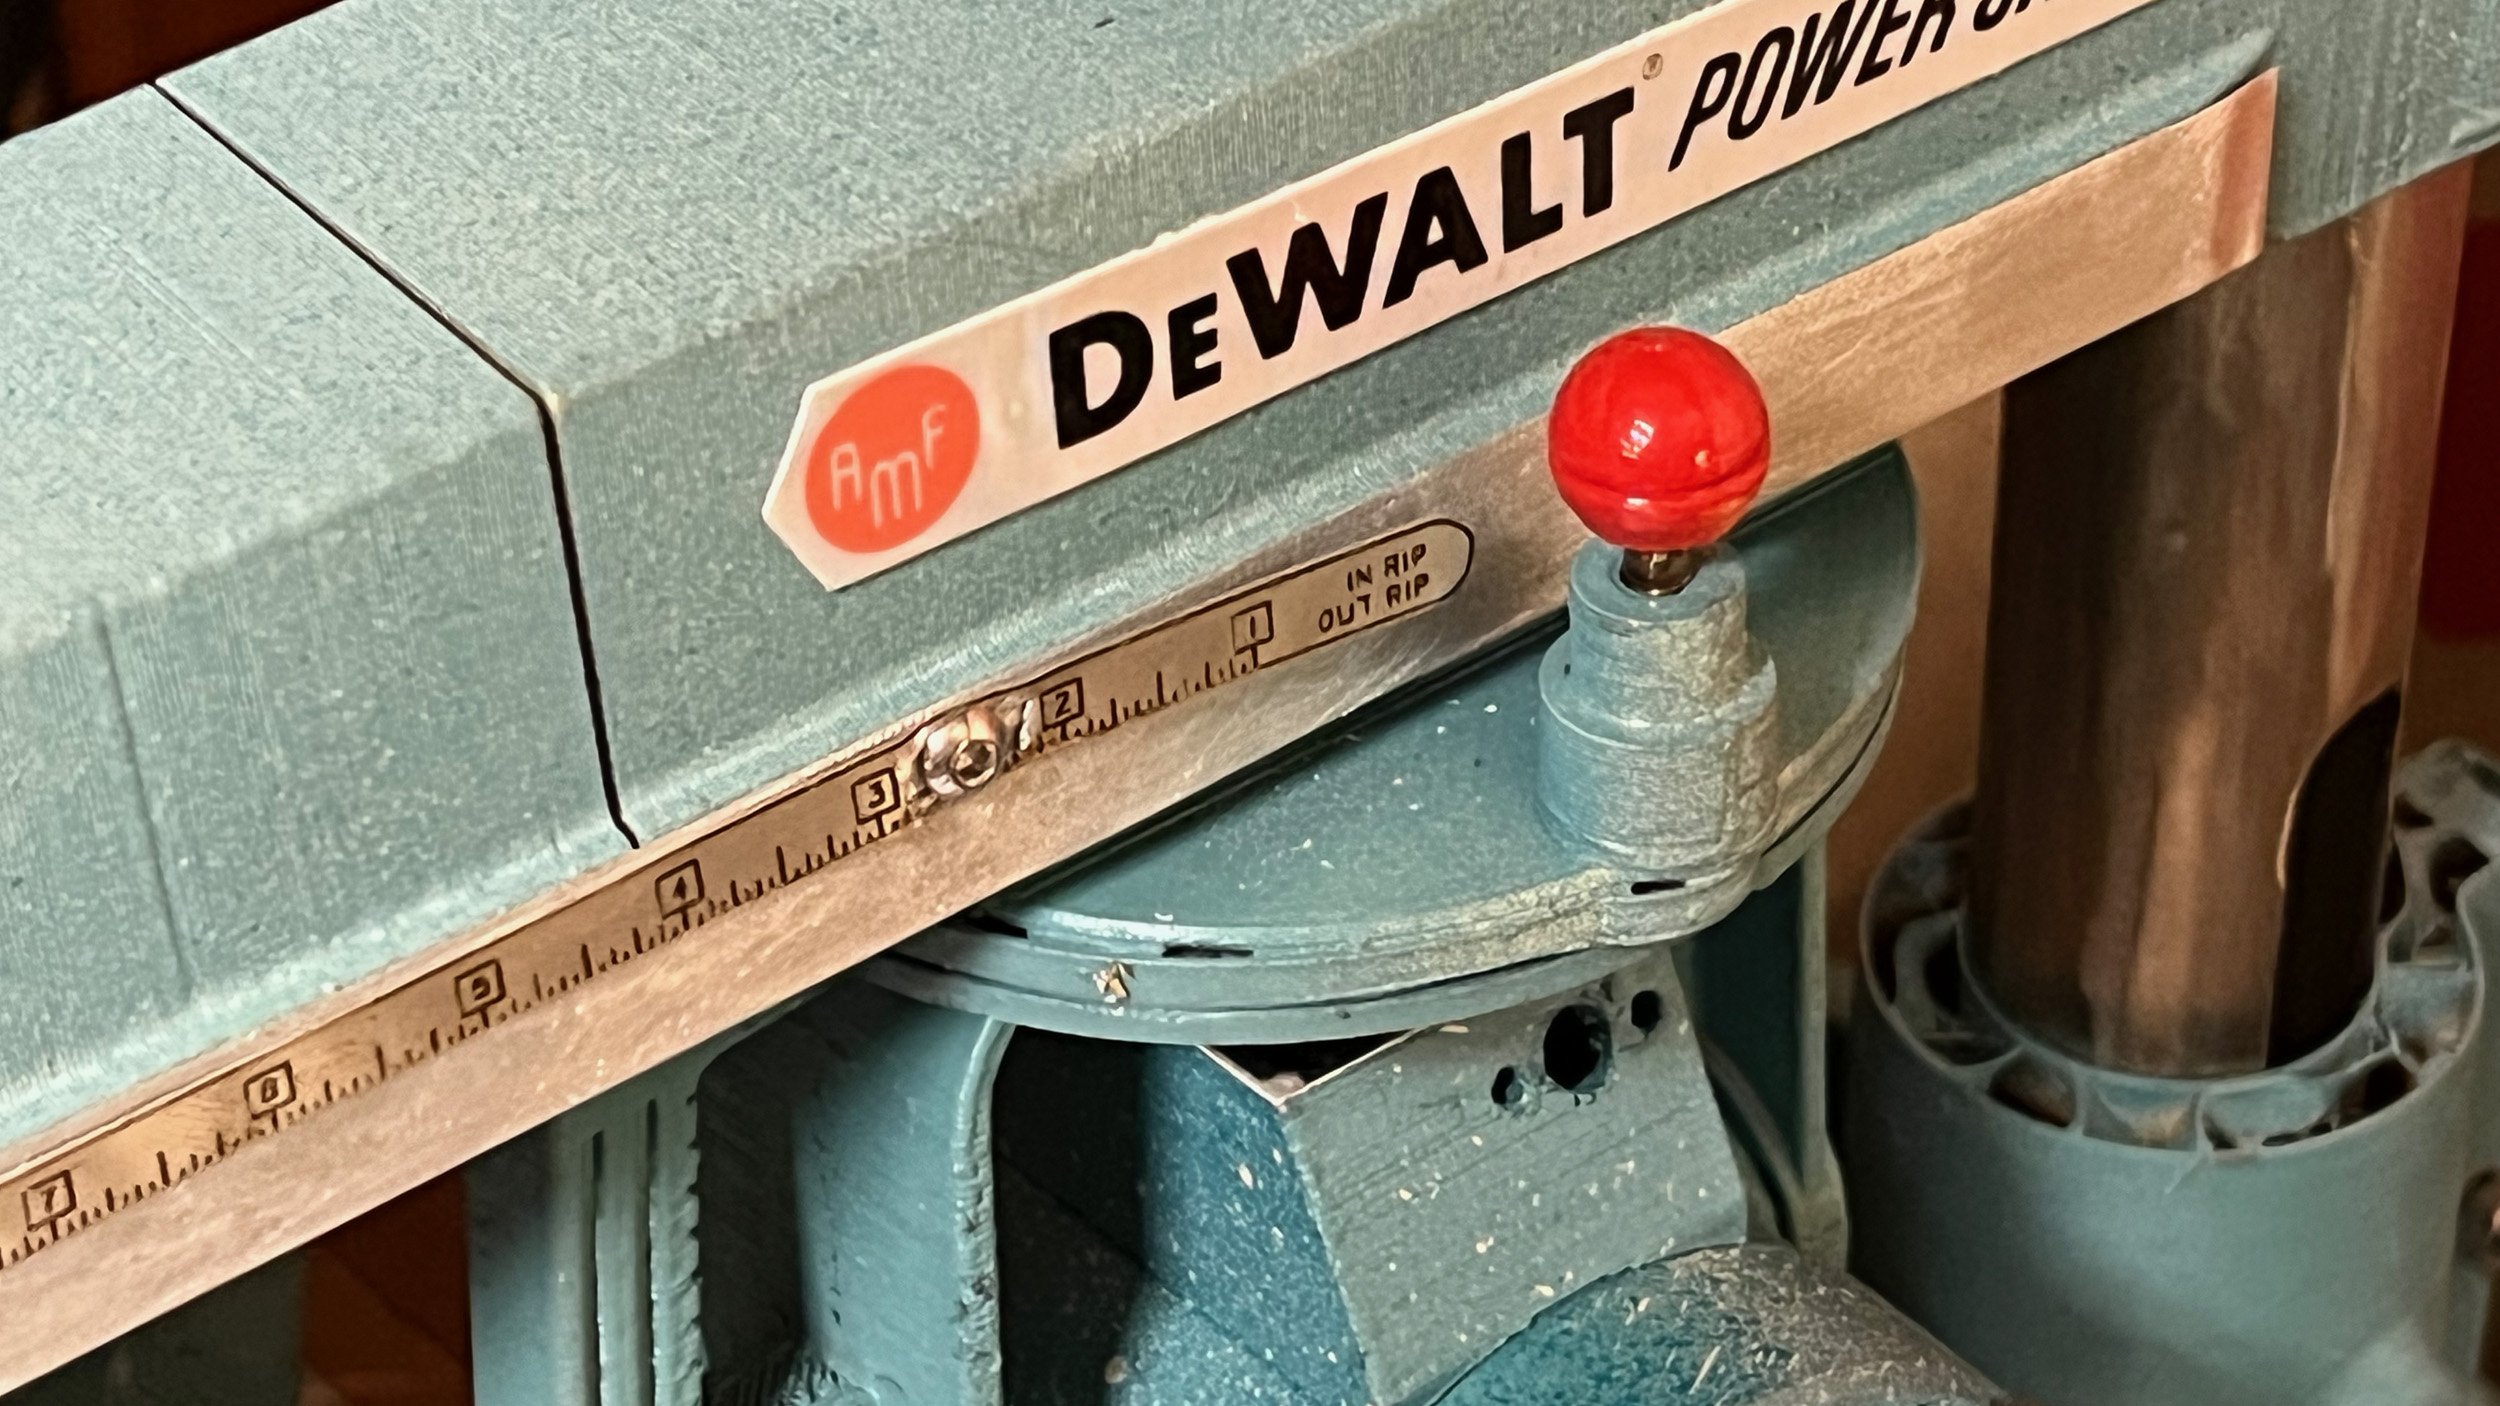
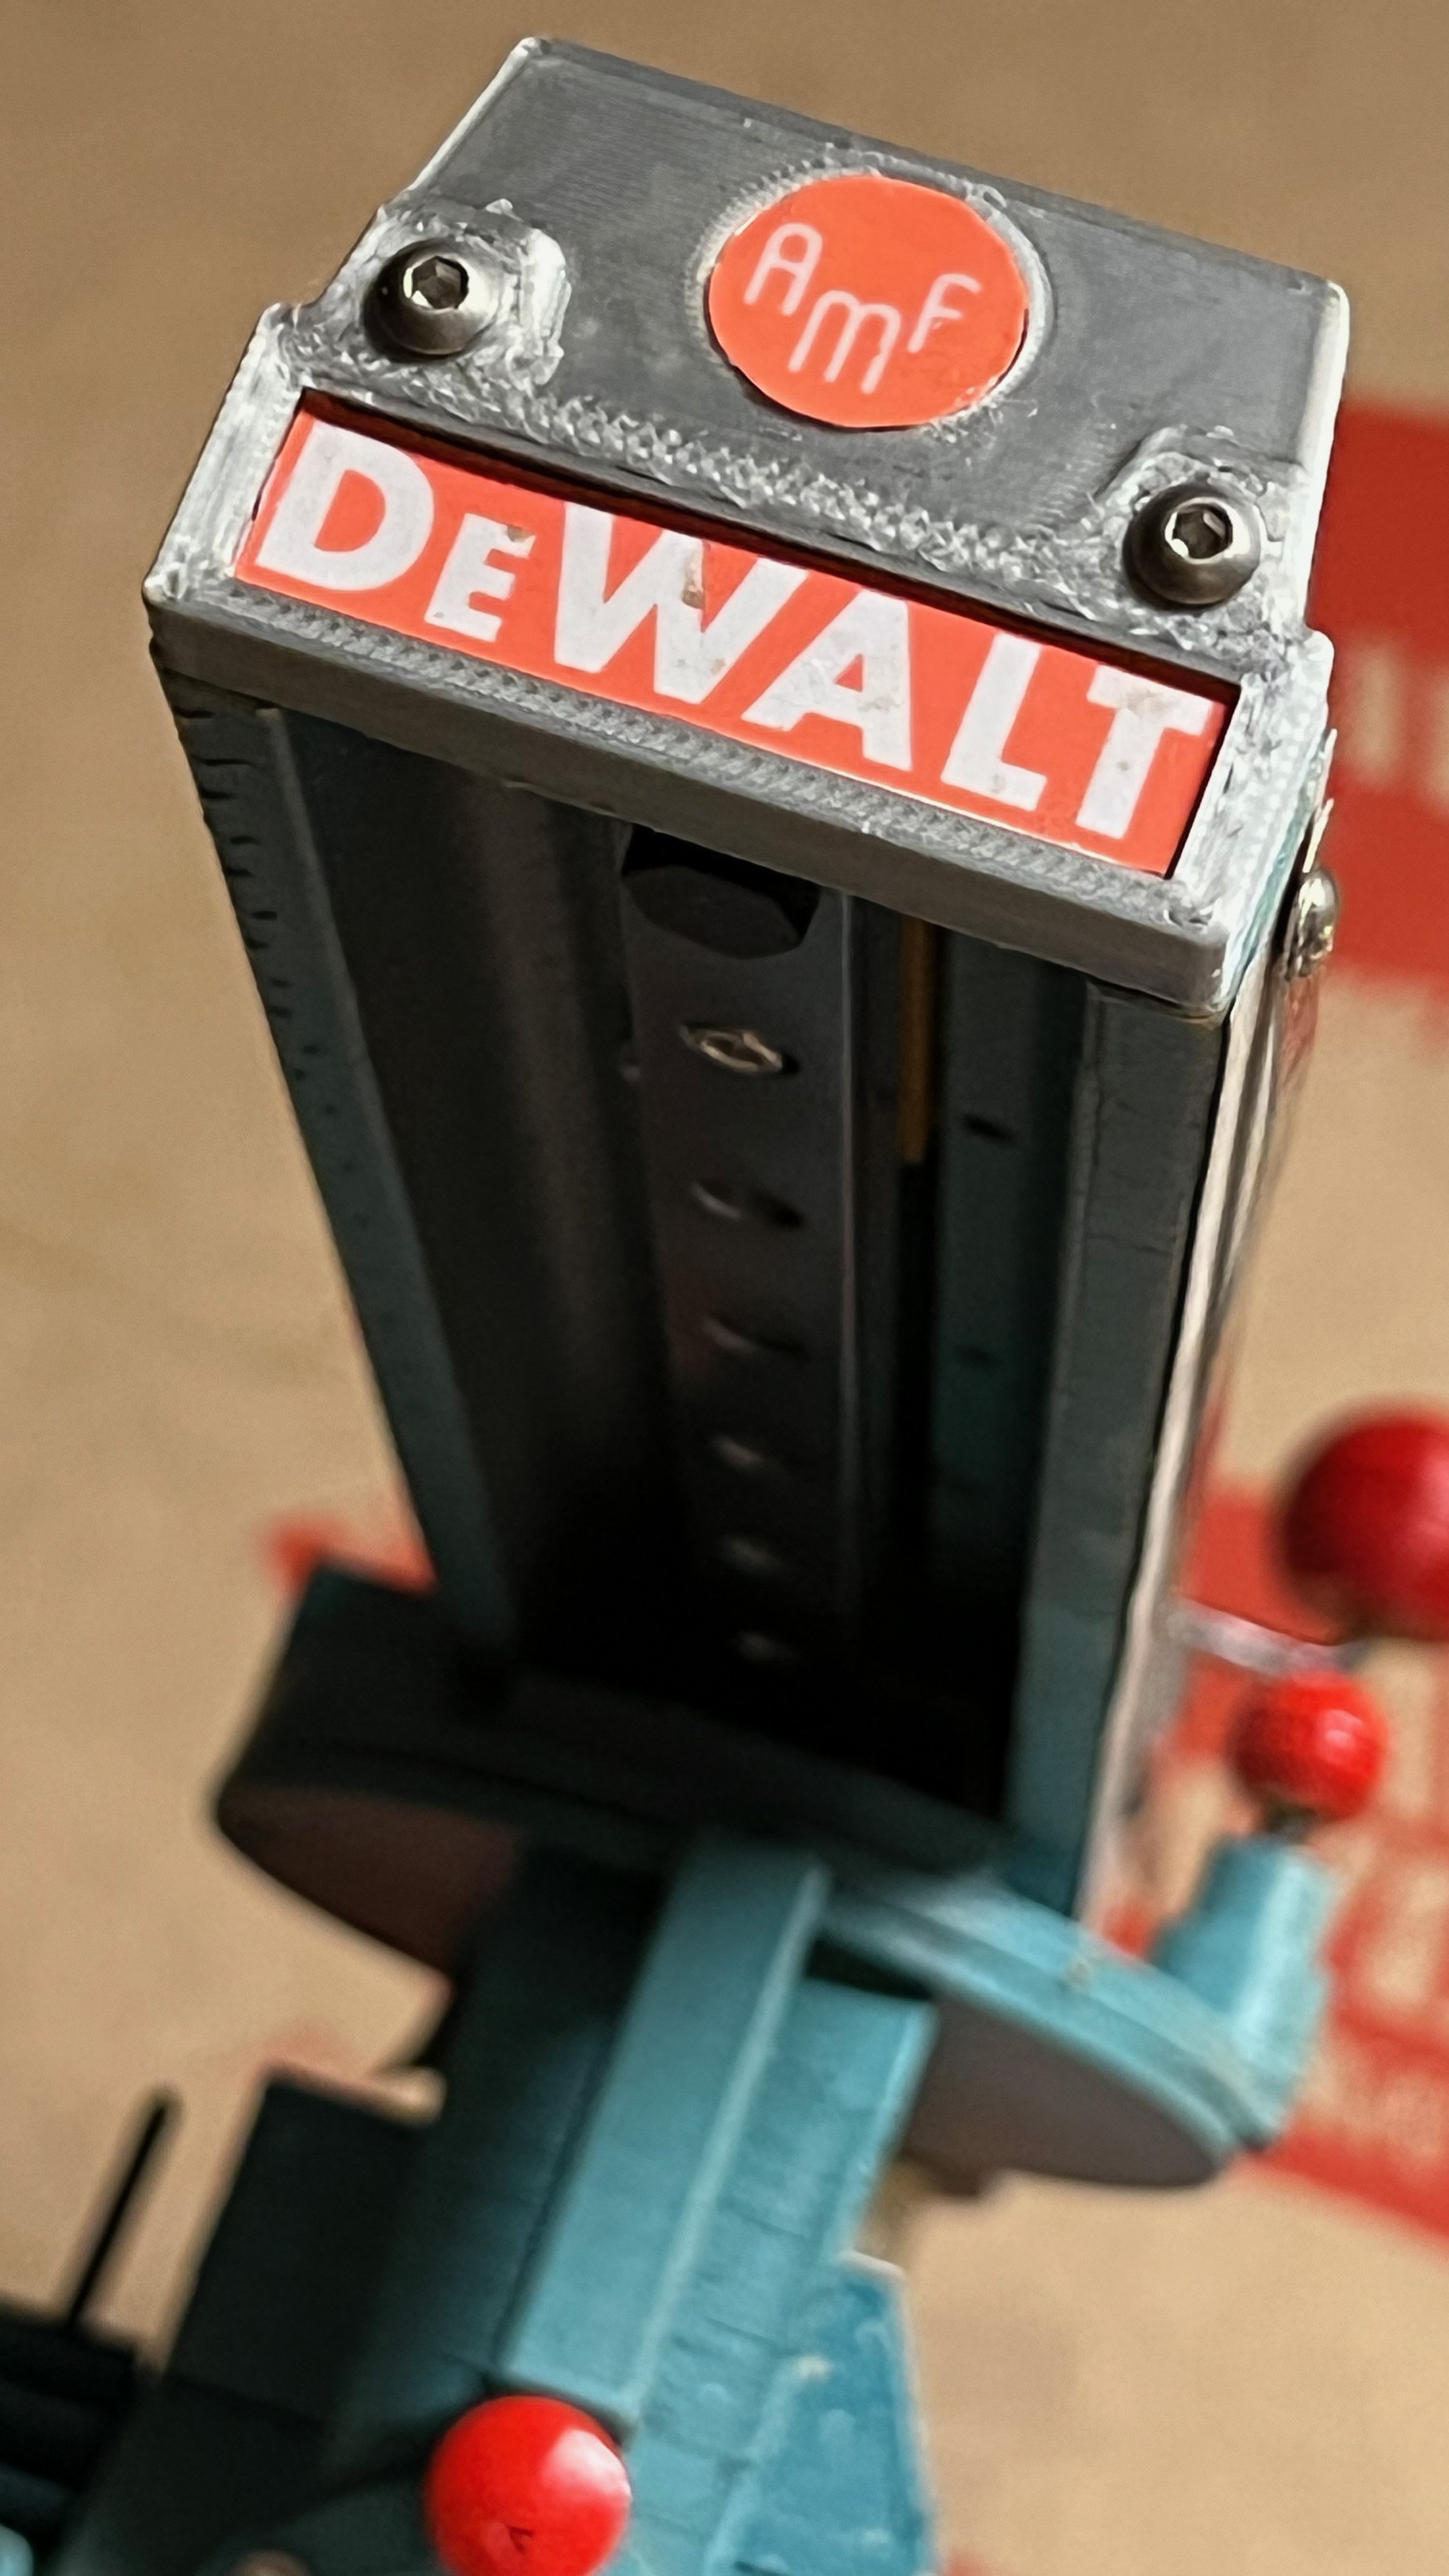
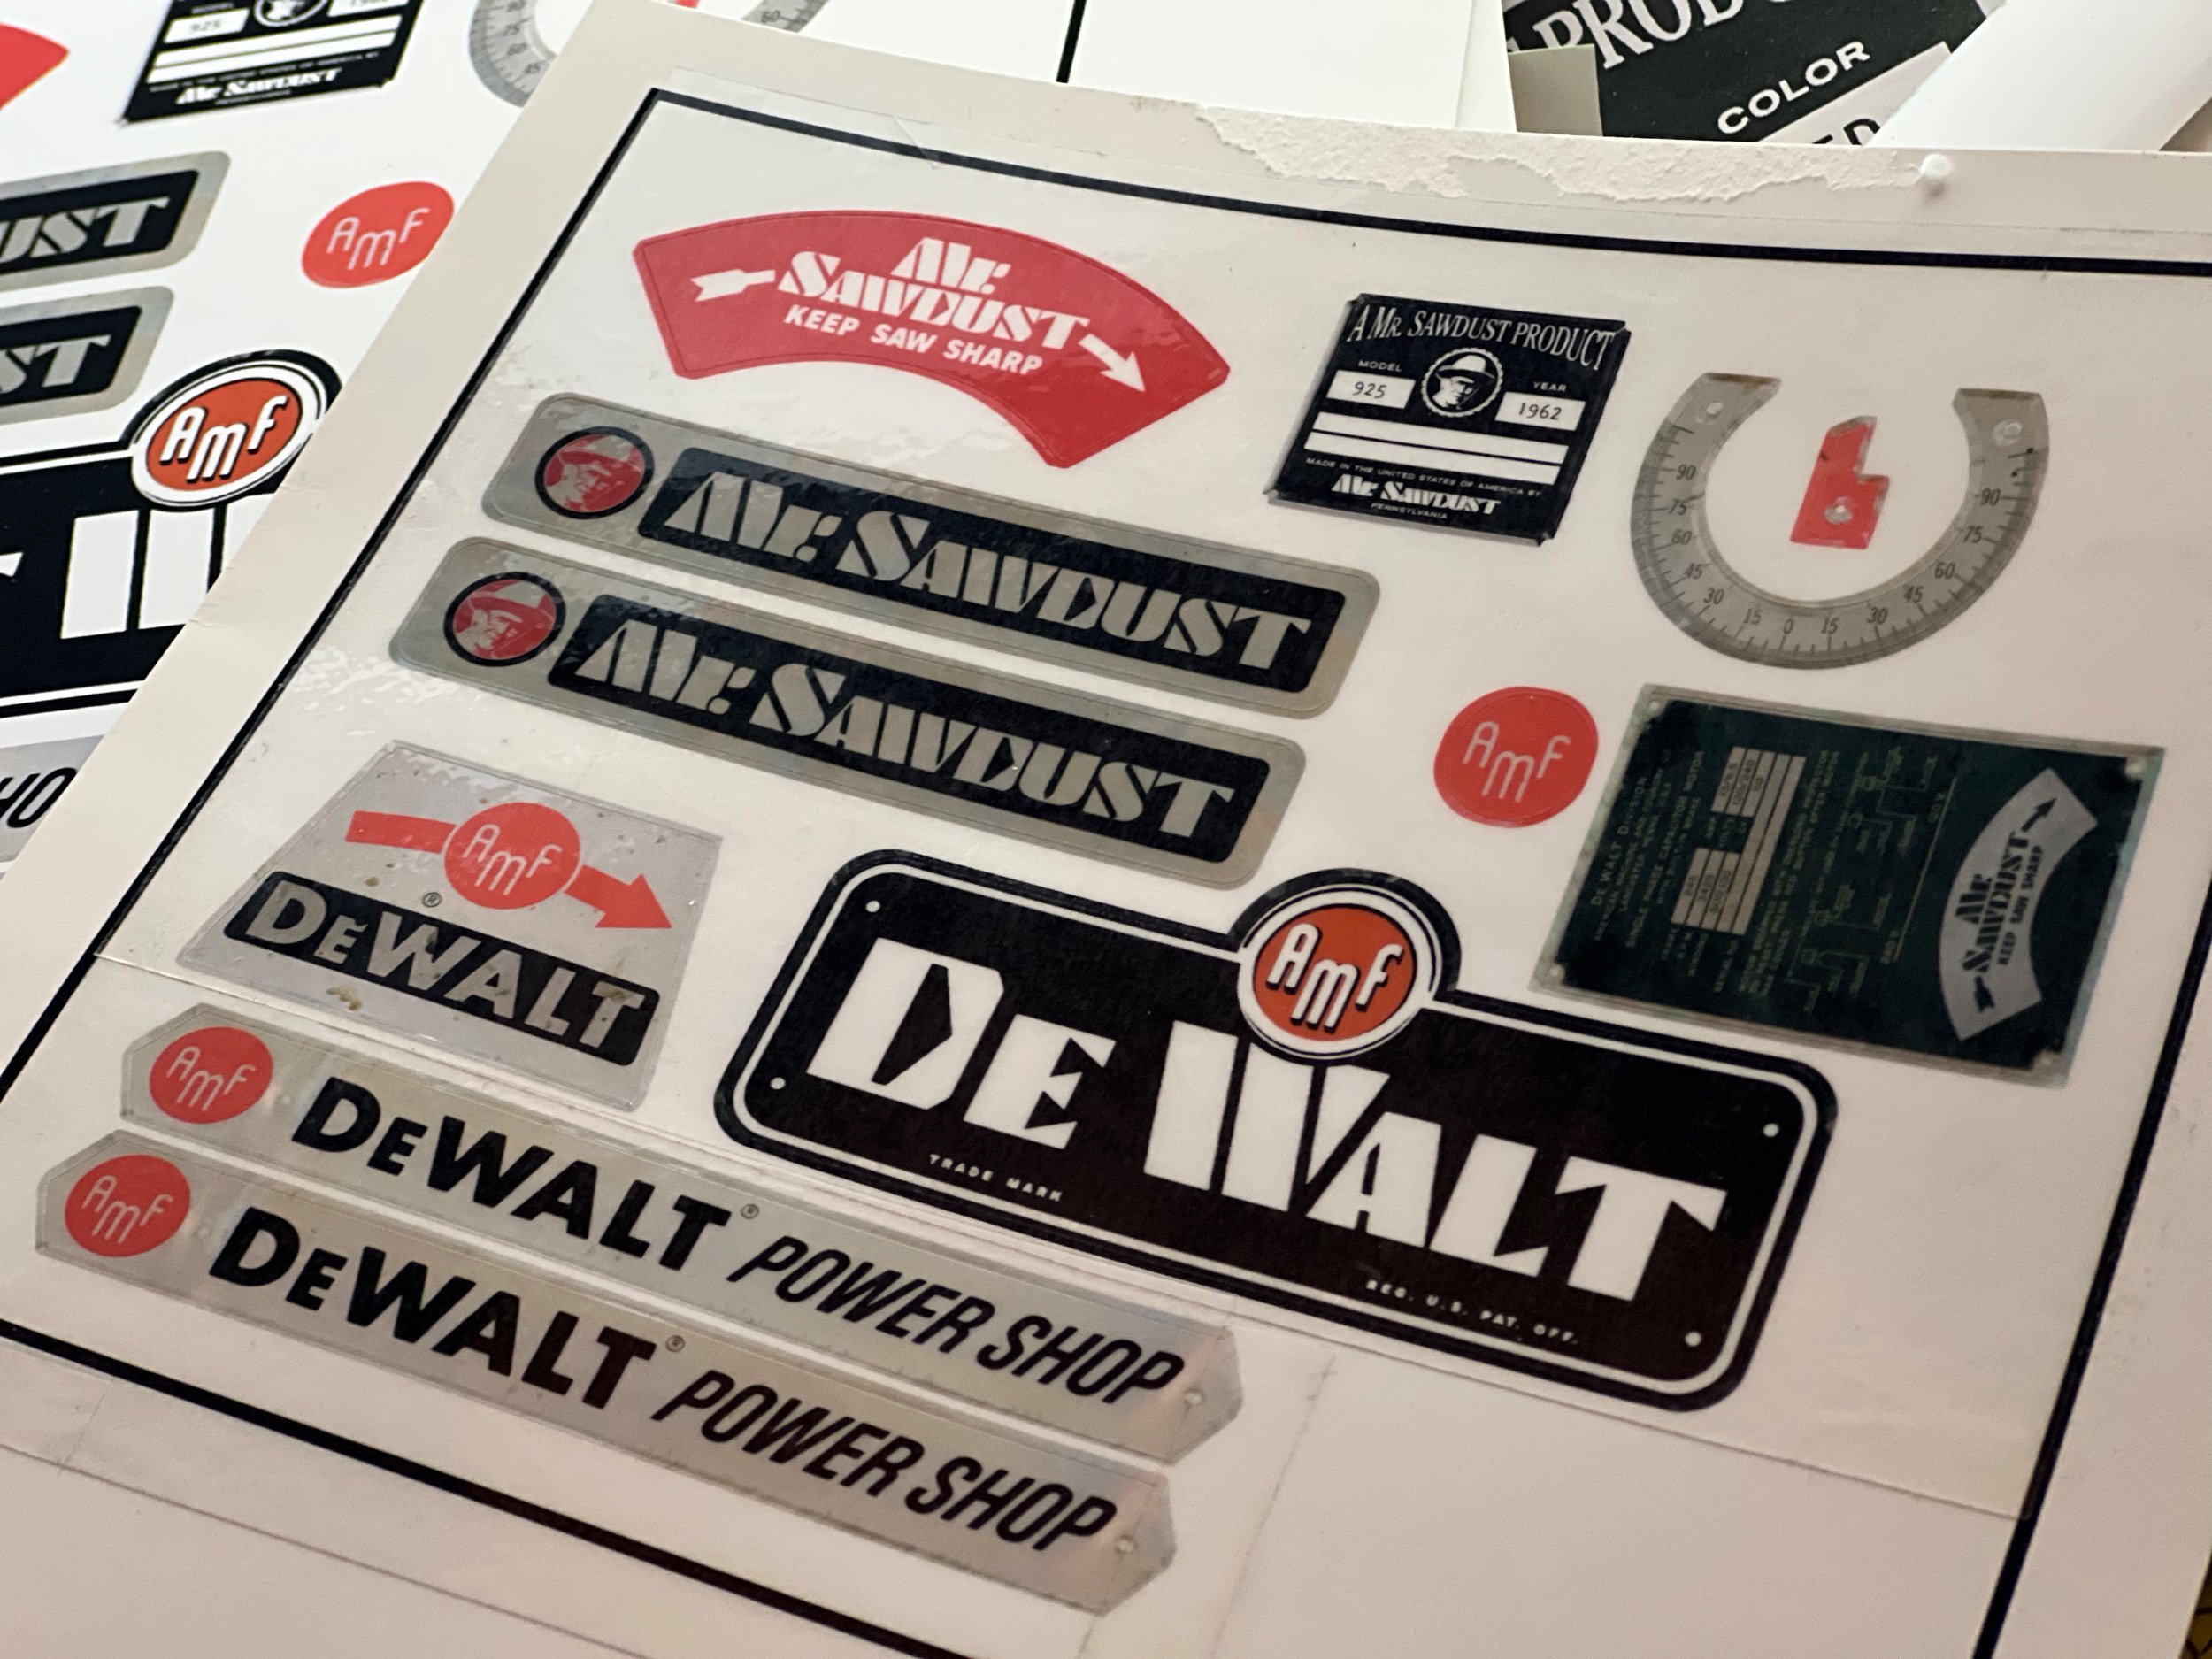
Badges
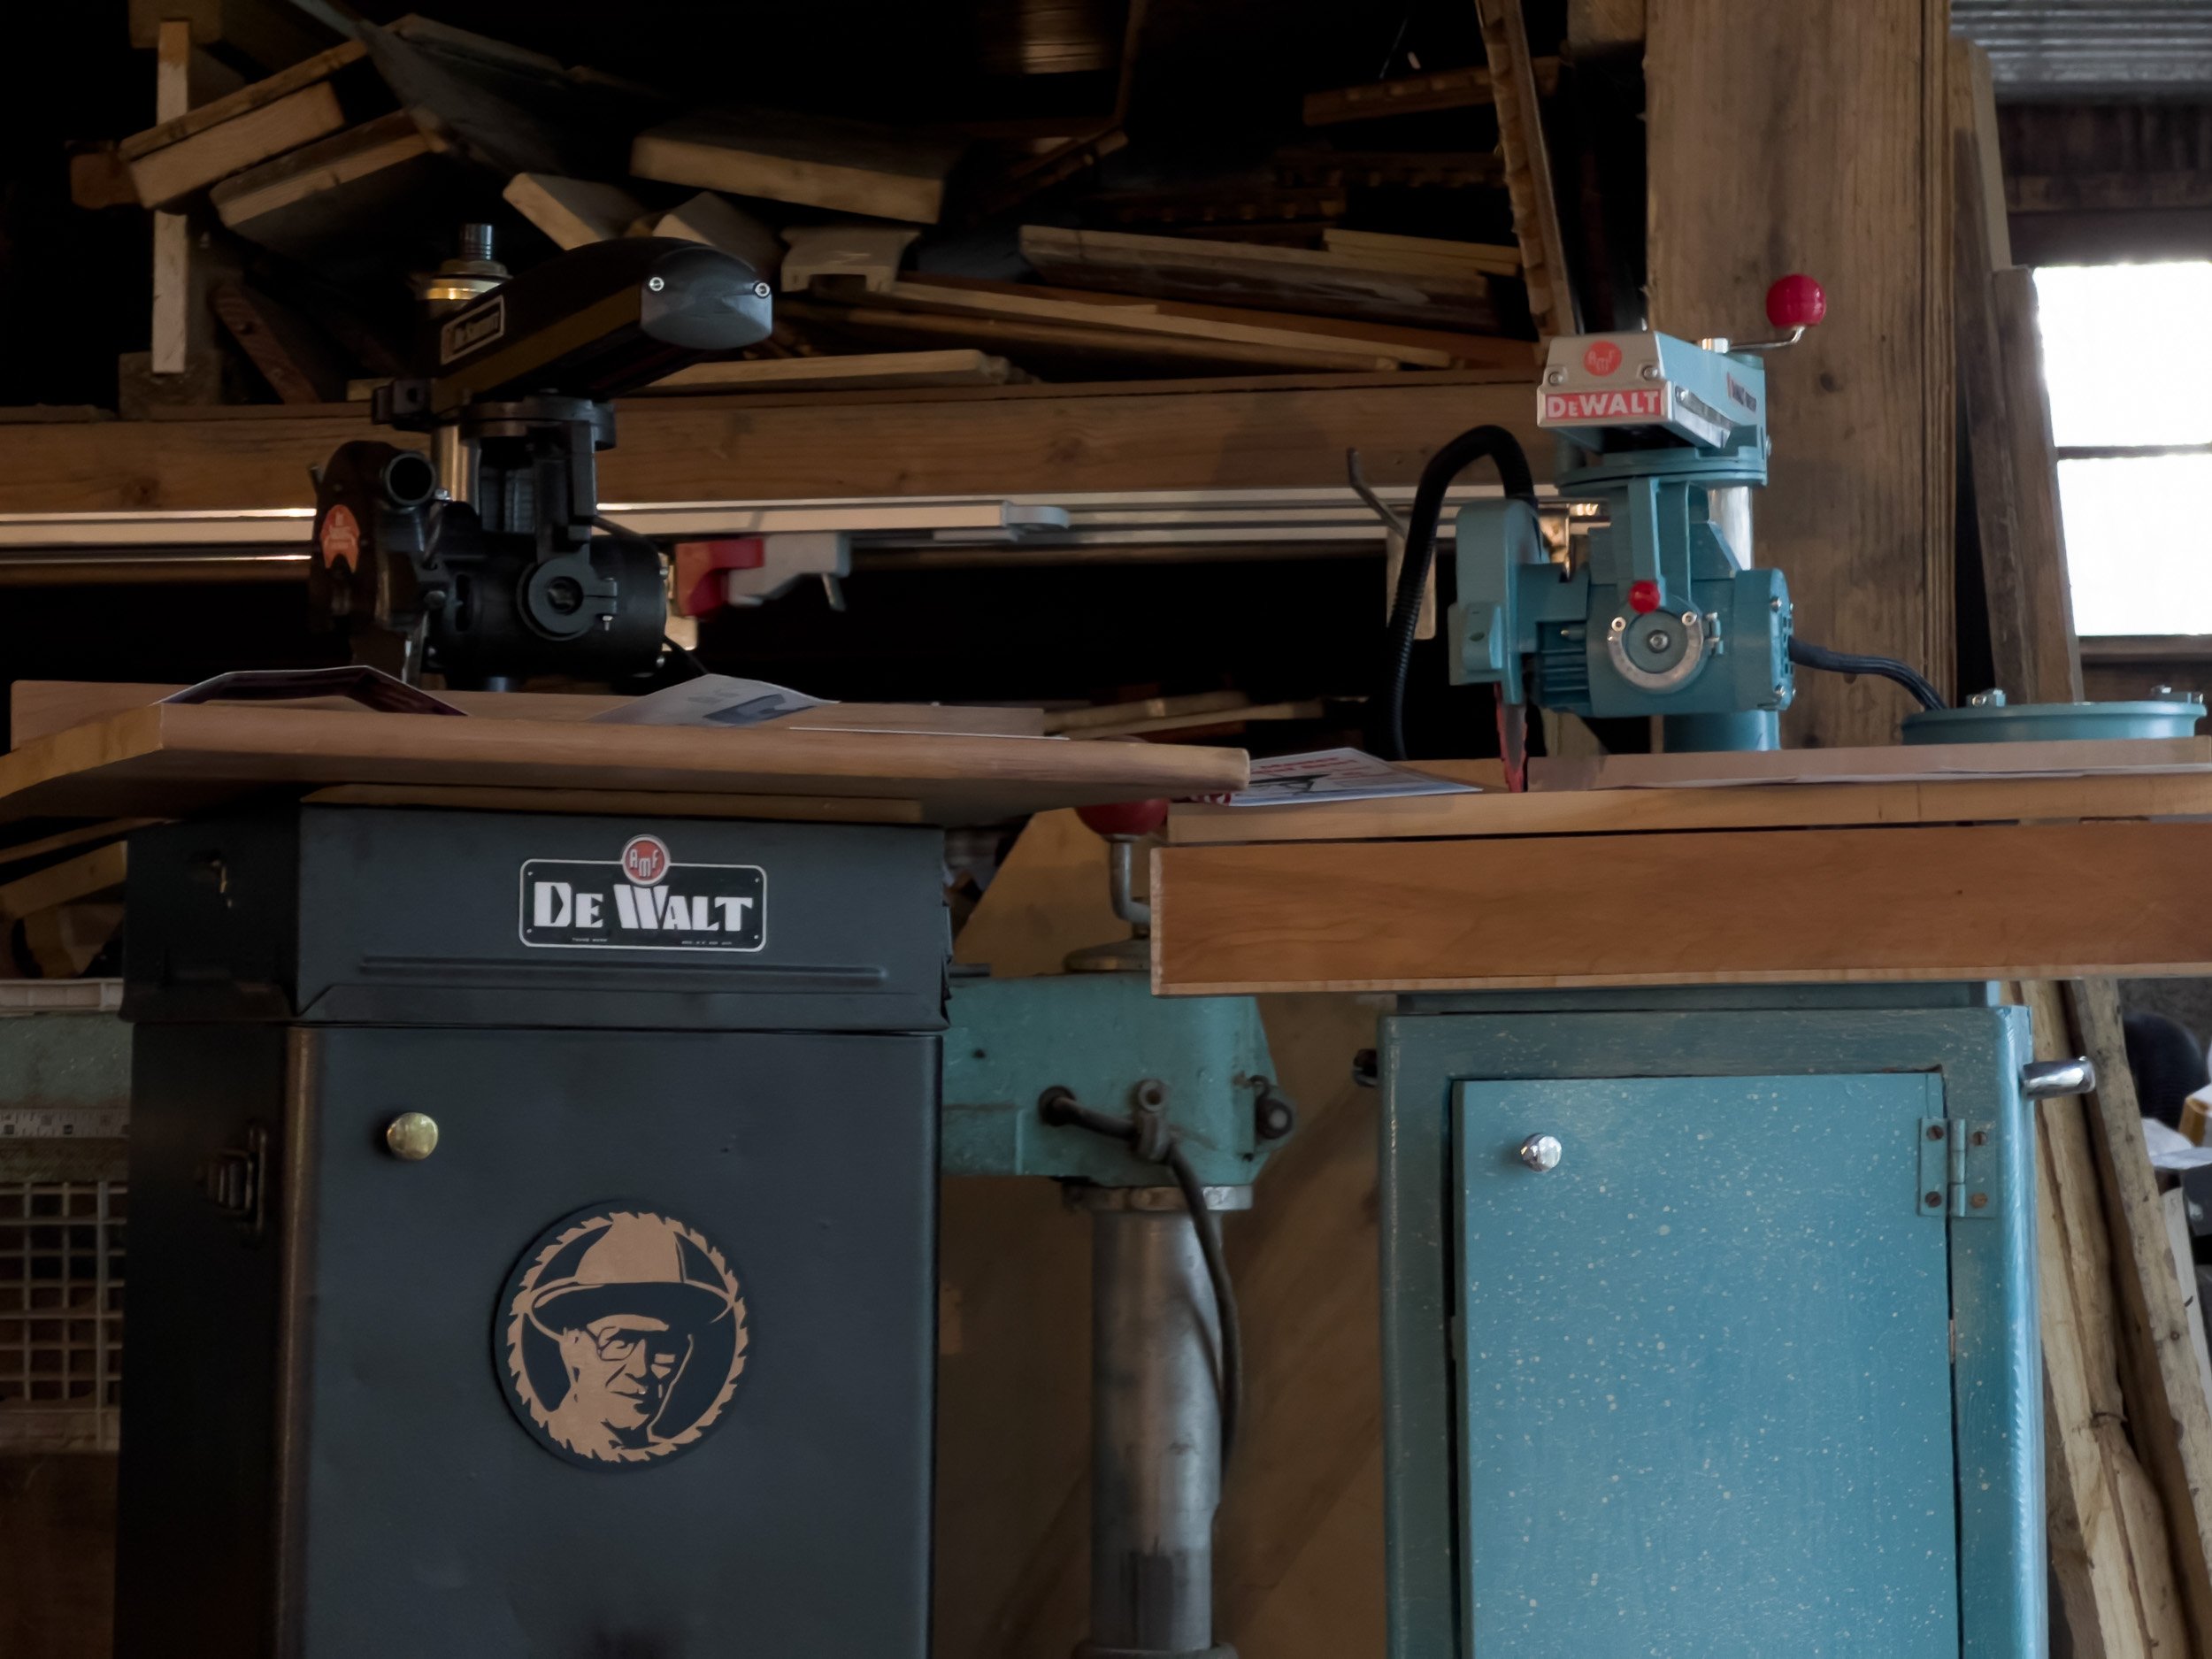
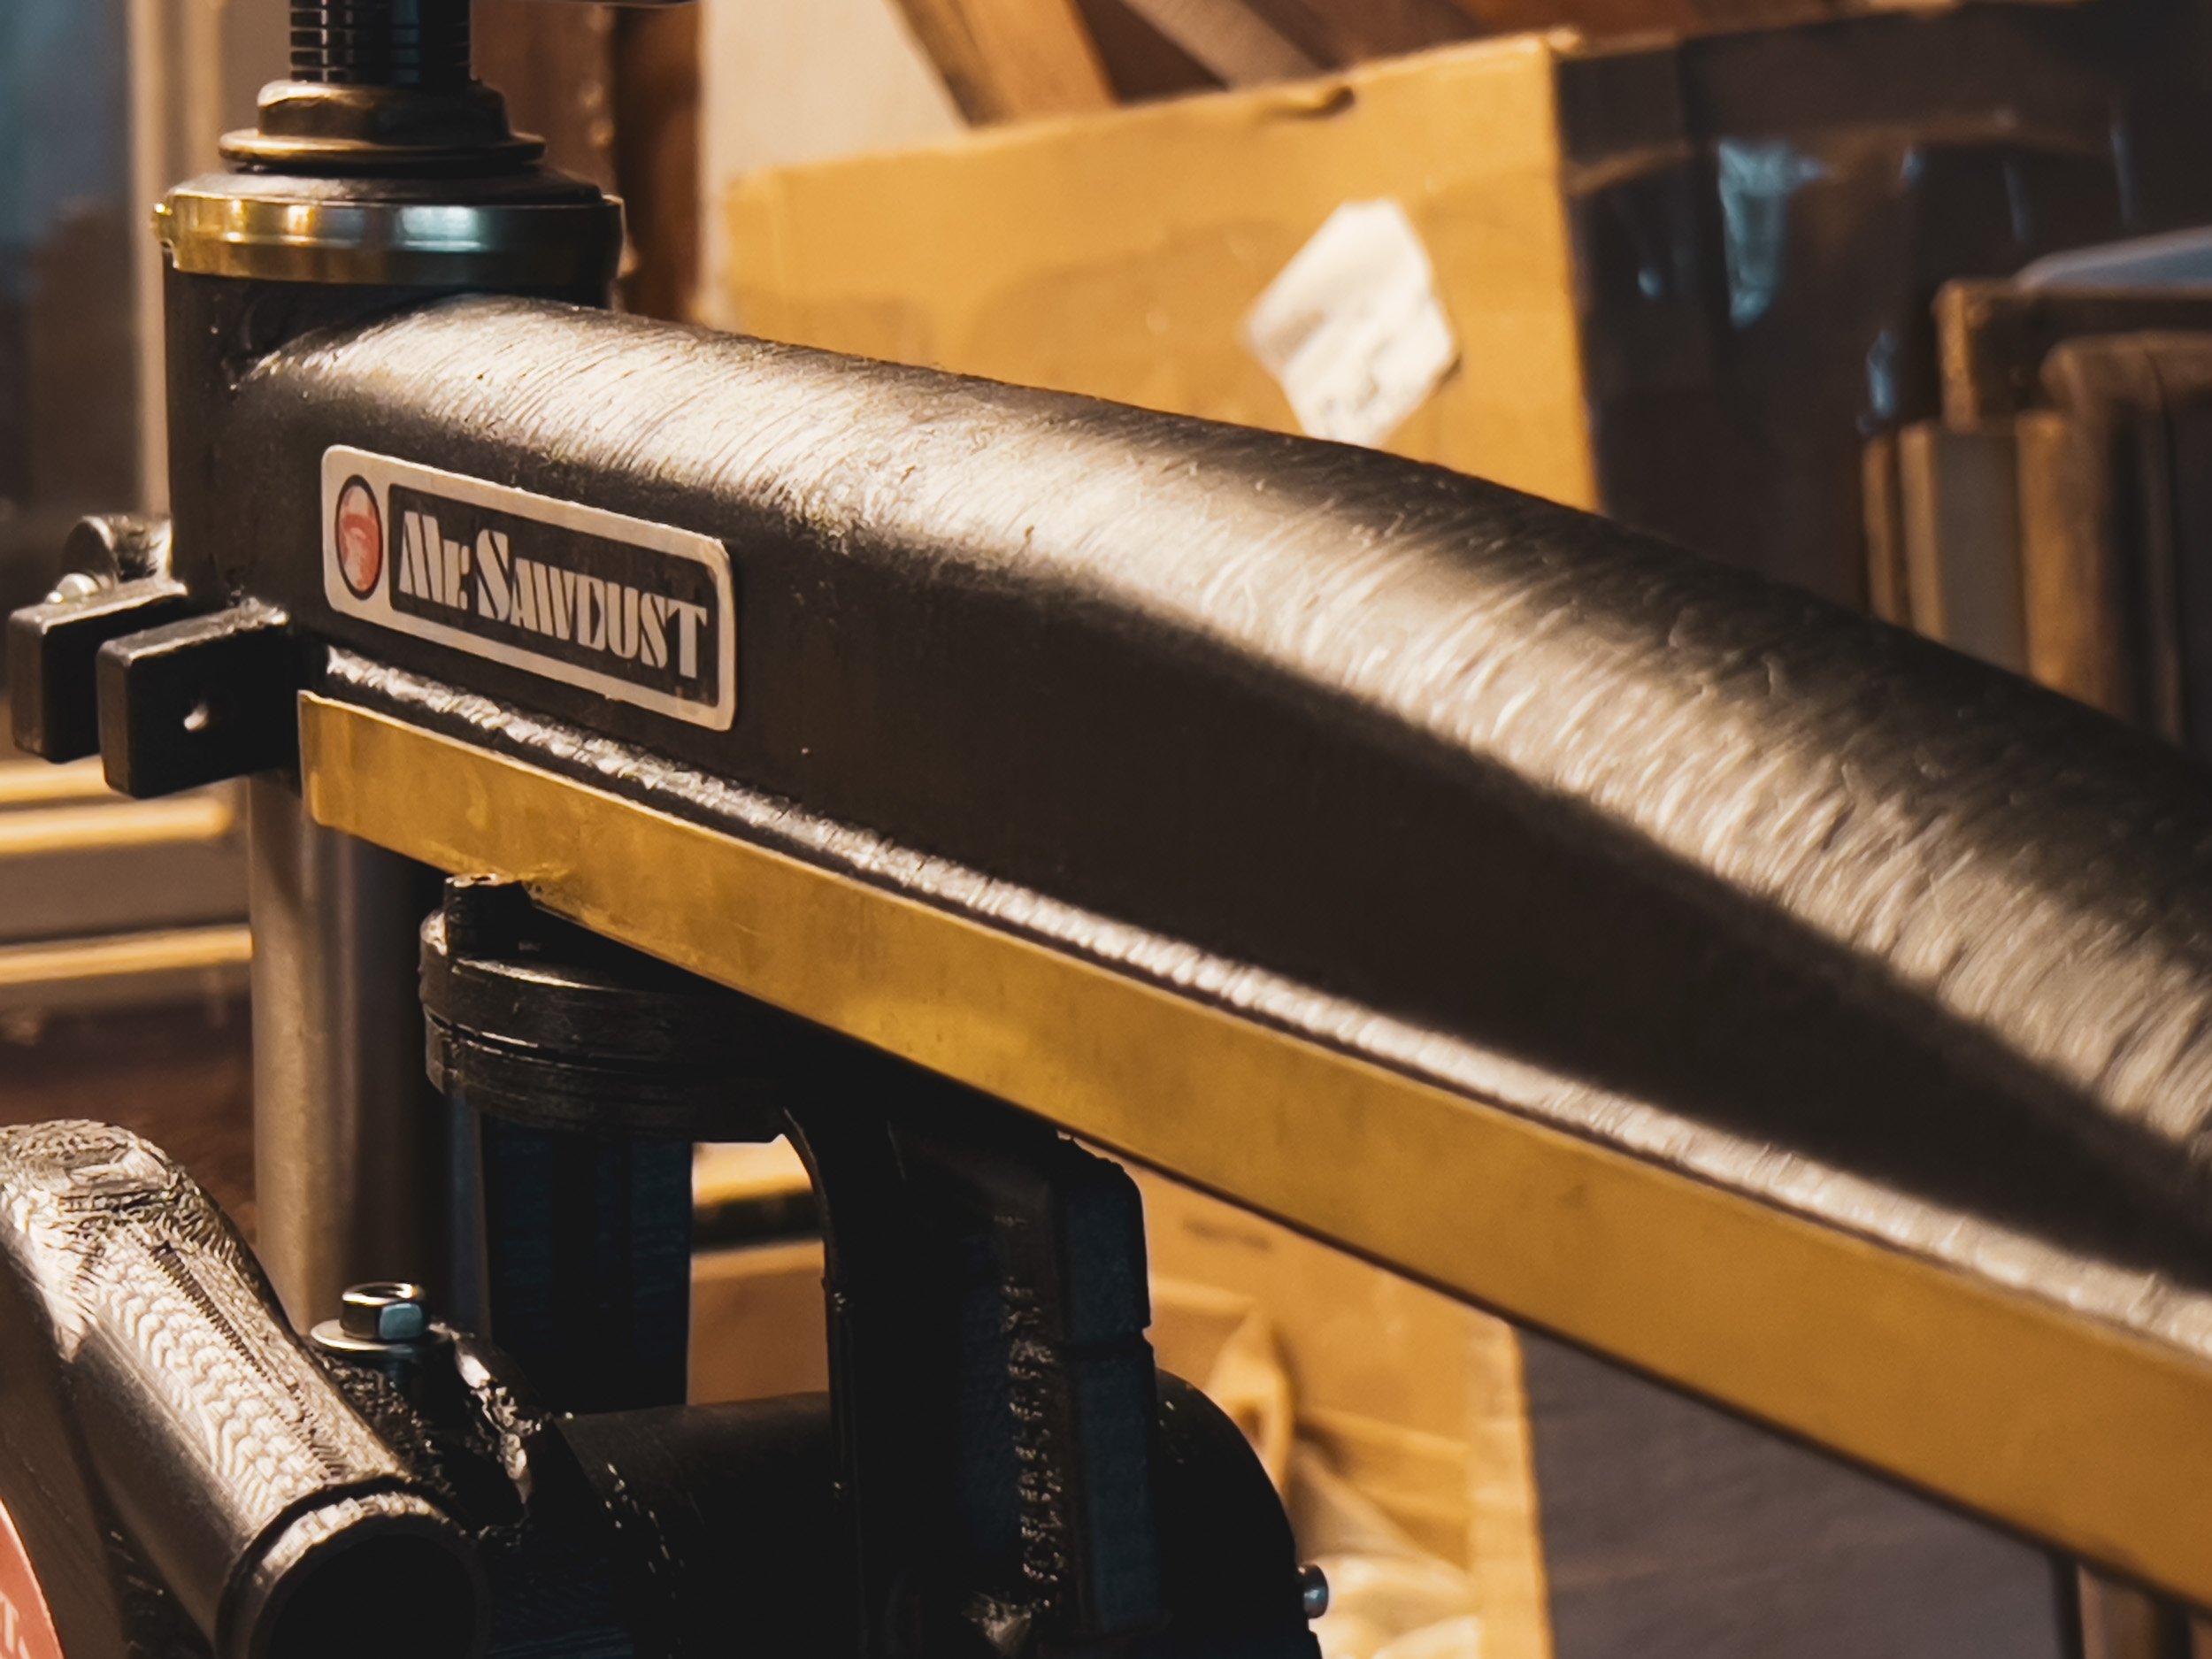
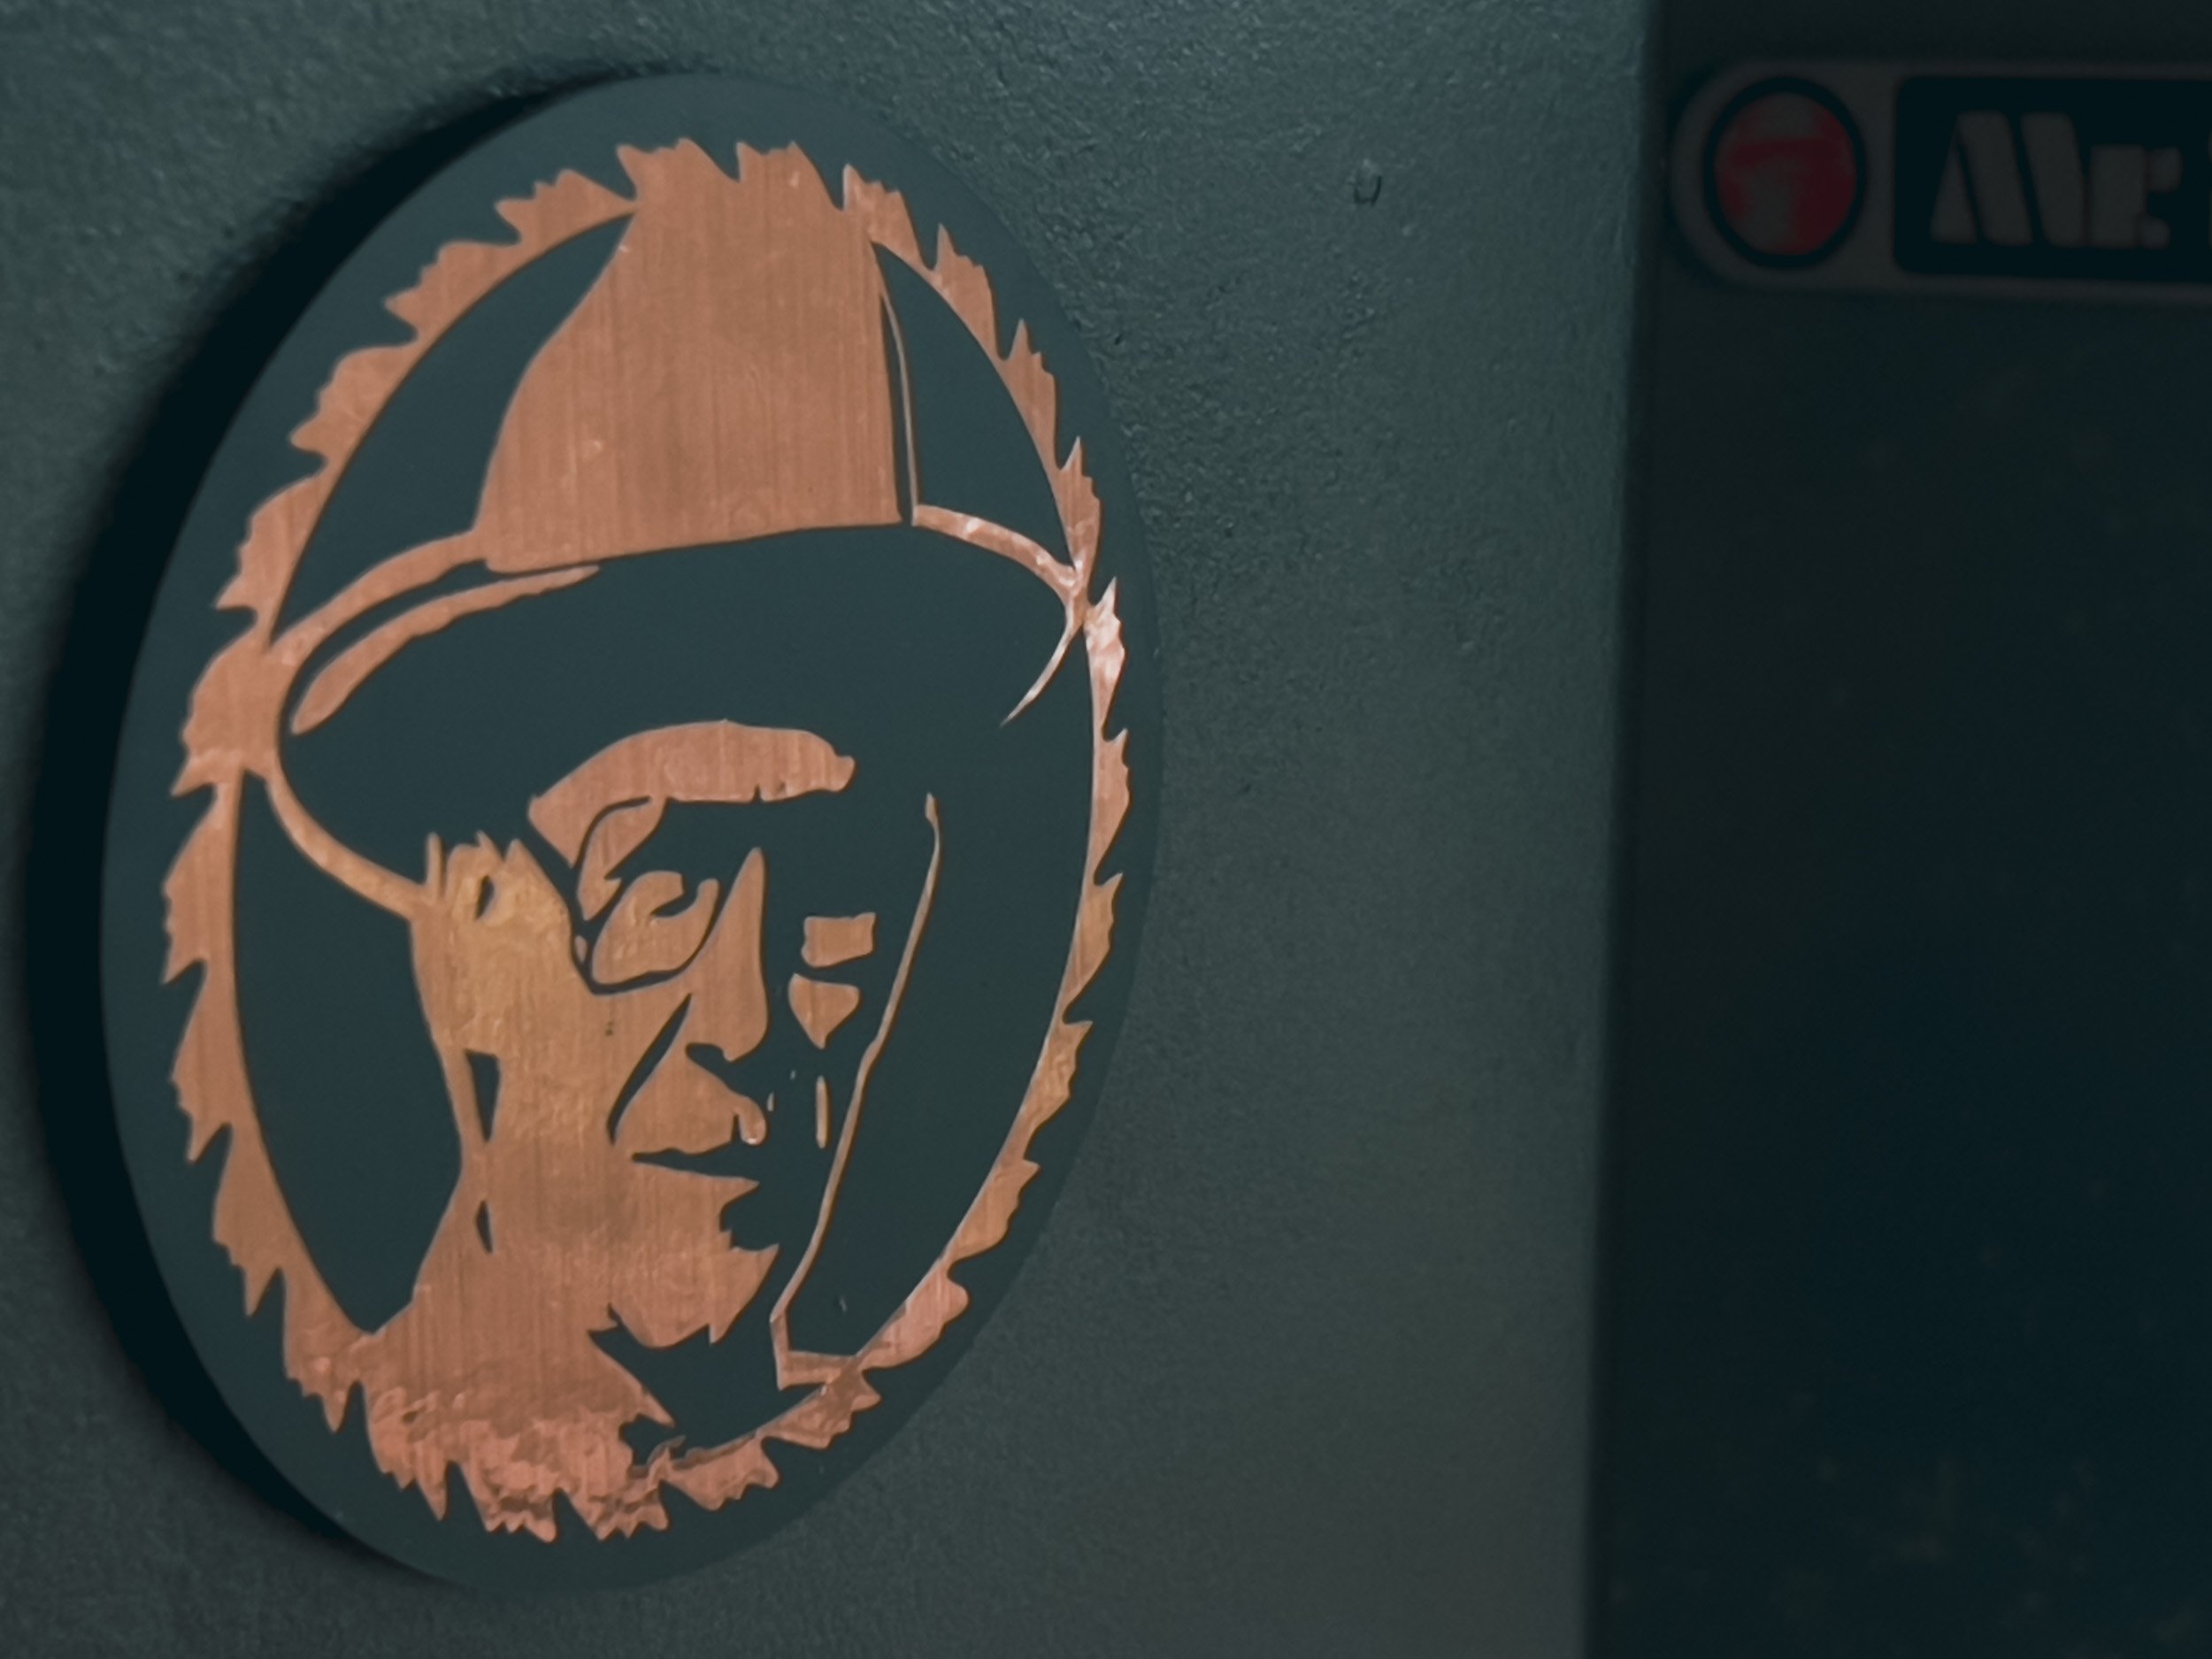
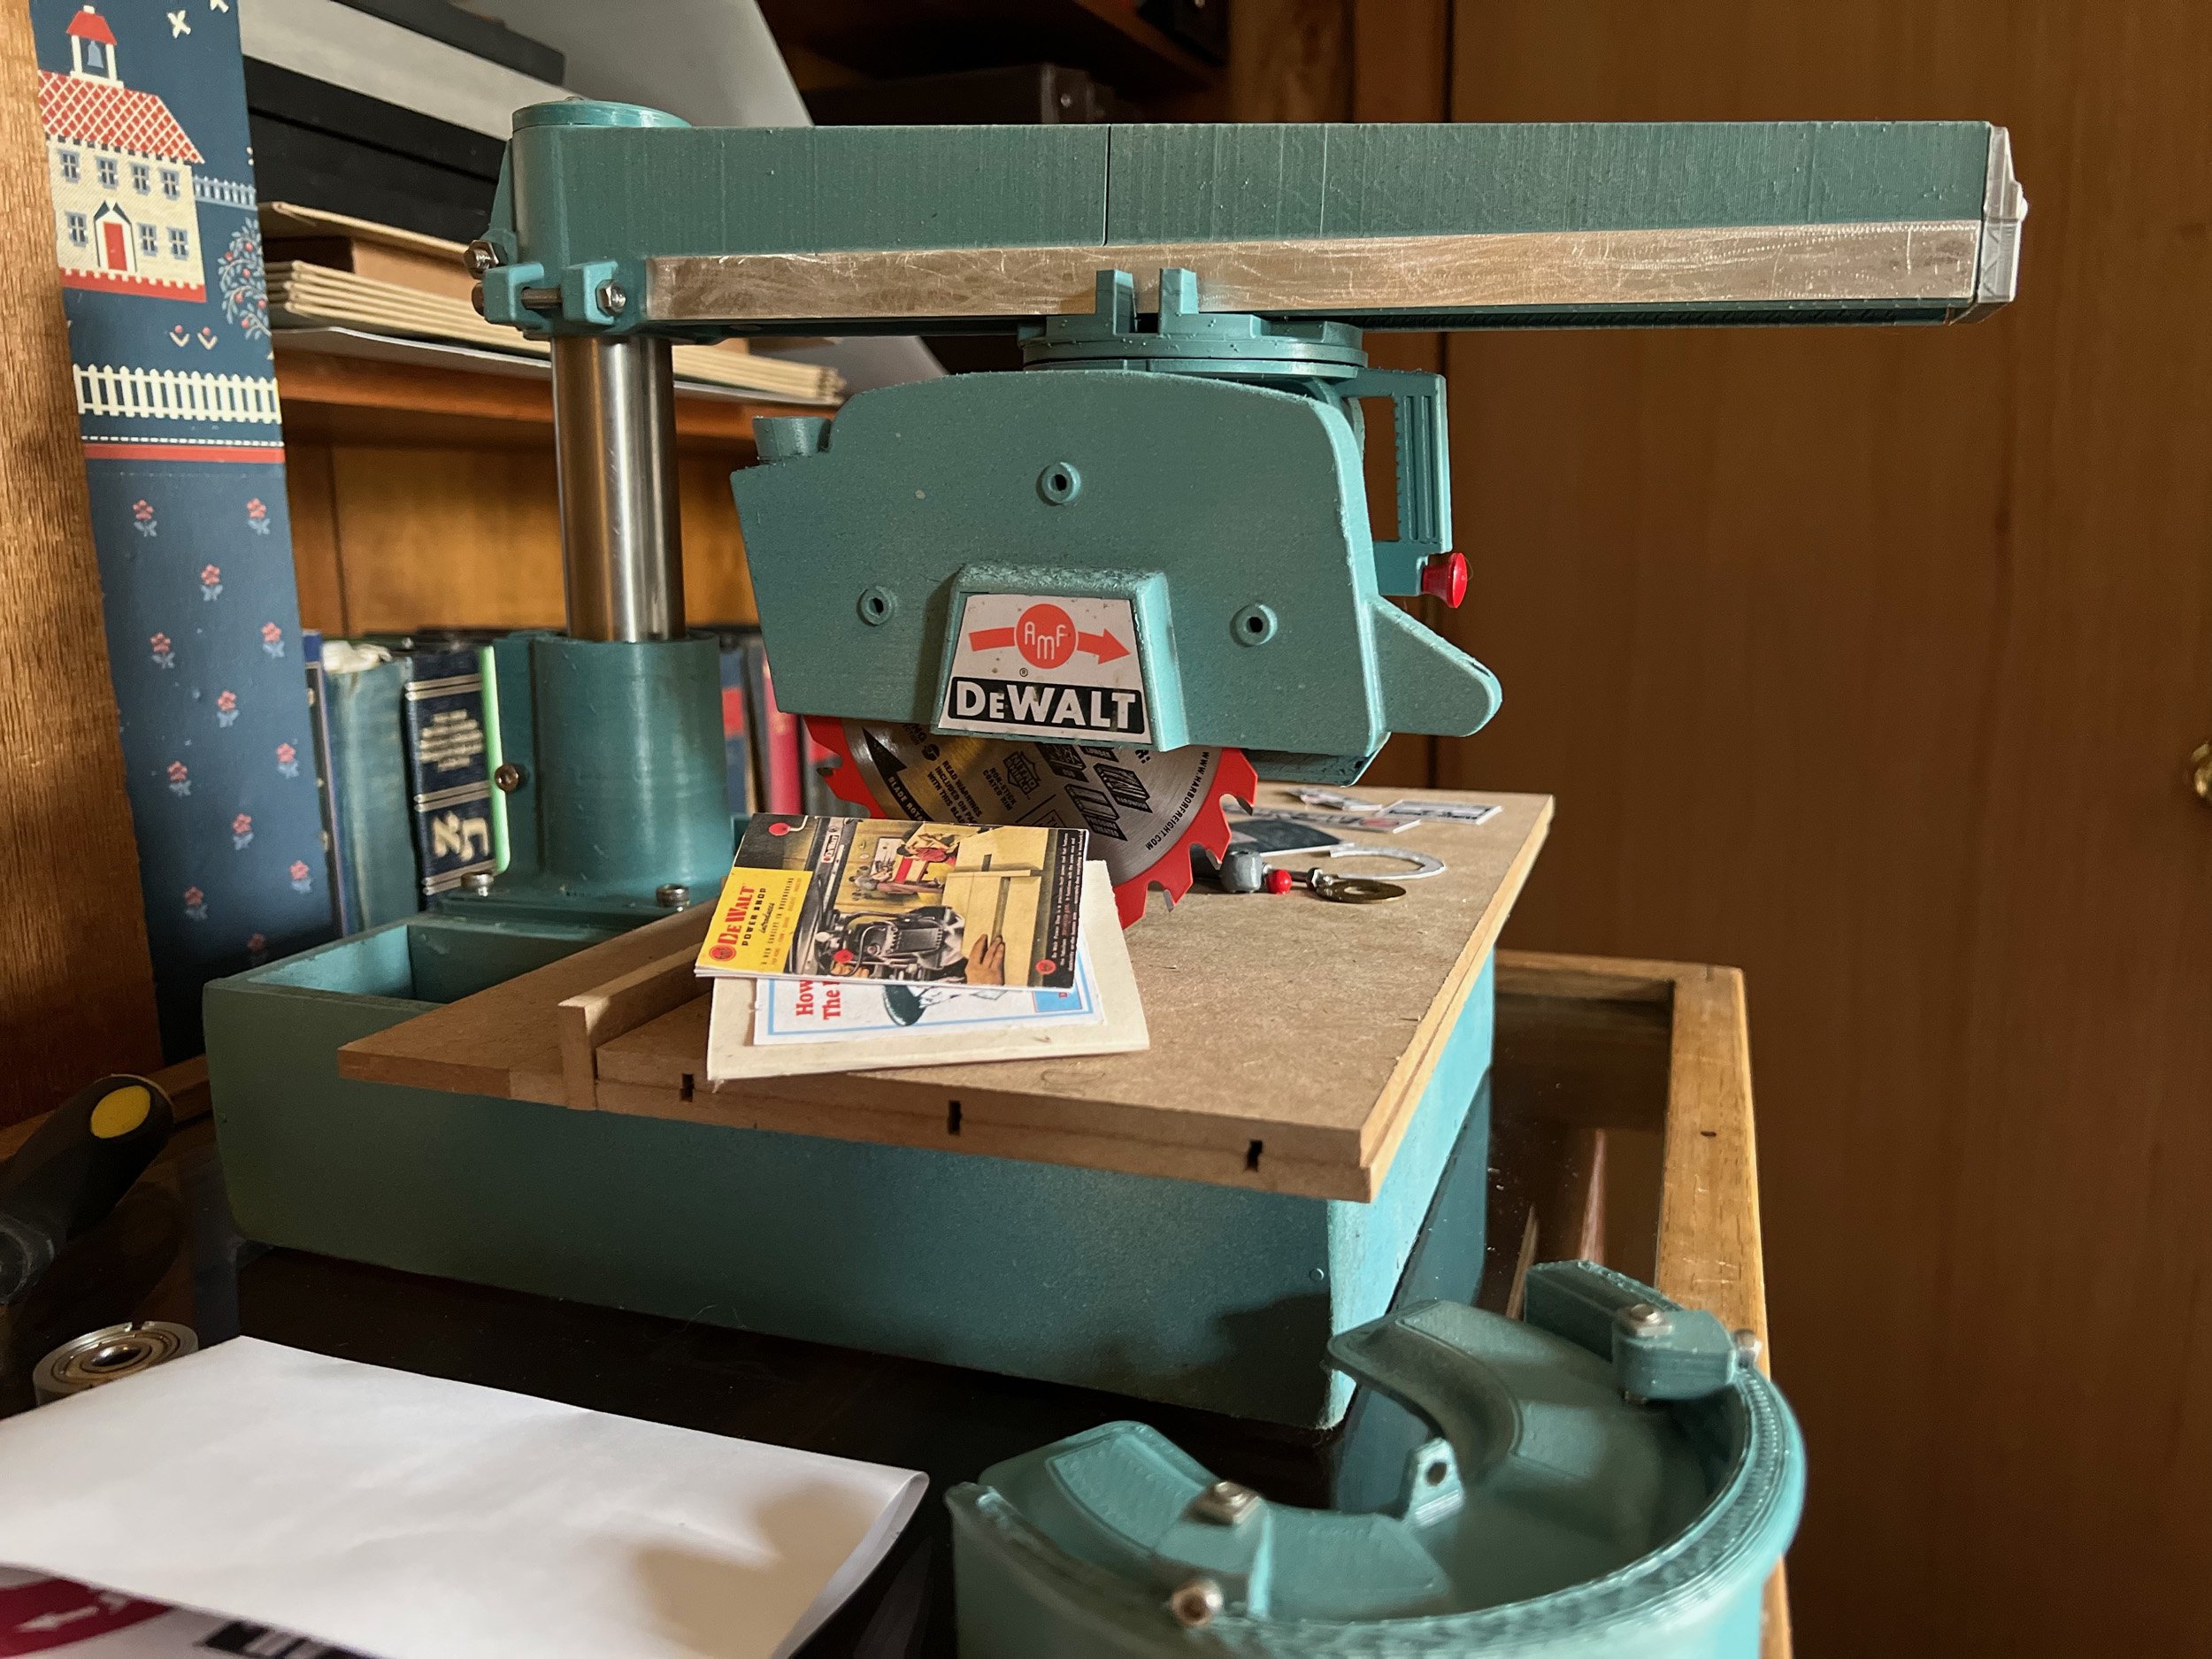
I made a handful of badges (a mix of originals, and my own Mr. Sawdust ones… because, why not?).
I’m always scanning every badge I can get my hands on. I pull them off all my saws to scan and take measurements, etc. I recreate them as I go in vector, but in this case, I just used the dirty scans.
To keep it simple, I just printed them to-scale, laminated, then cut them on a Cricut. To do this properly, you’d want to do some acid-etching, but having done that enough to know what’s involved, I decided not to start another-something that would take a week to get right.

Metal
As much as I’d love to own a fiber/galvo laser (the only real way to laser etch metals), I managed to etch an arm-scale using my CO2. Technically this should not even work, but I experimented myself into finding a weird trick that gave me something close enough.
I haven’t gotten to doing the same for the little 925 bevel scale just yet.
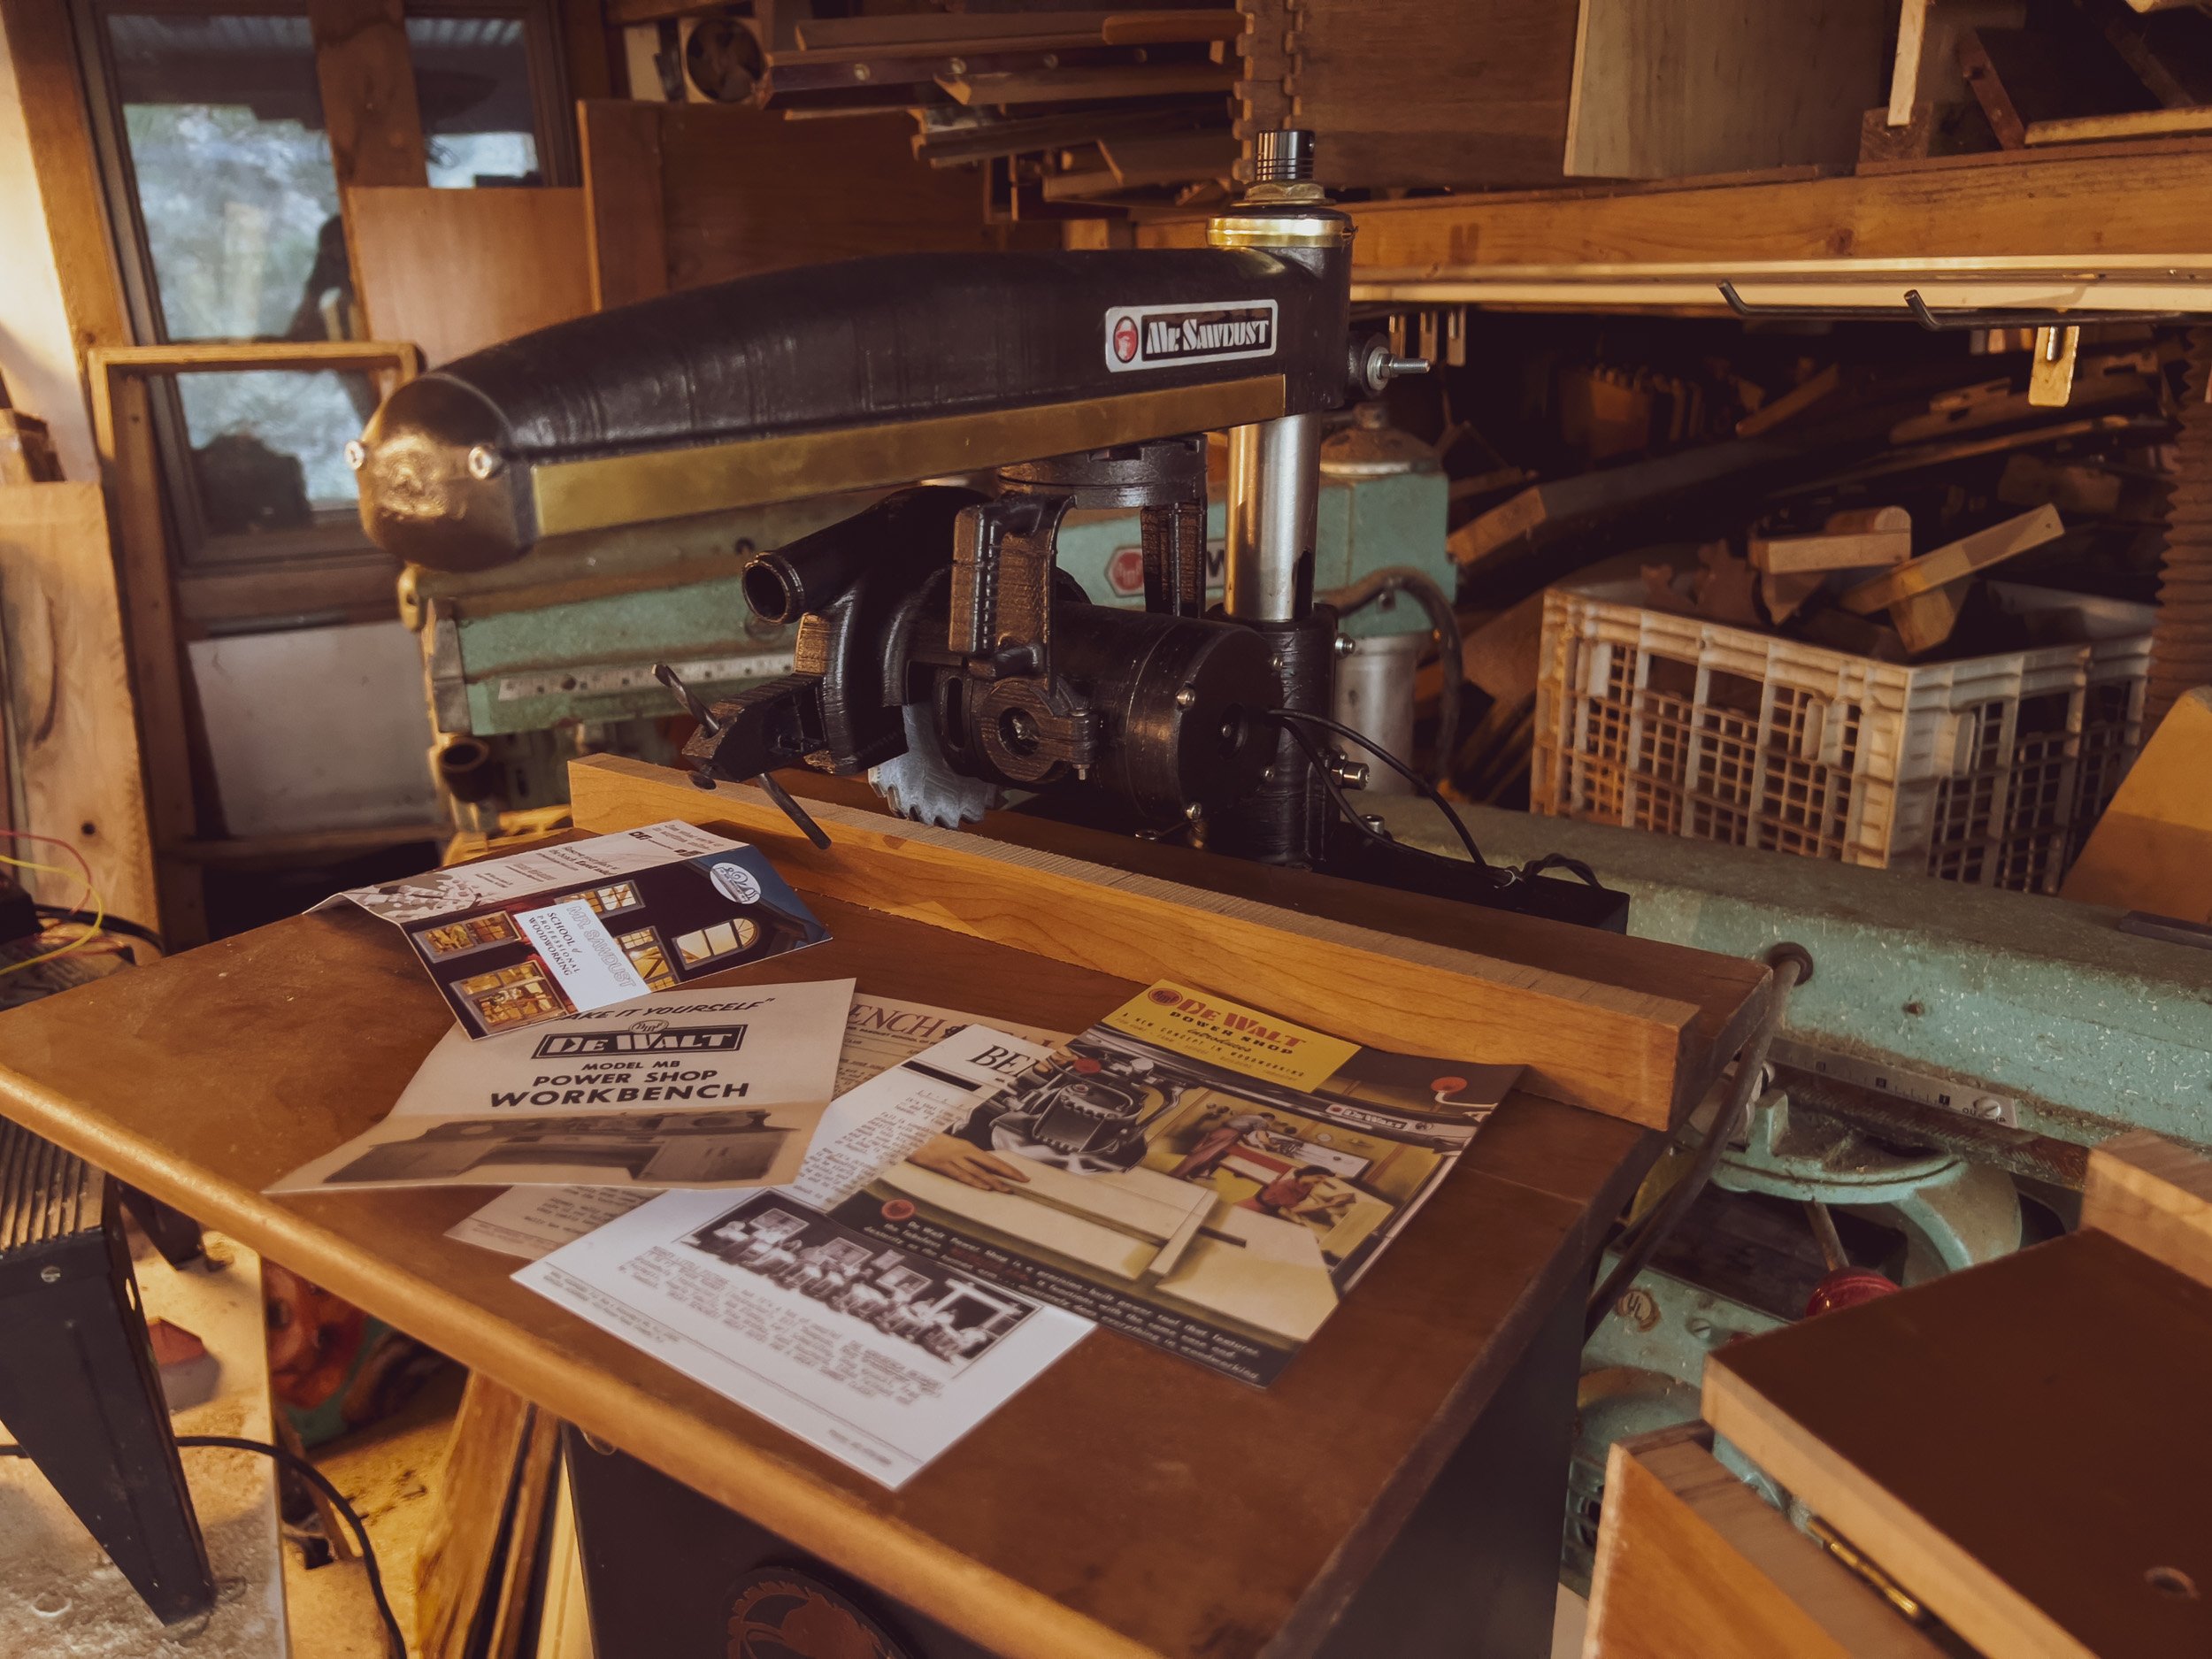
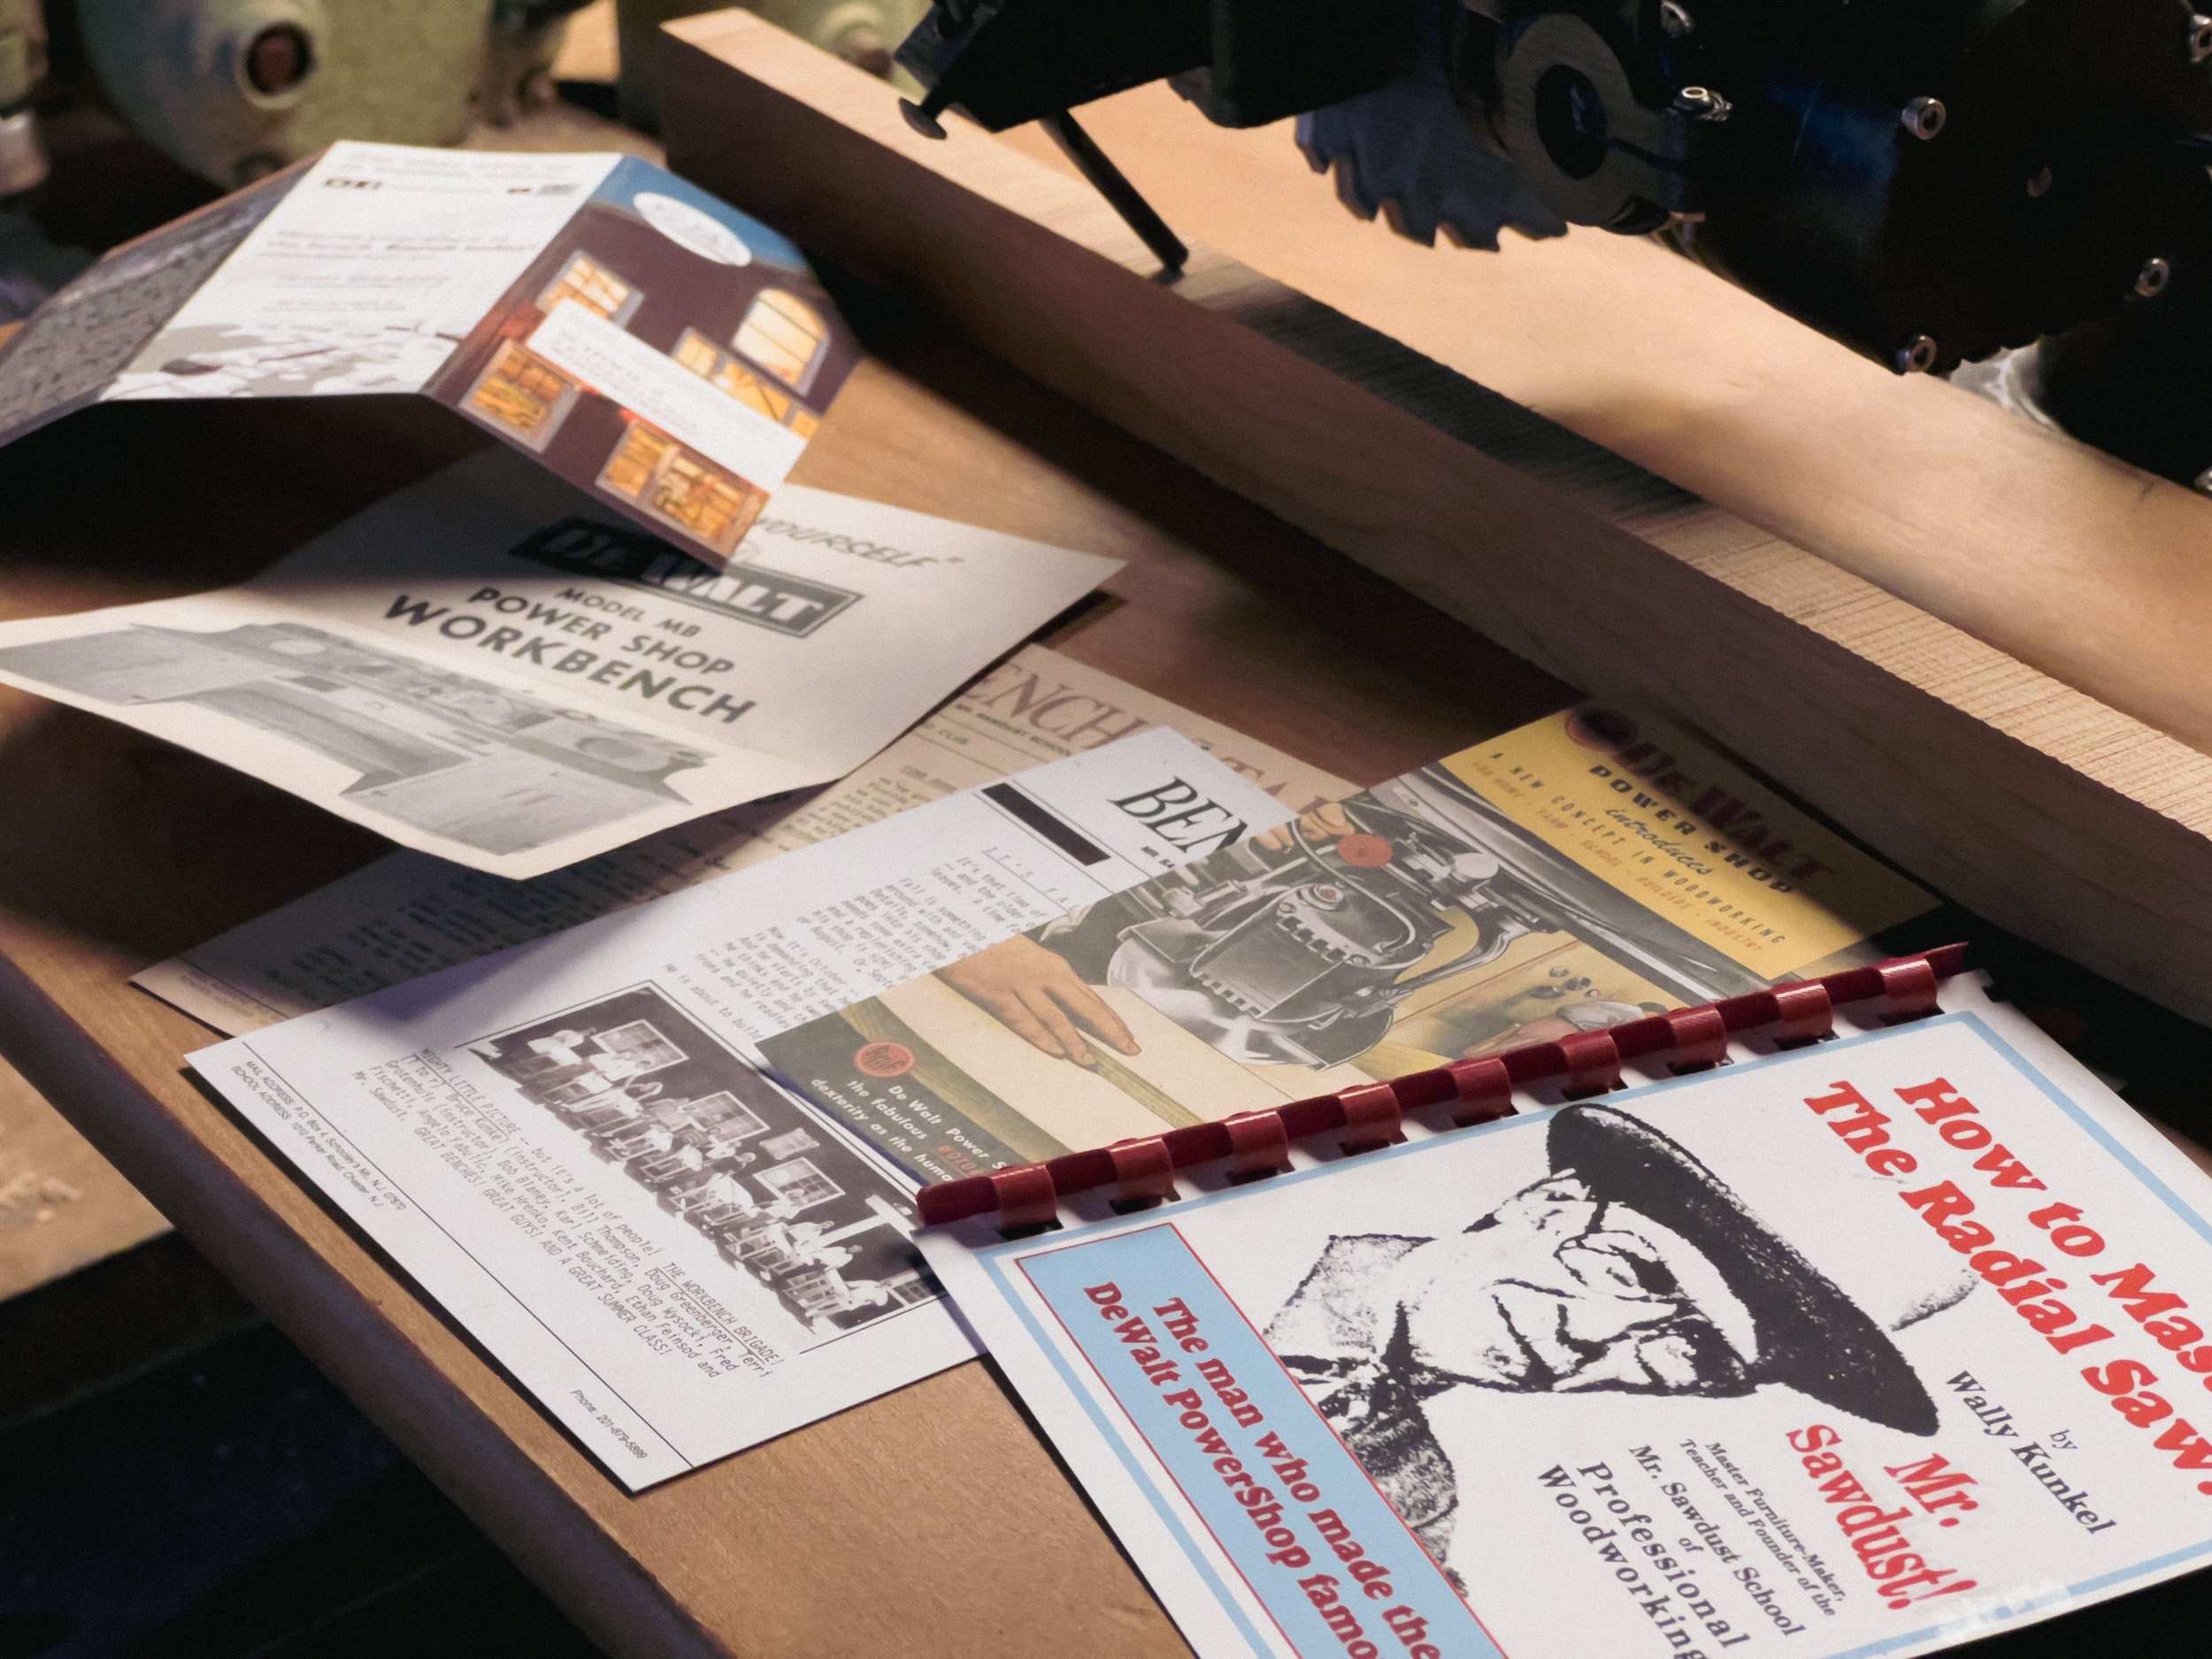
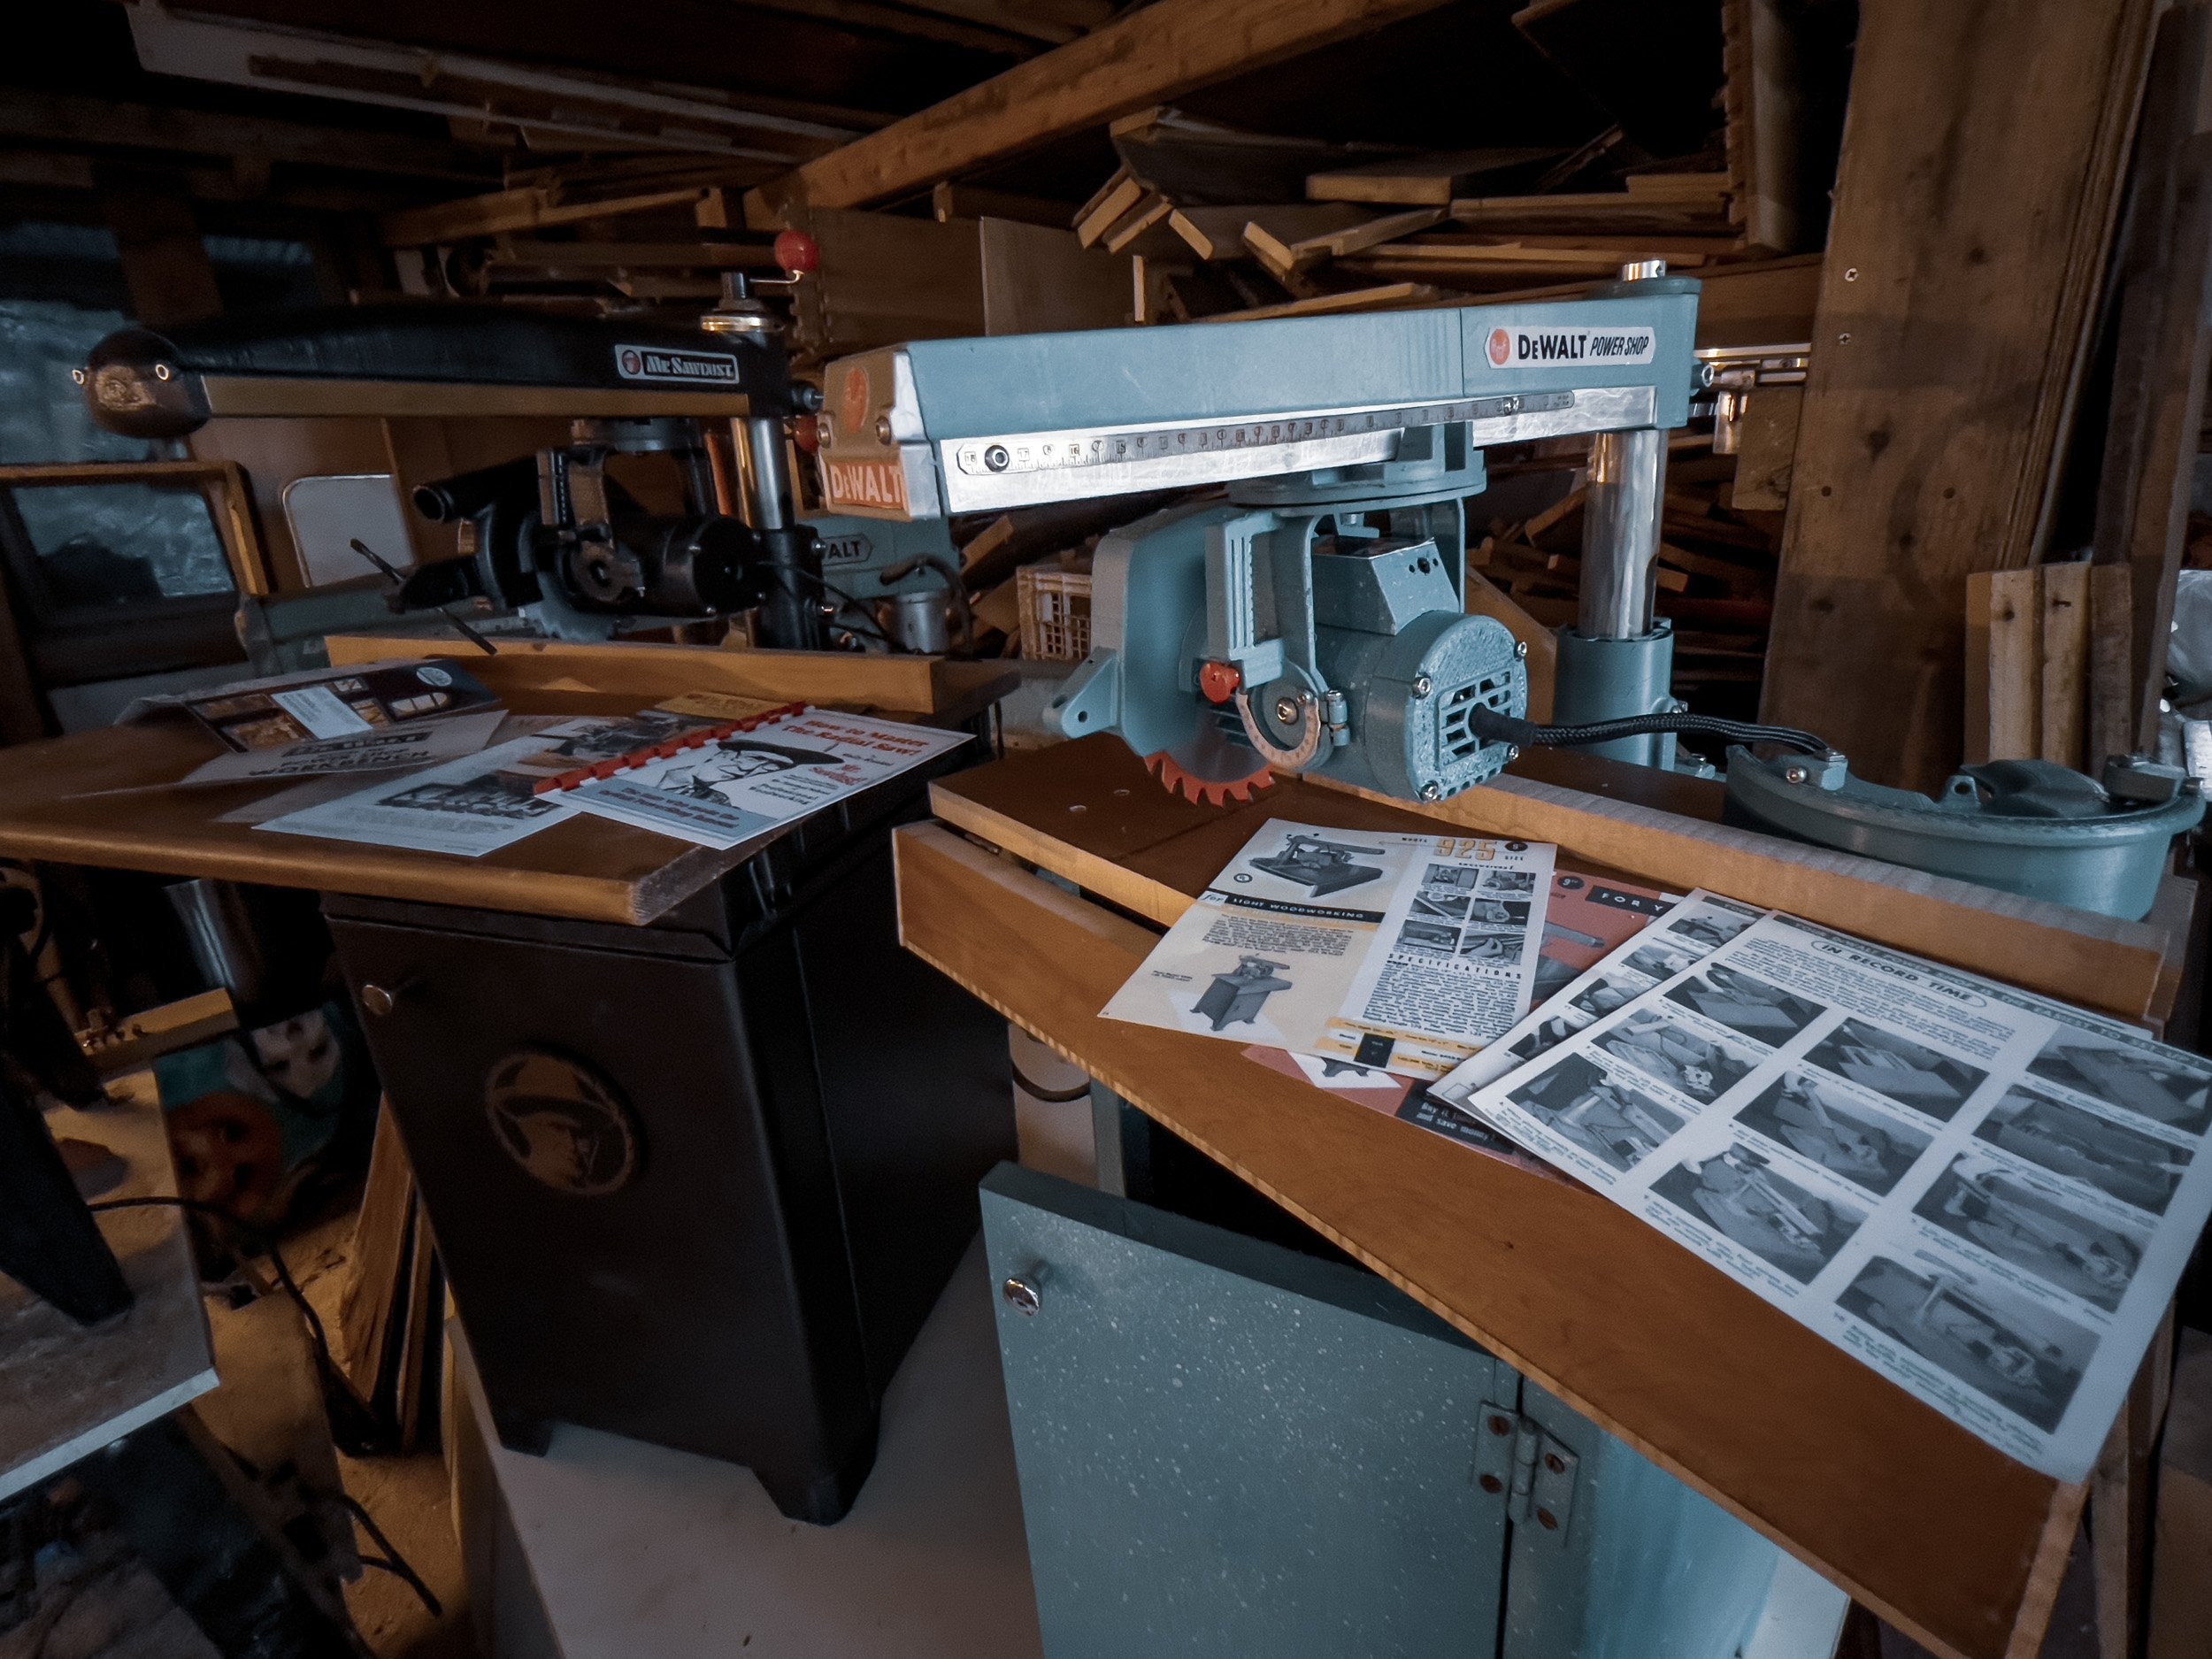
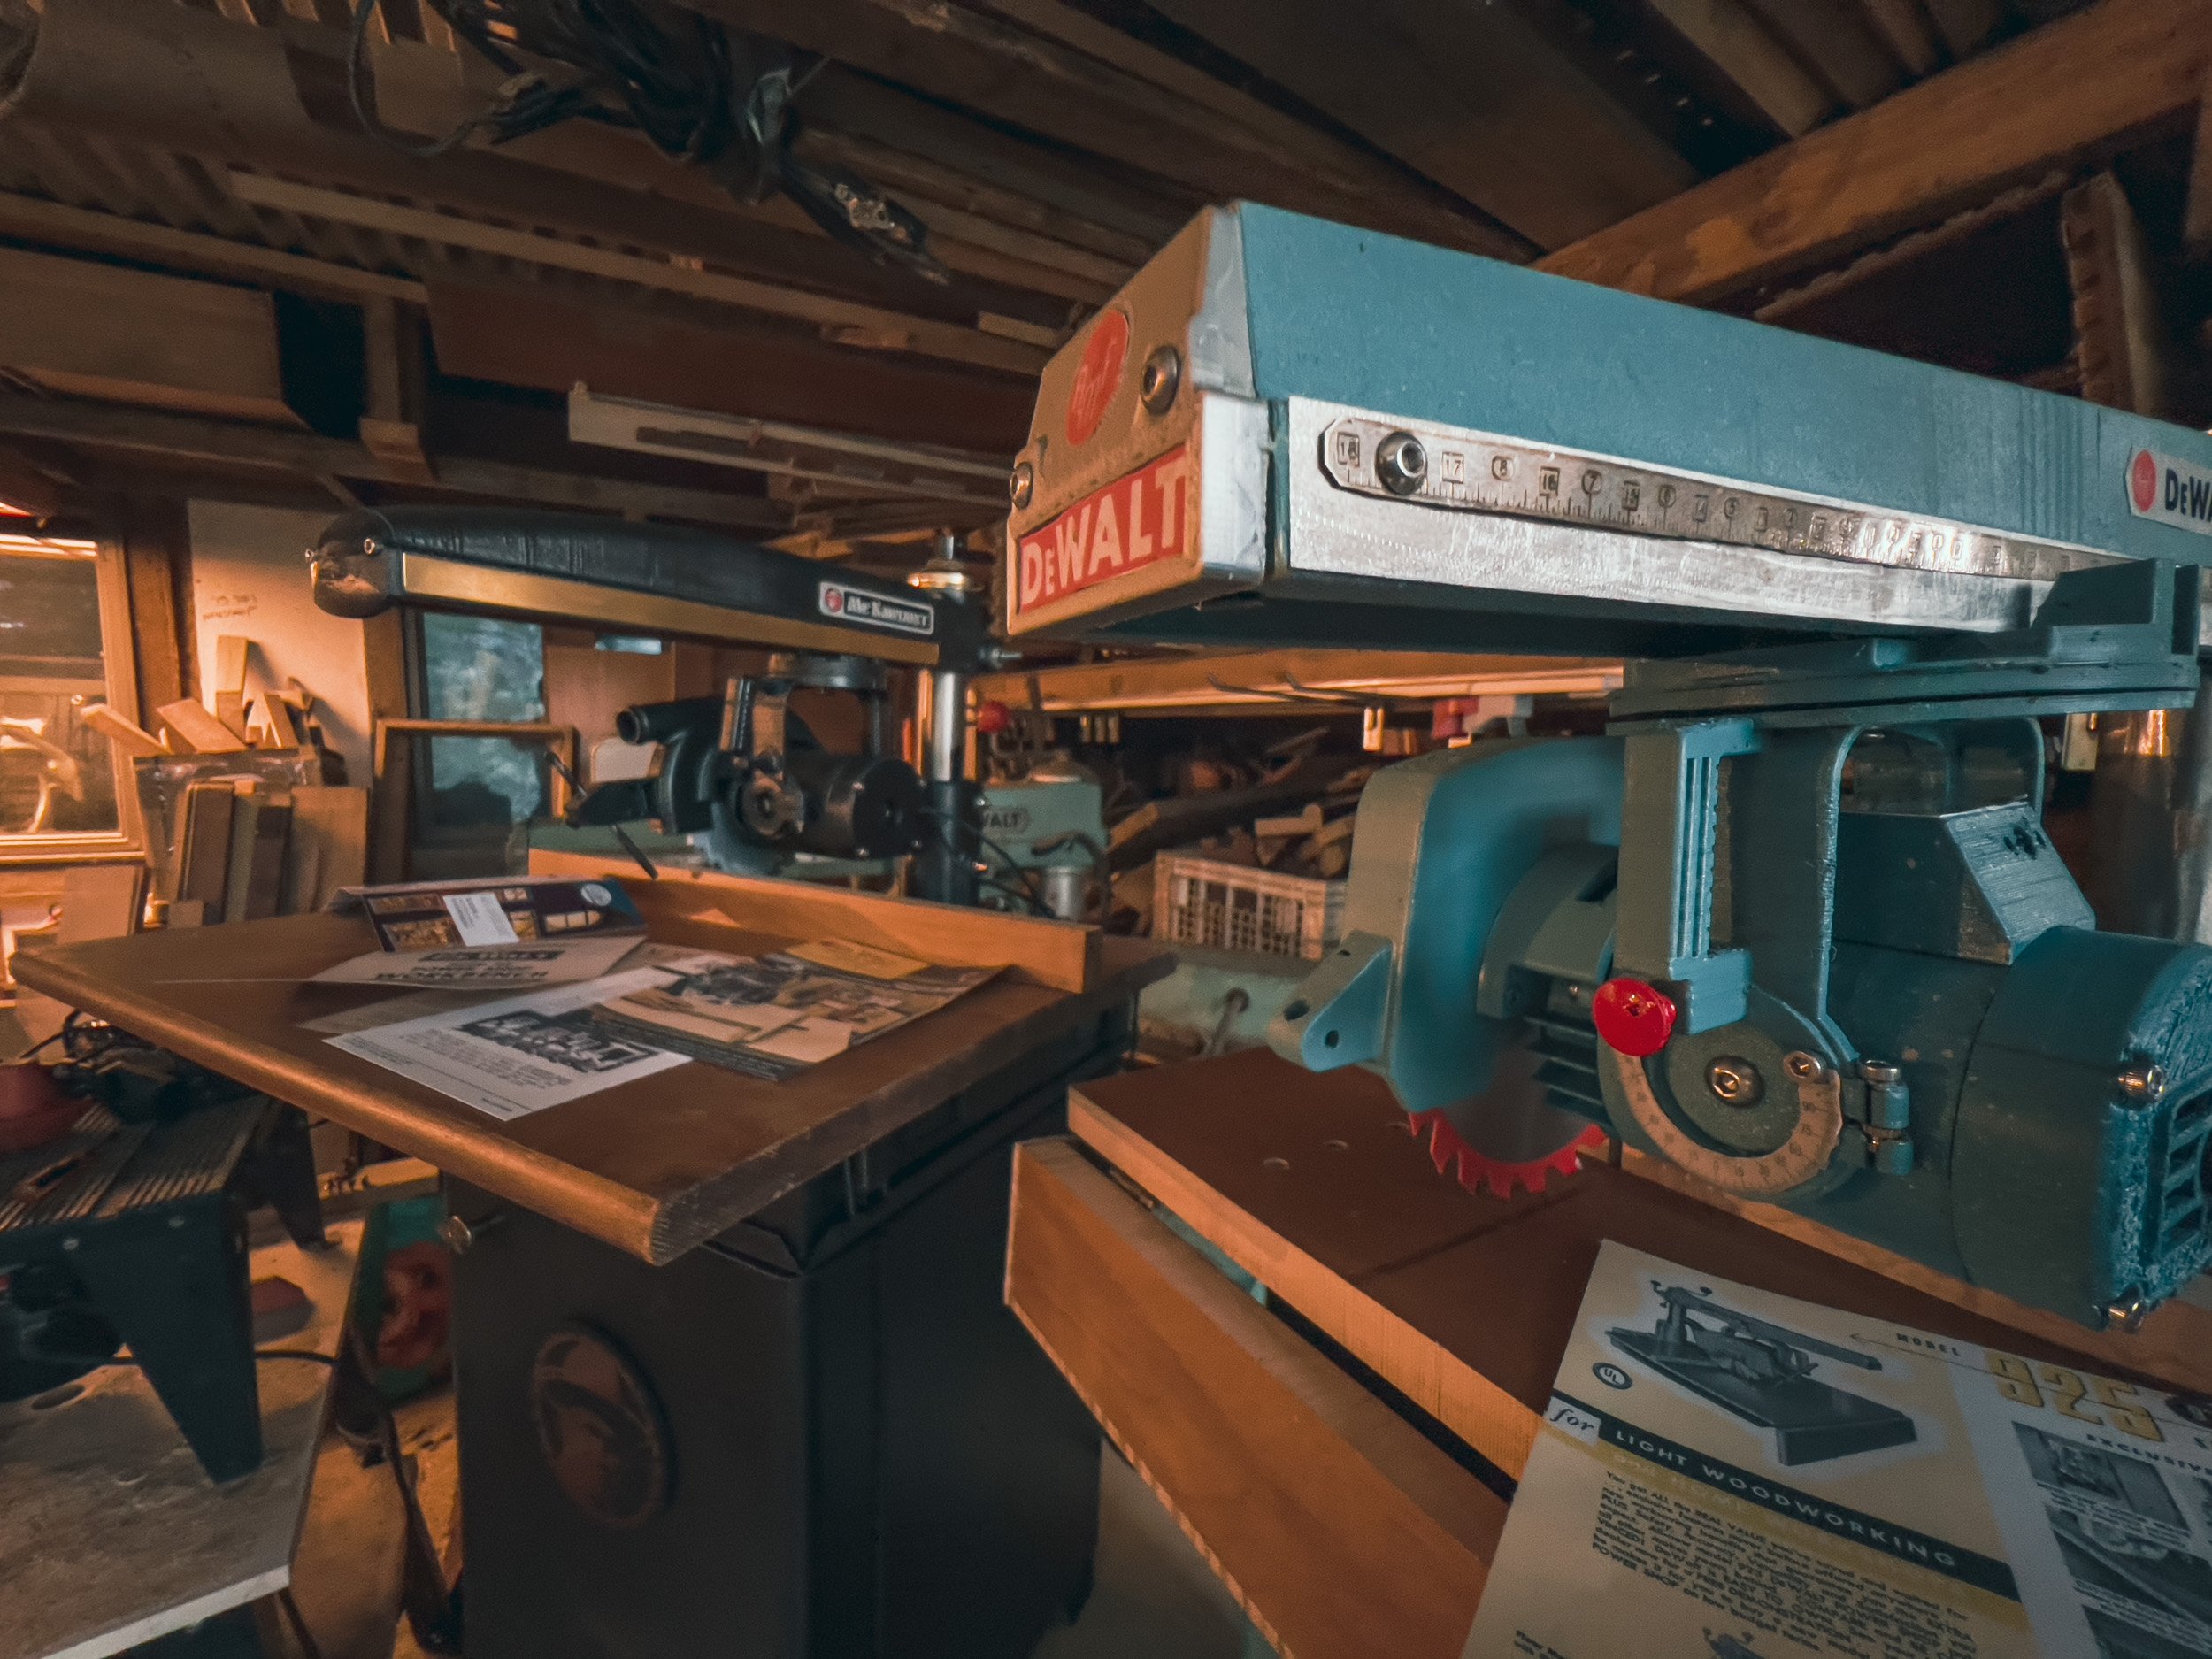
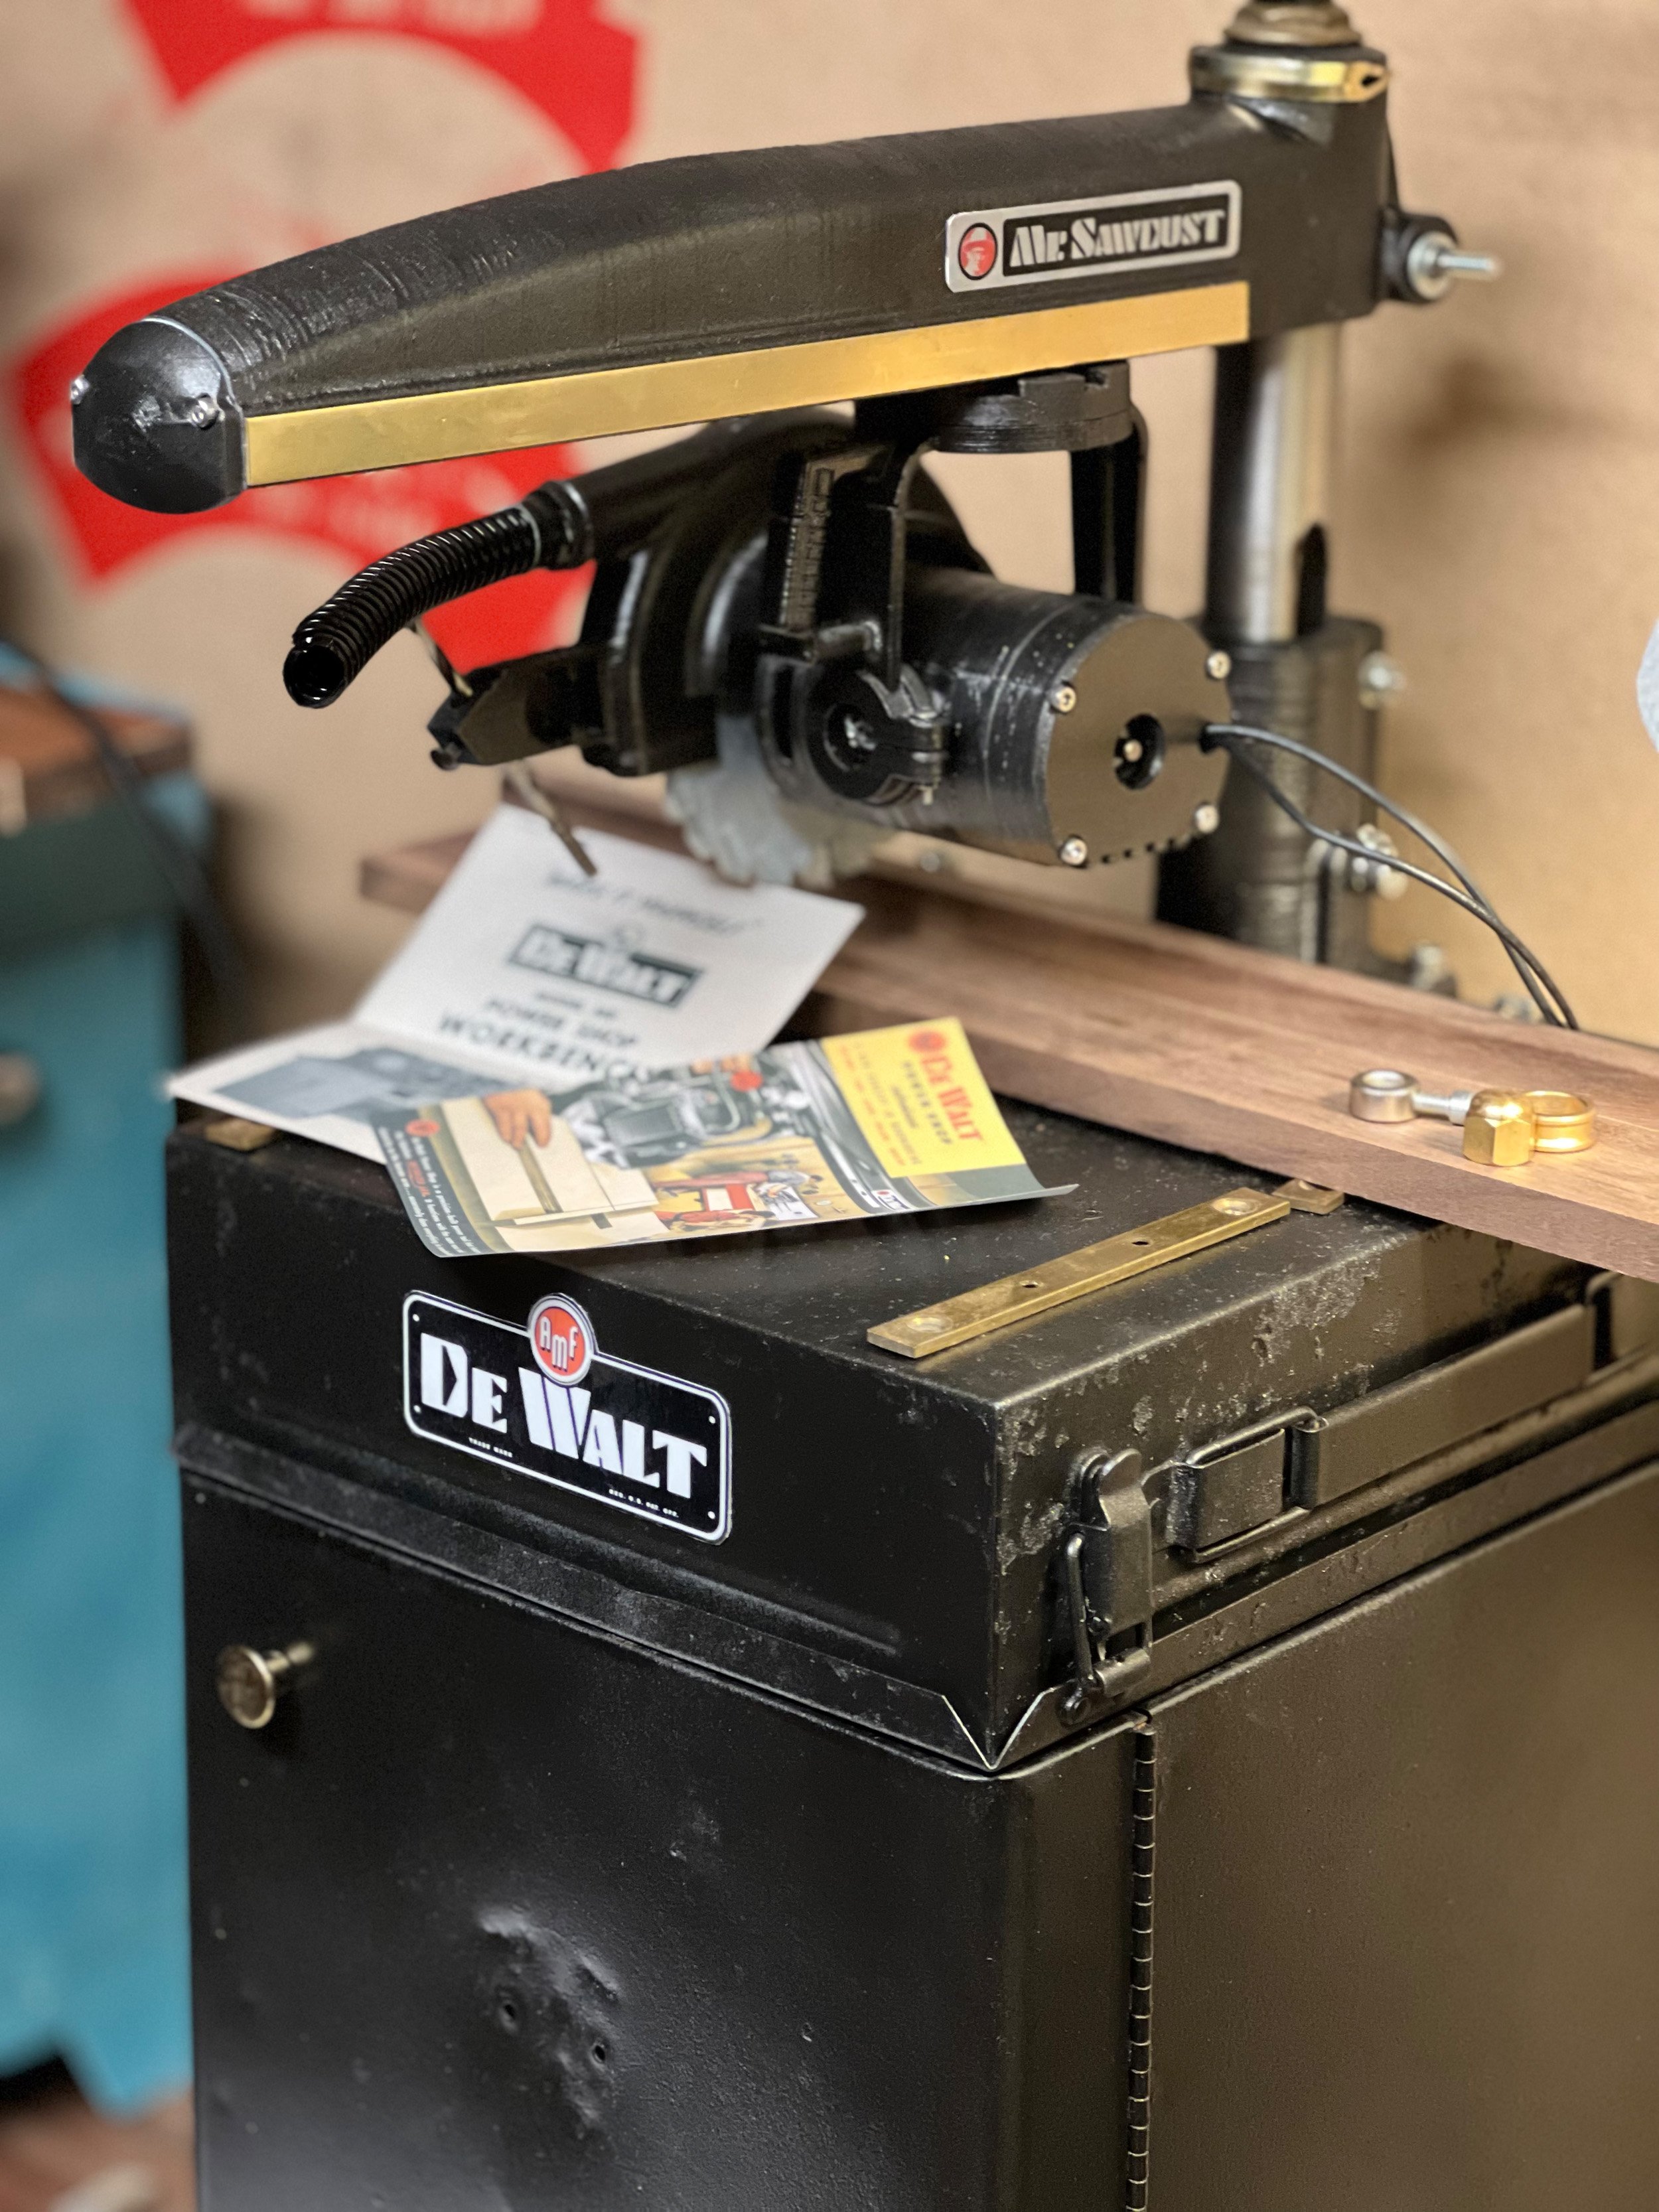
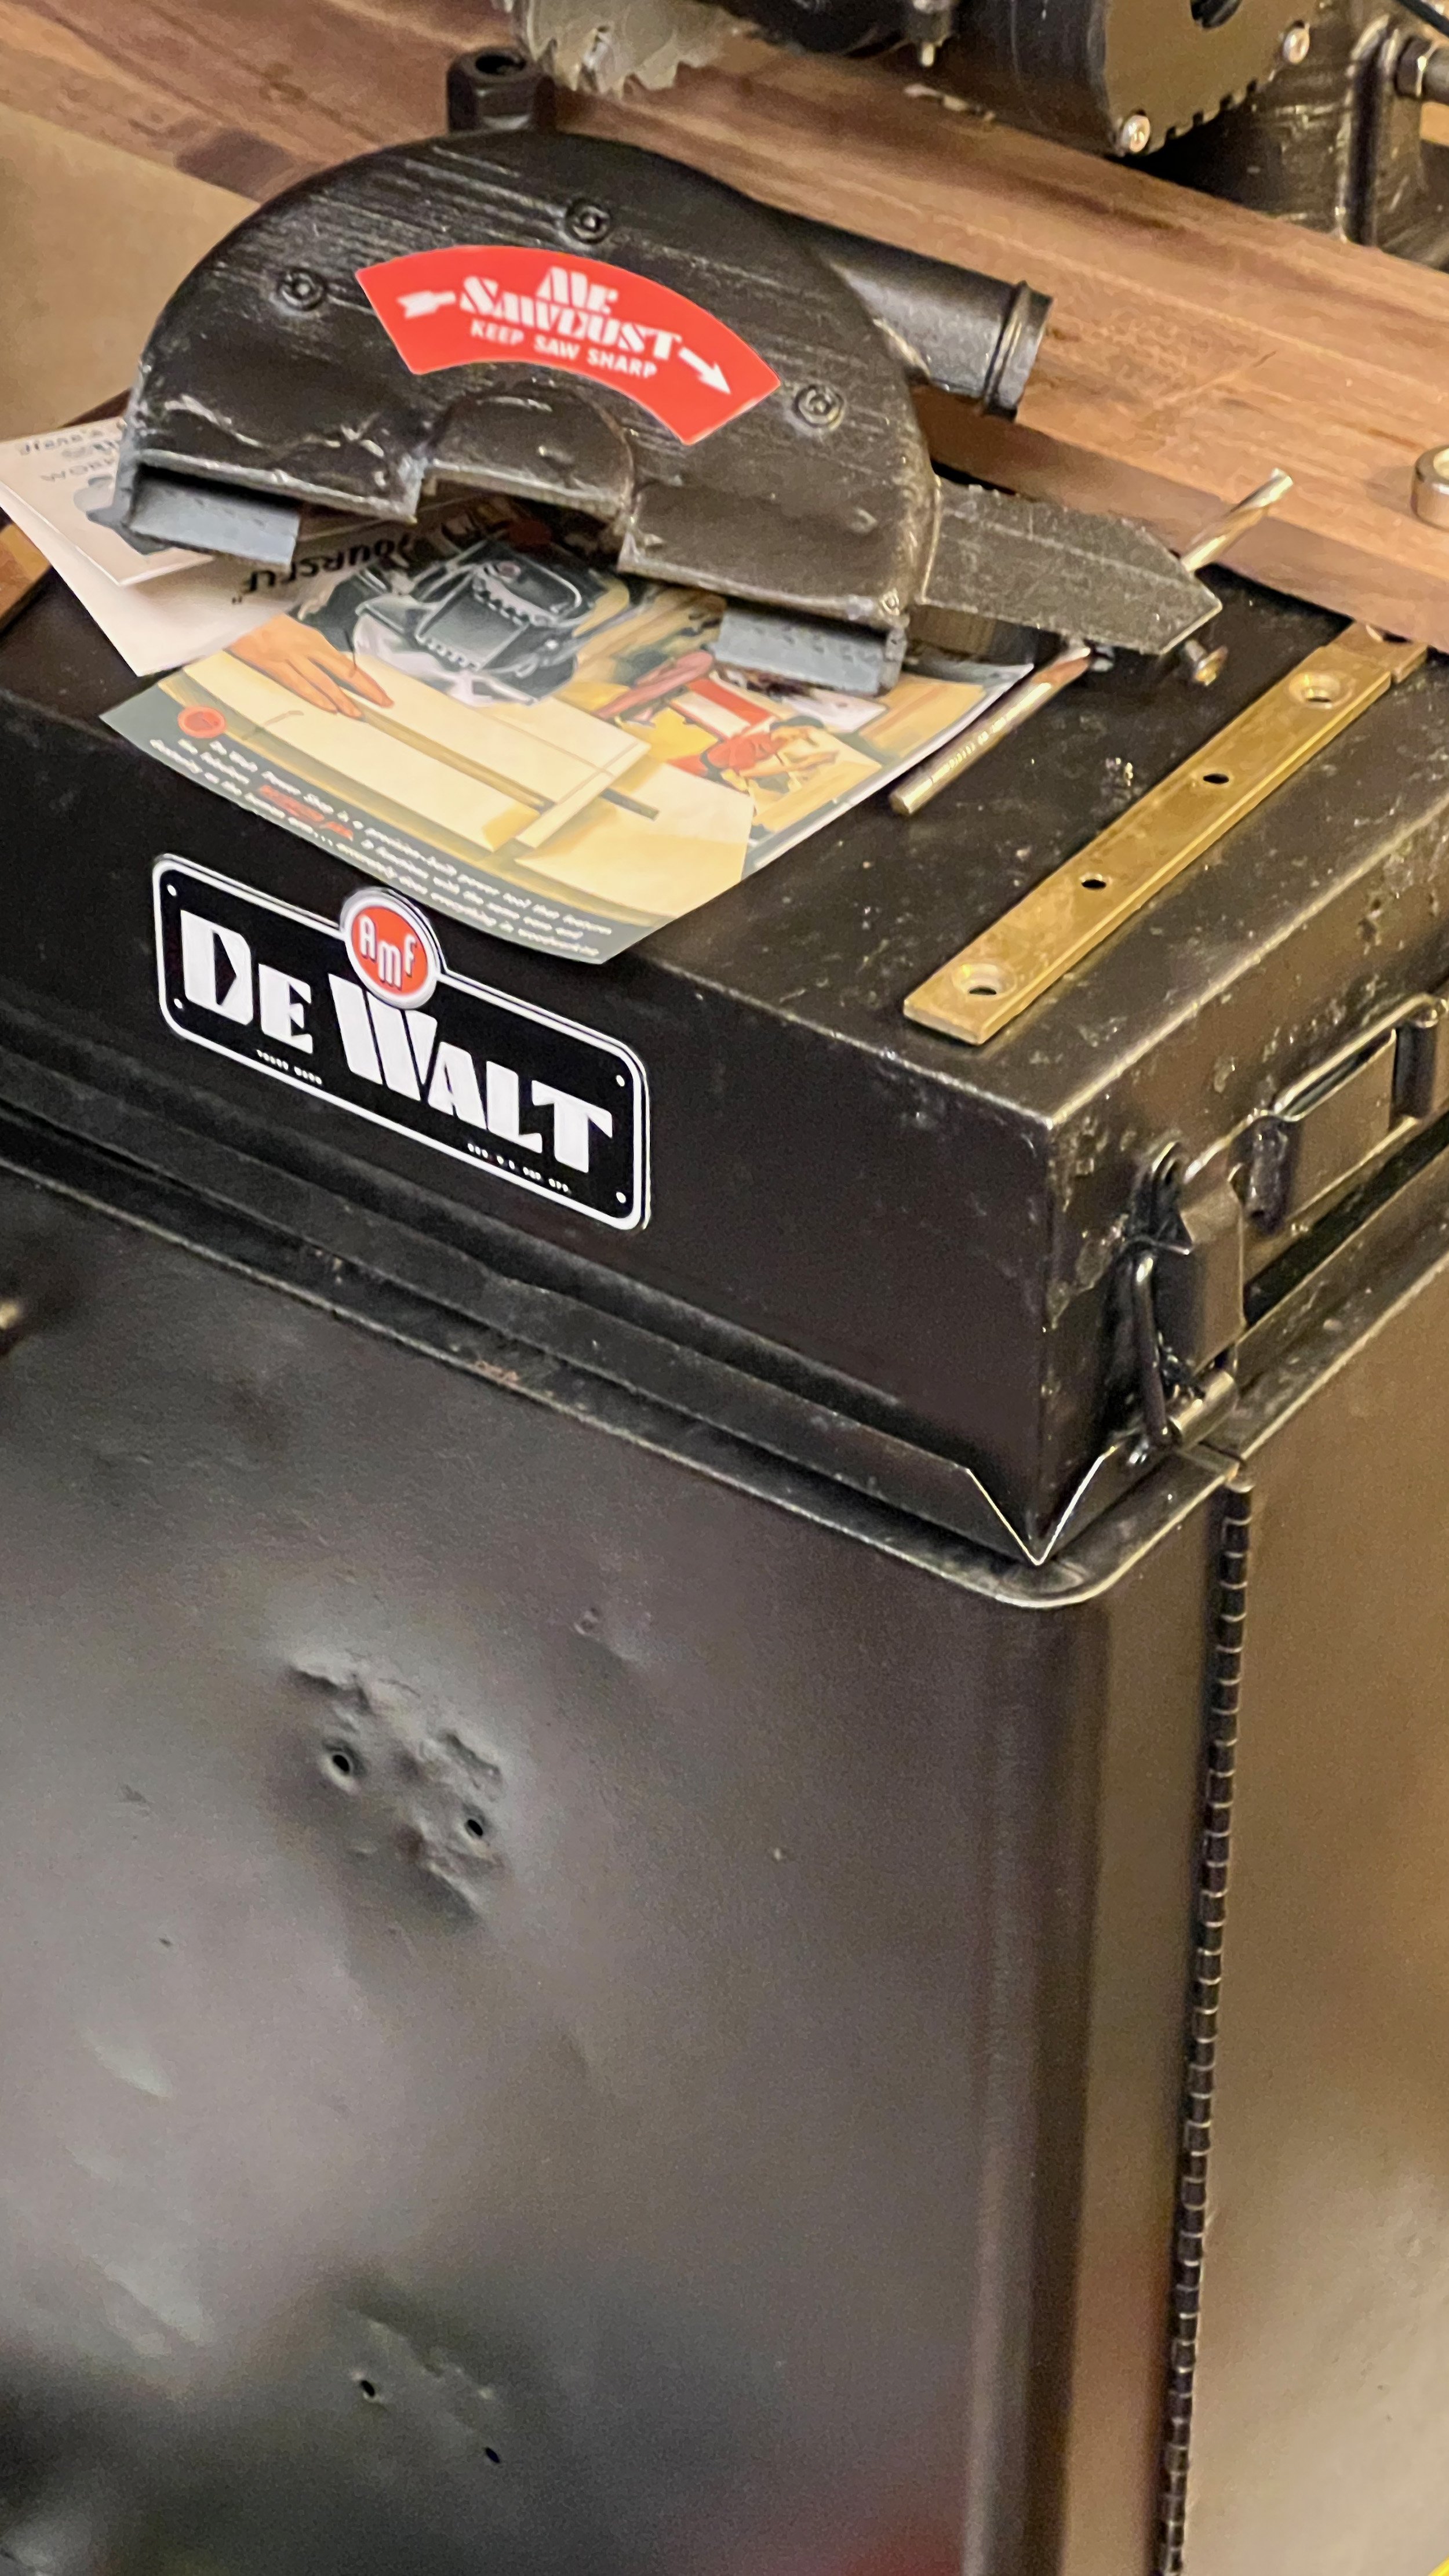
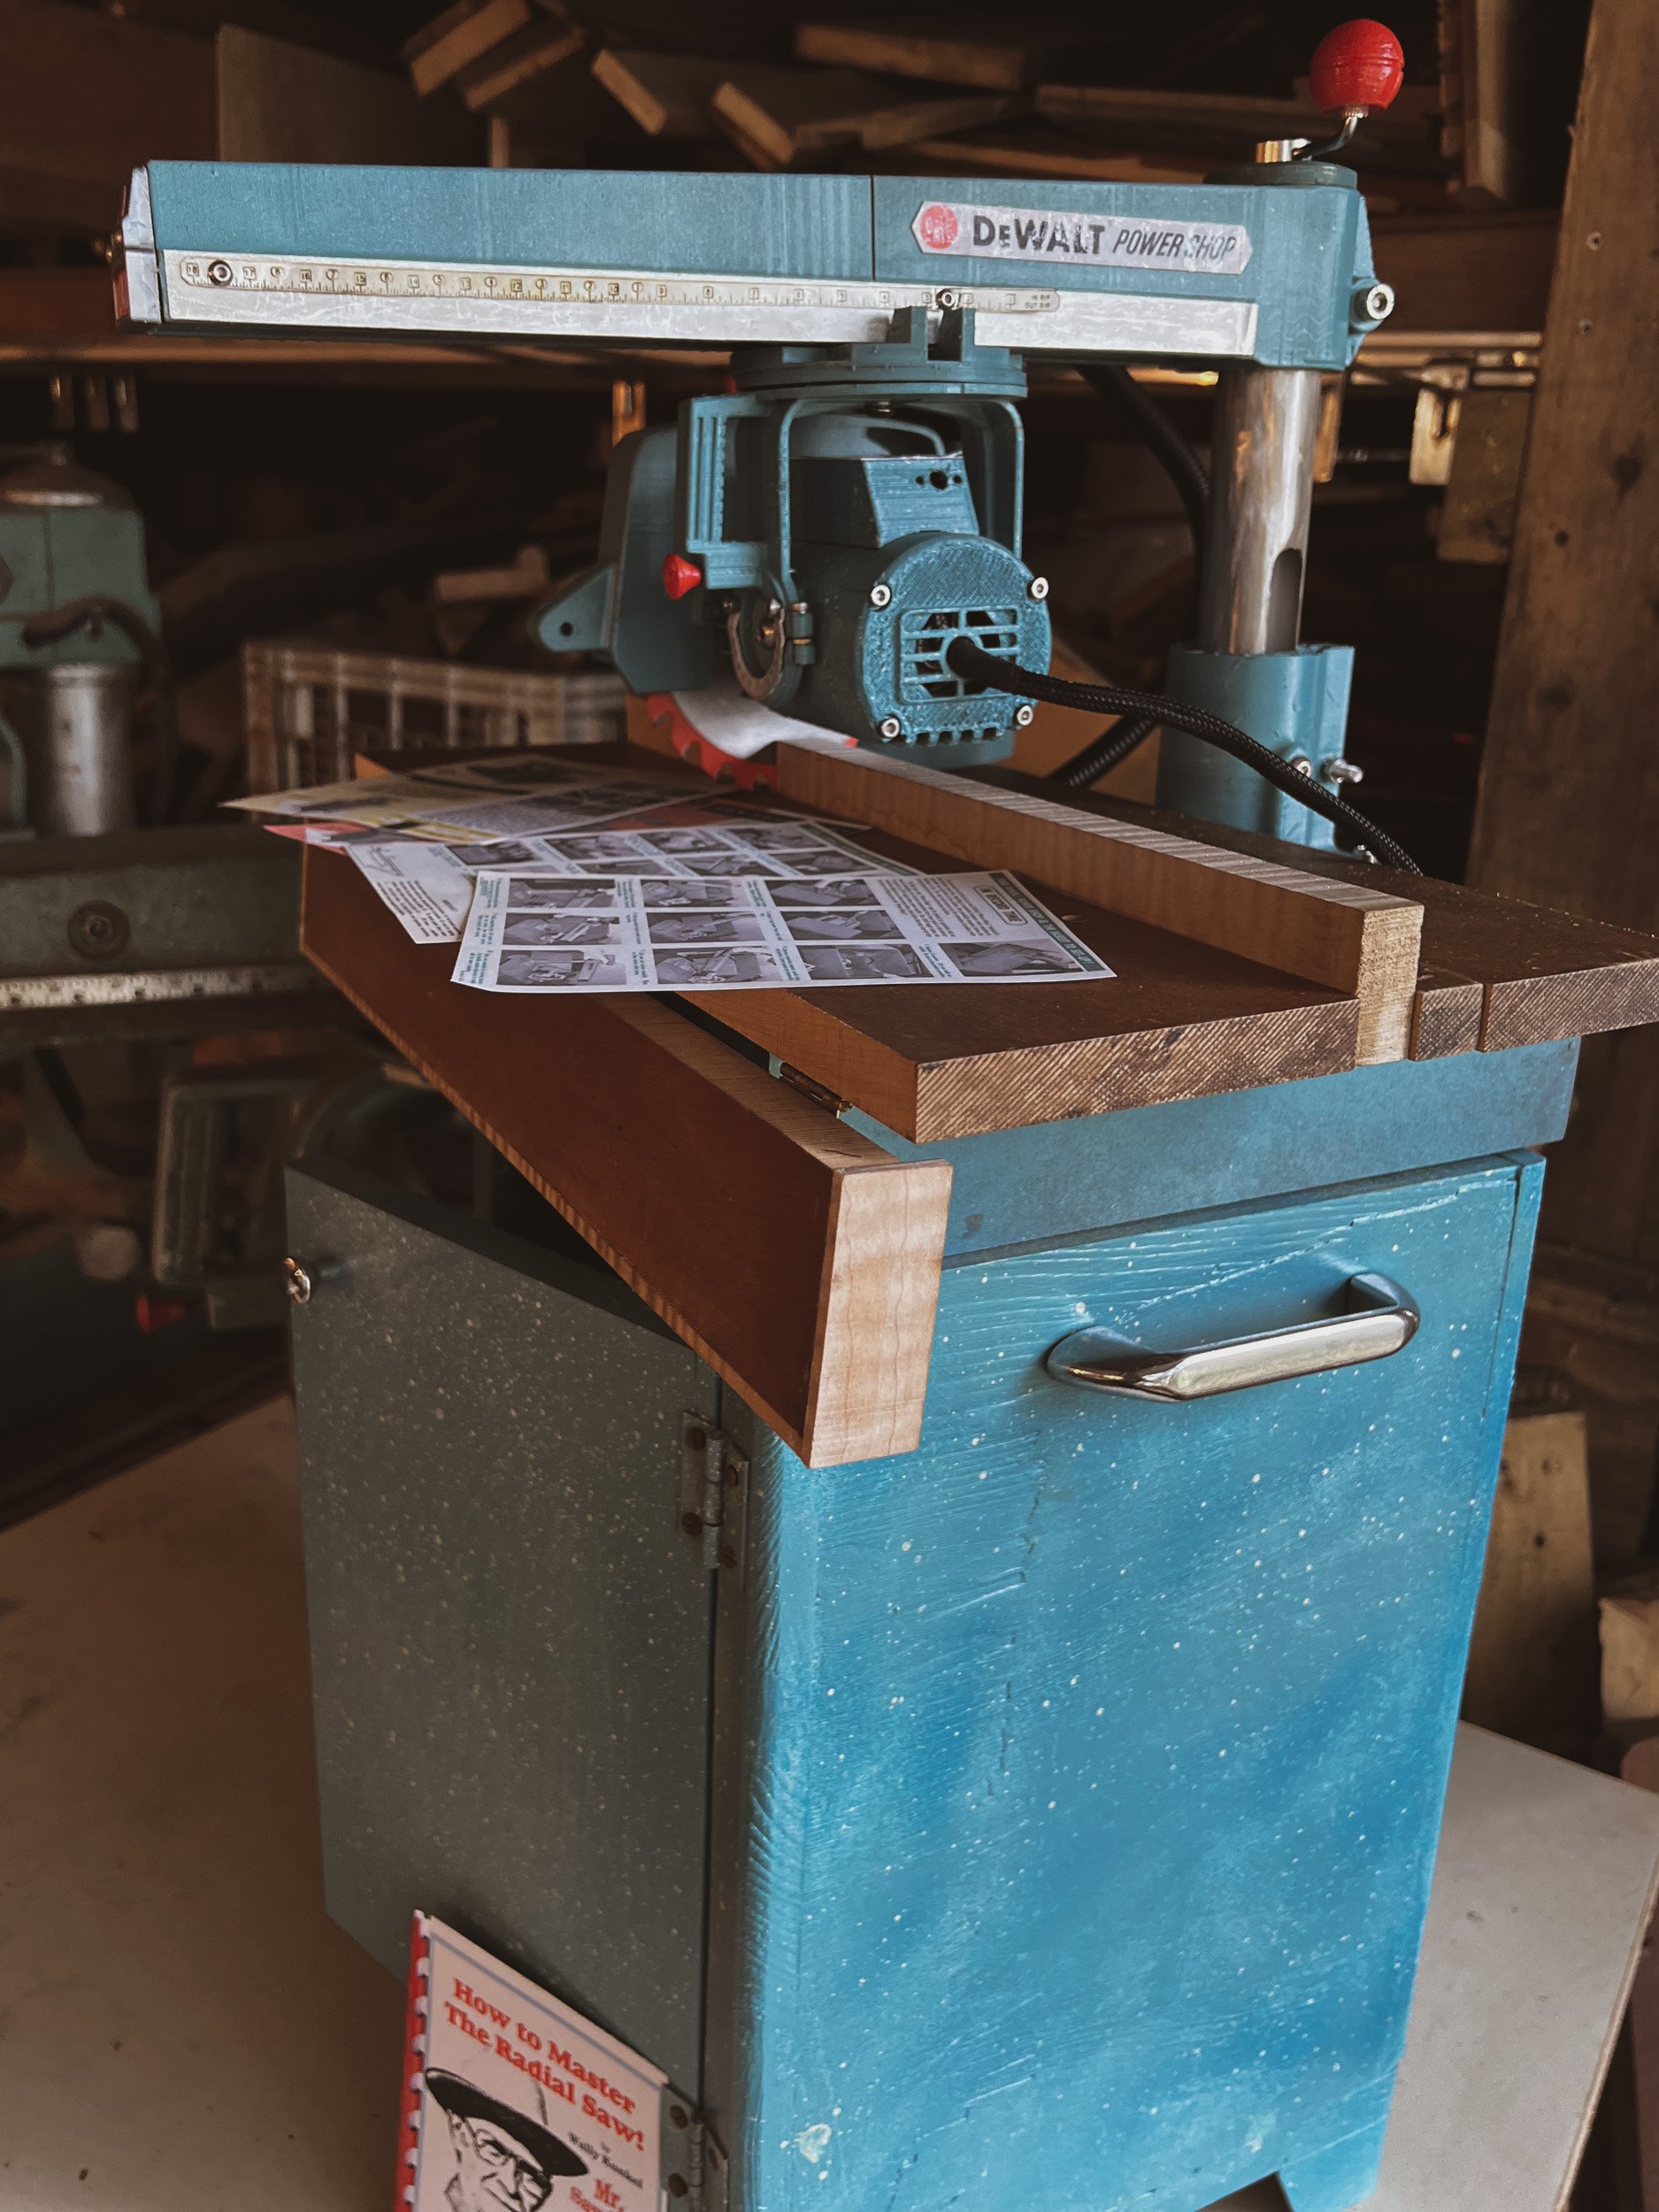
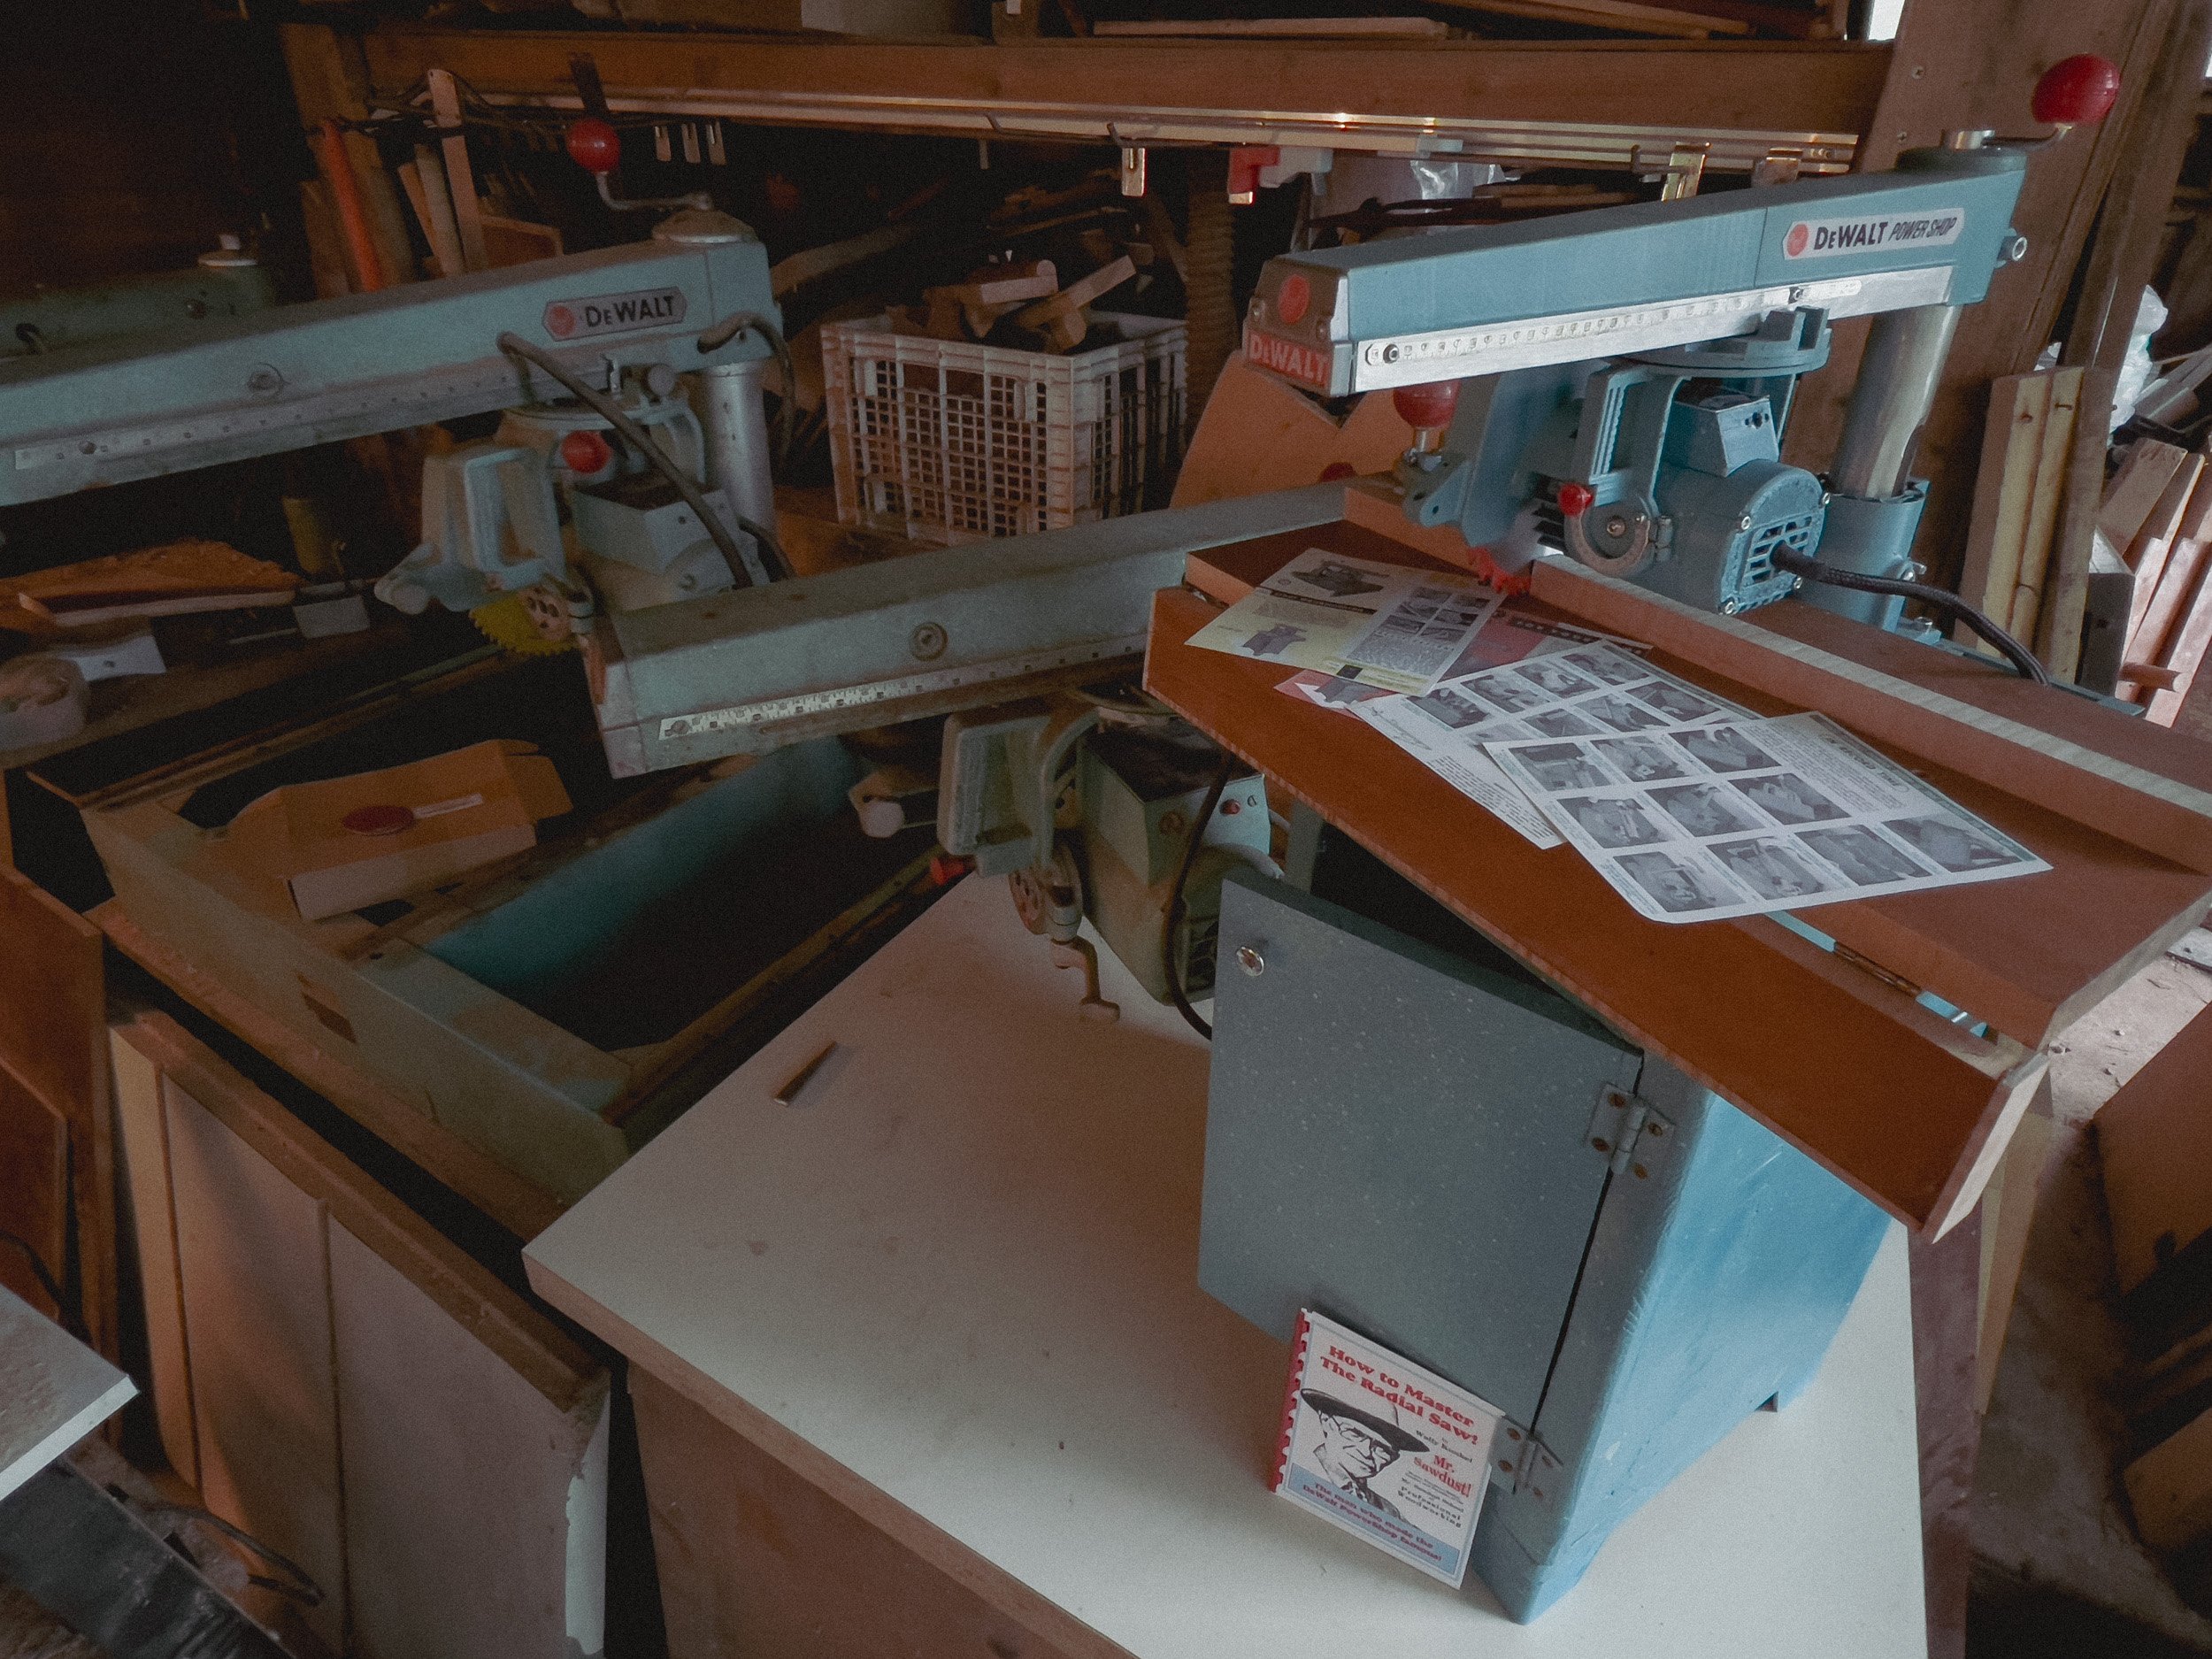
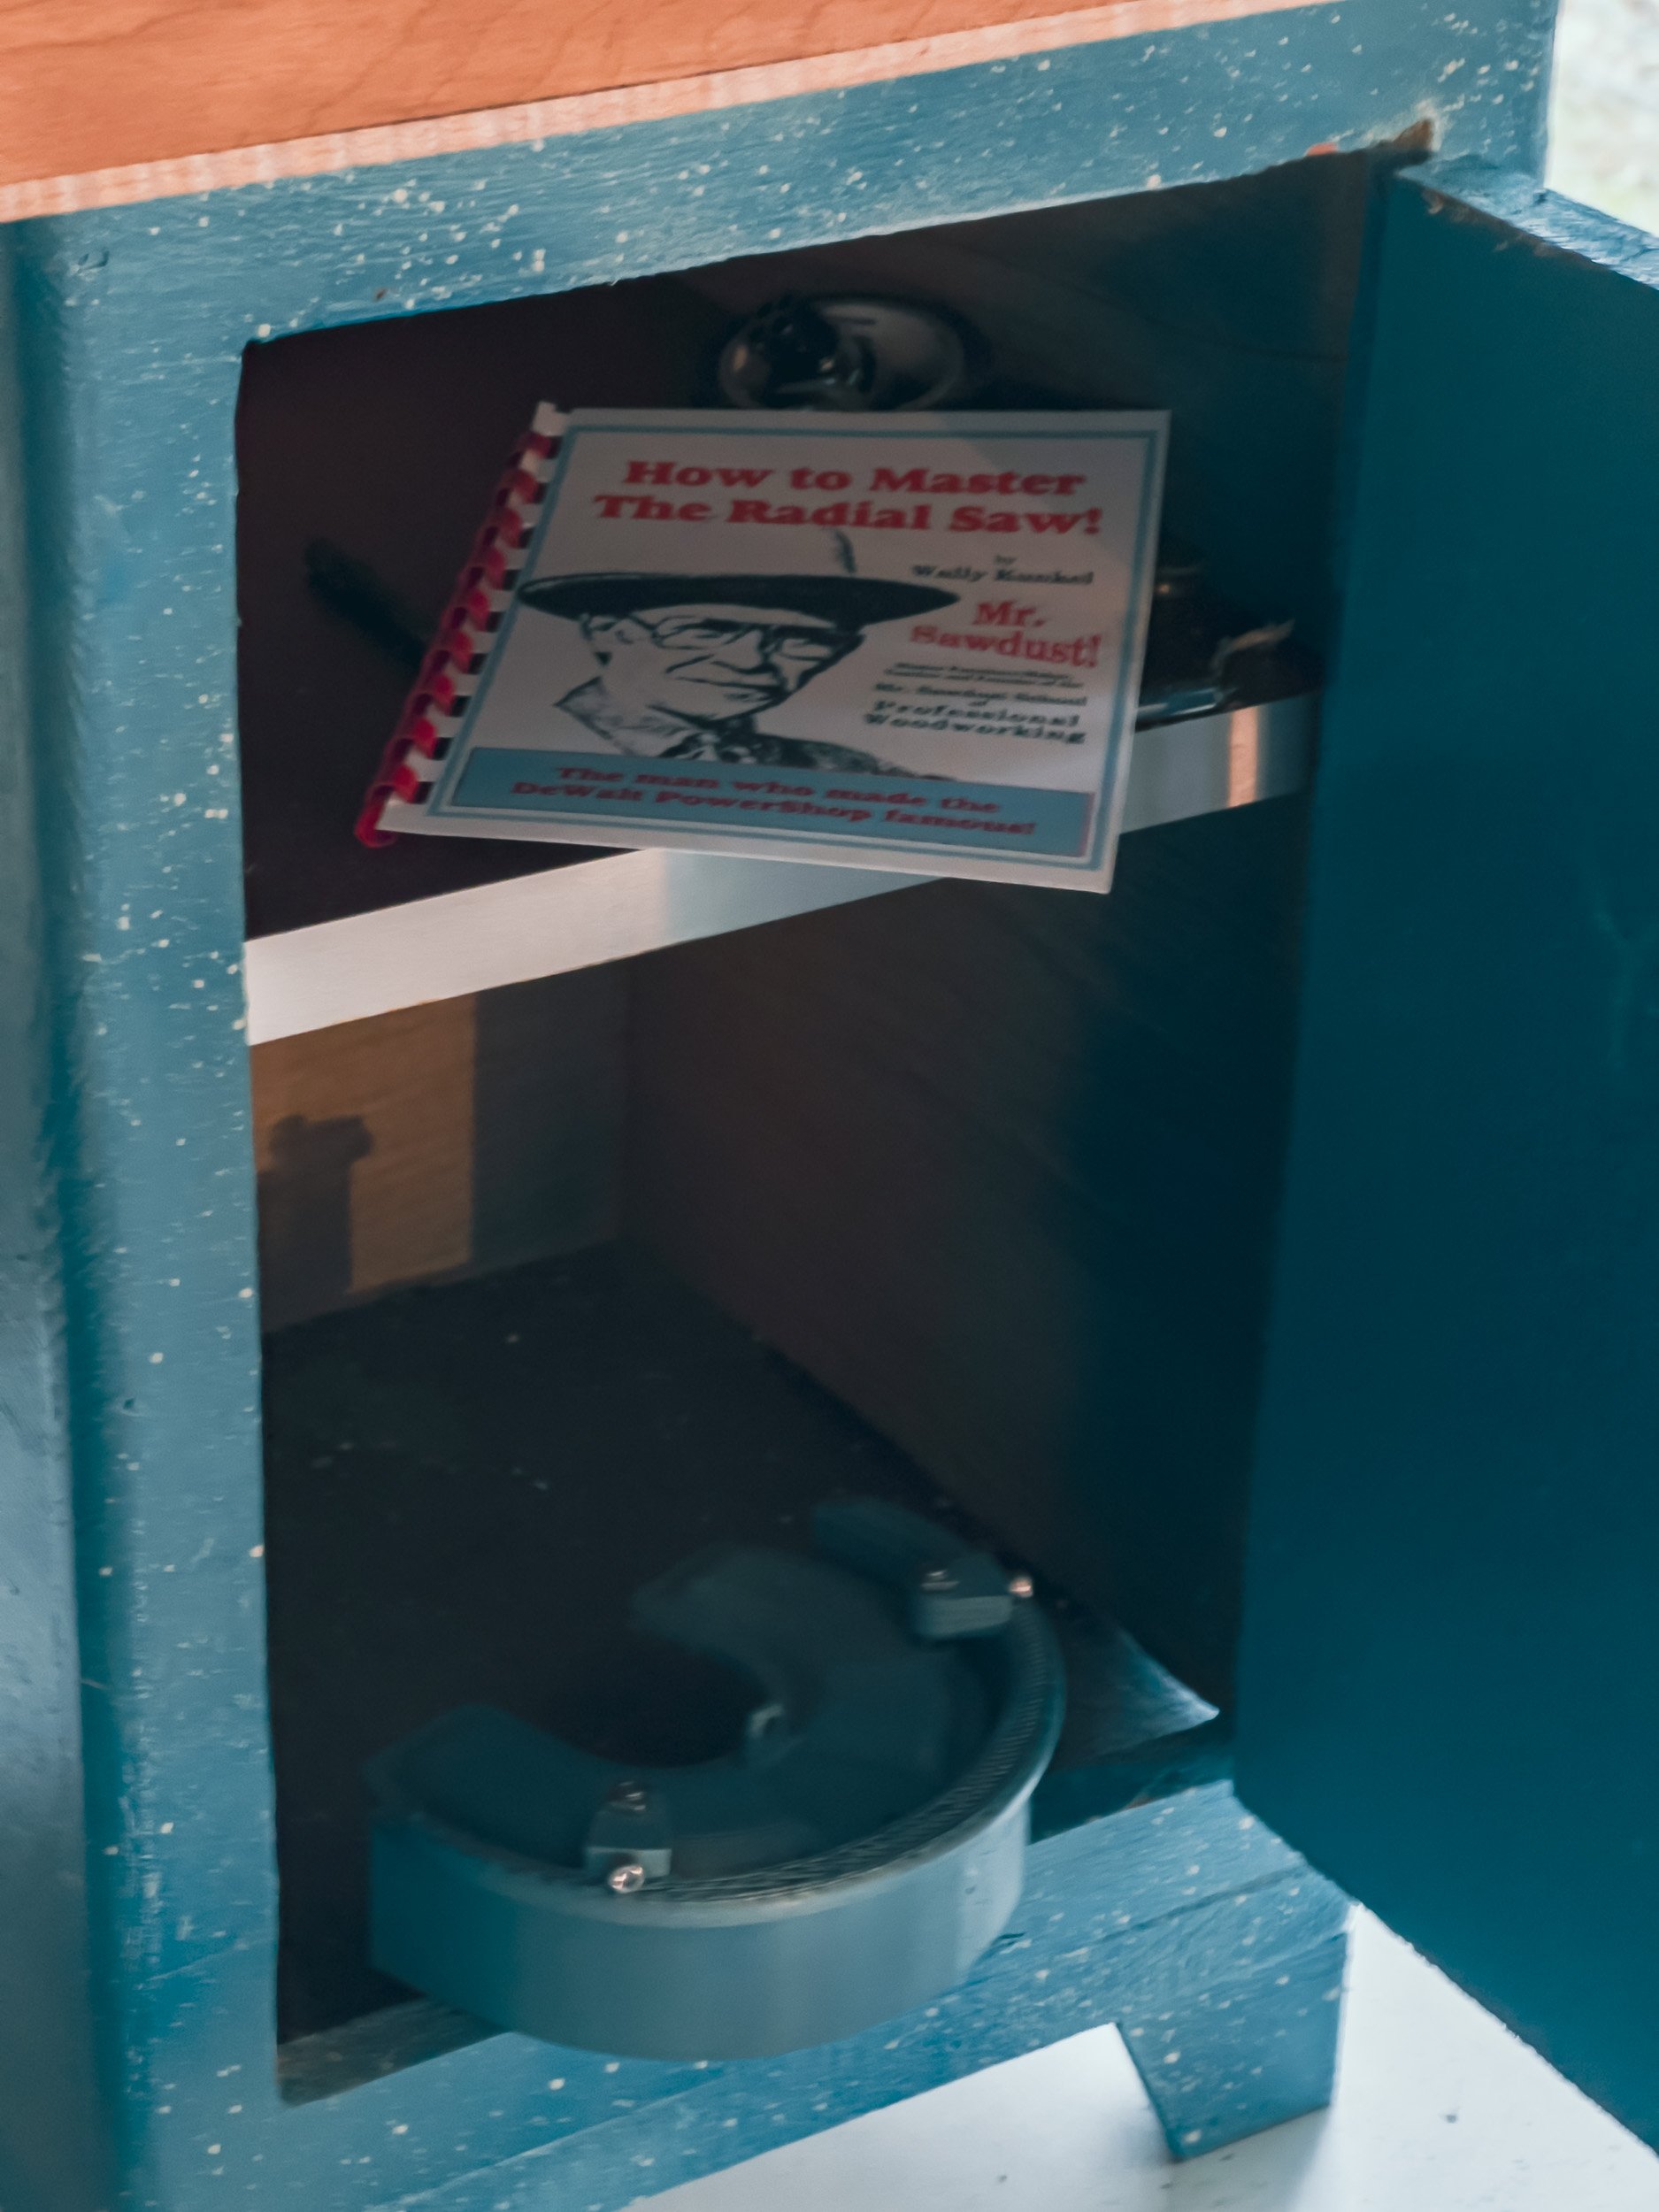
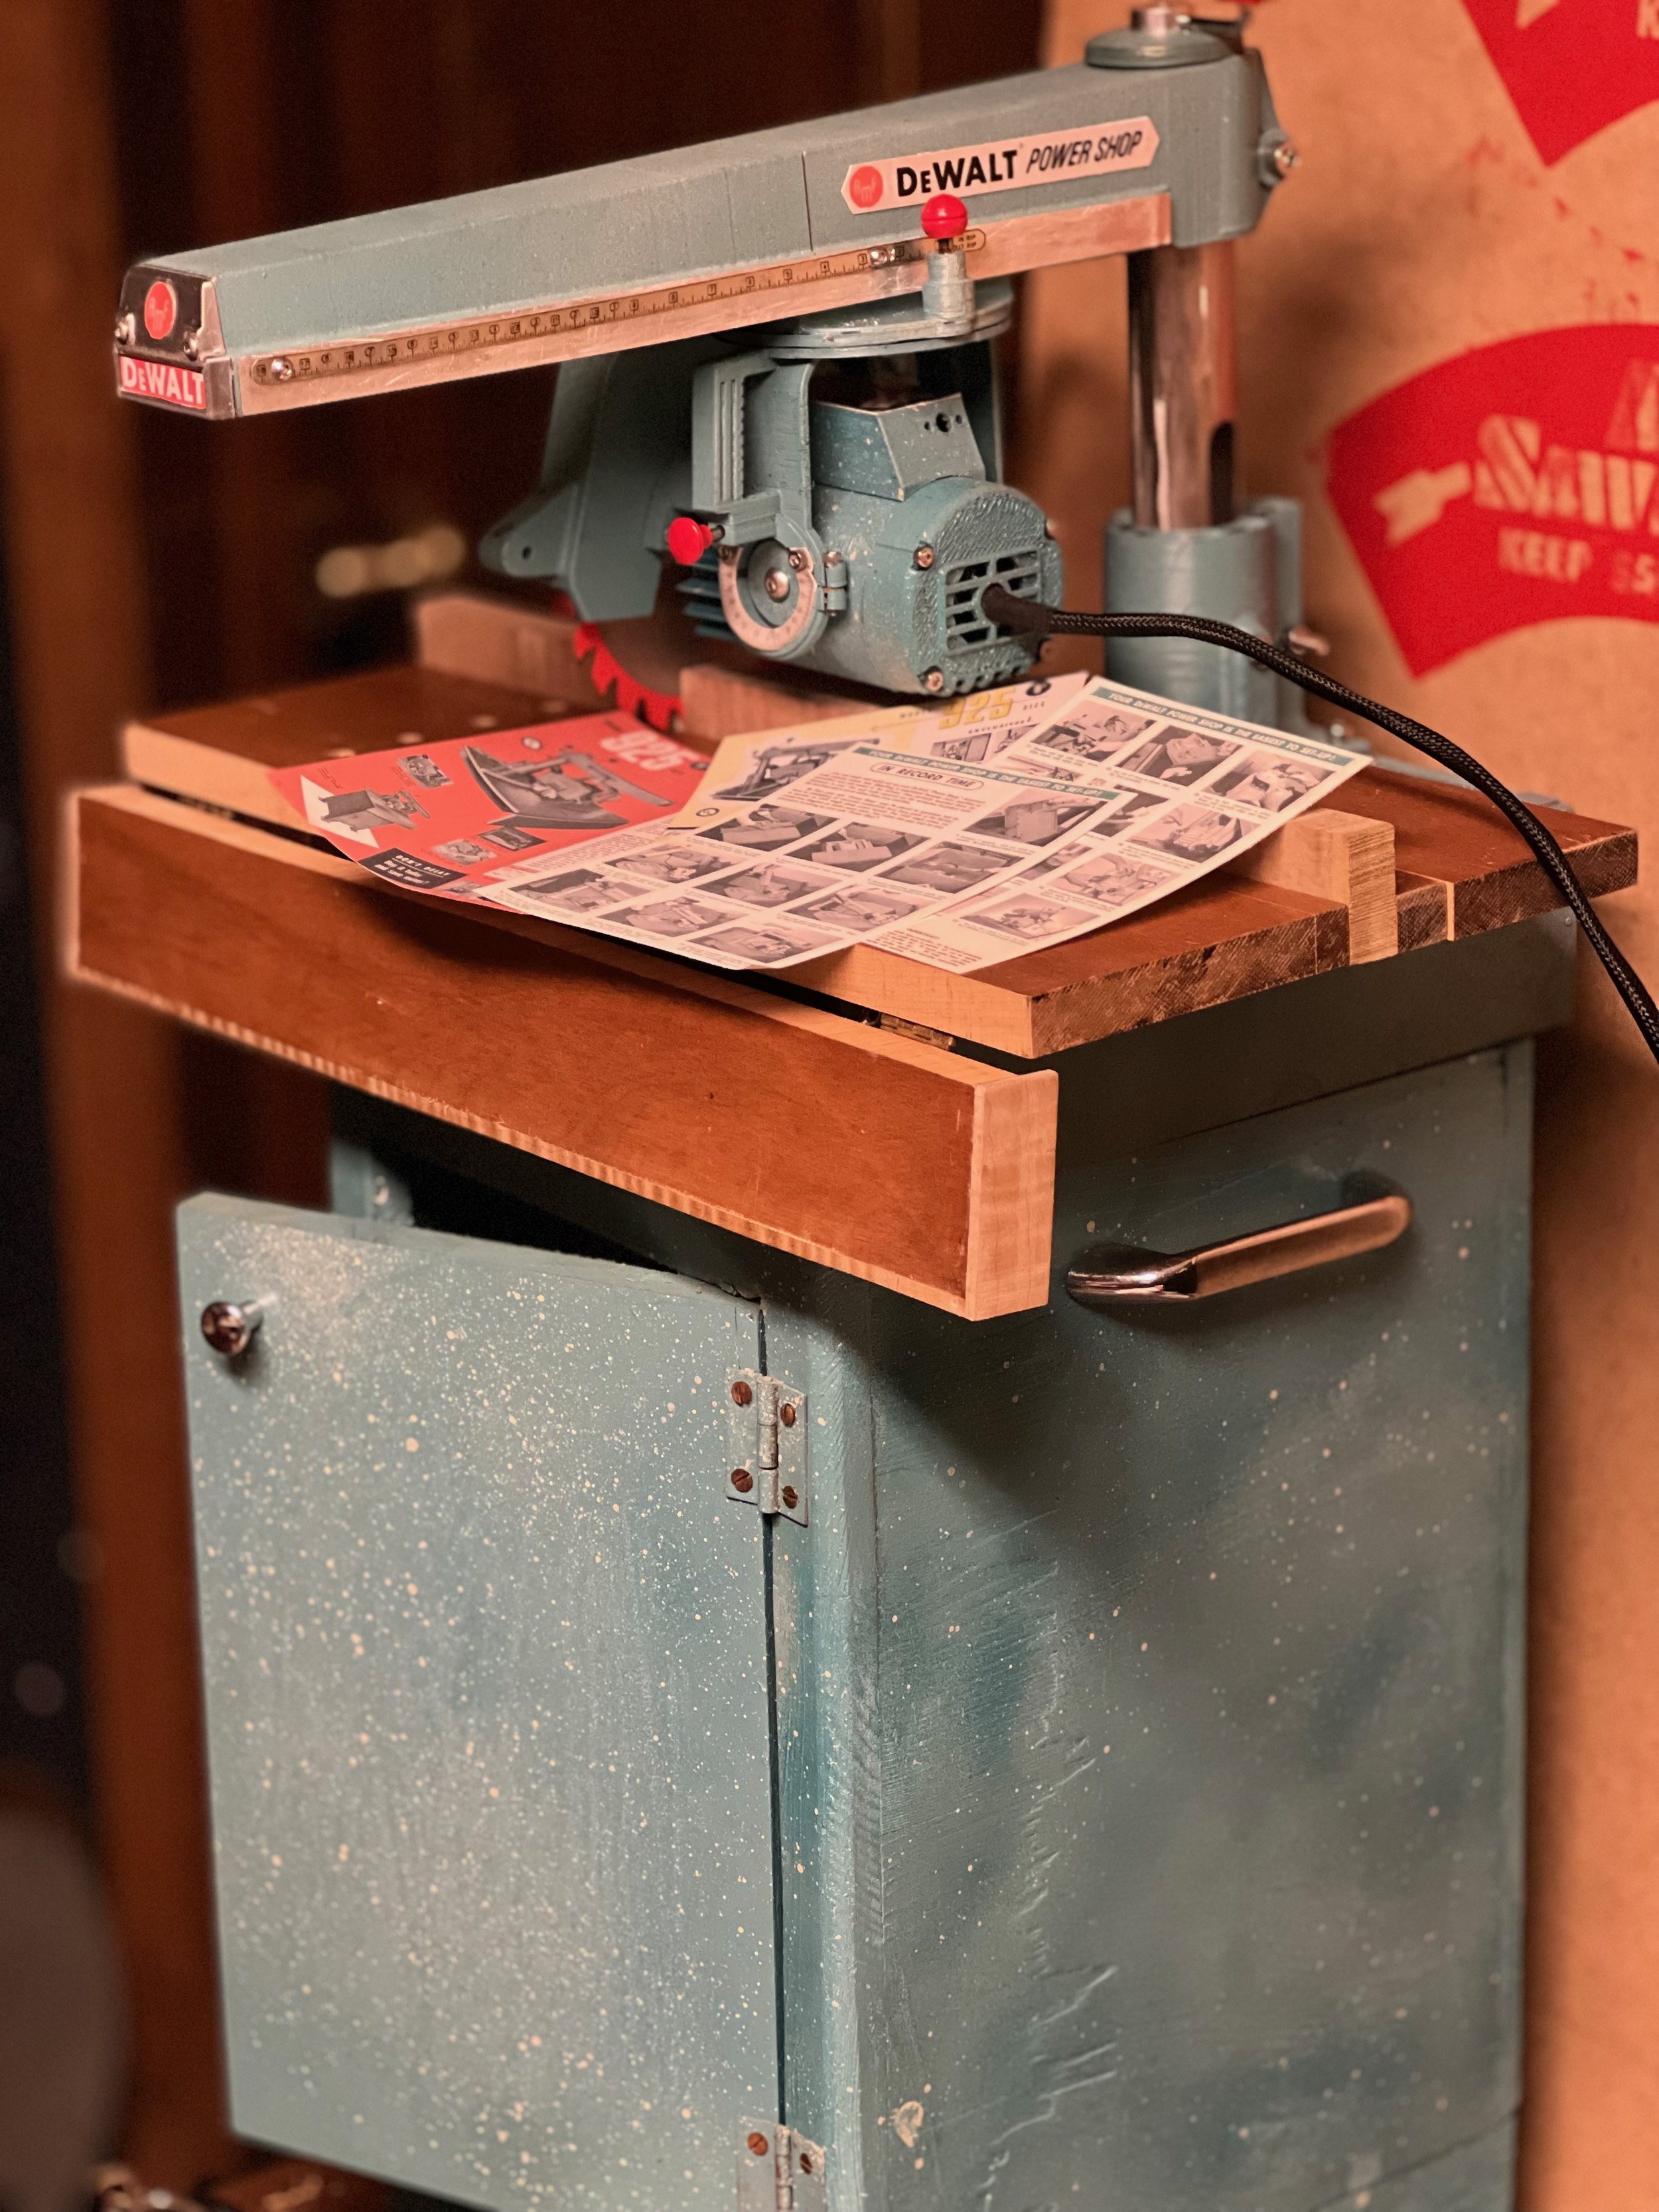
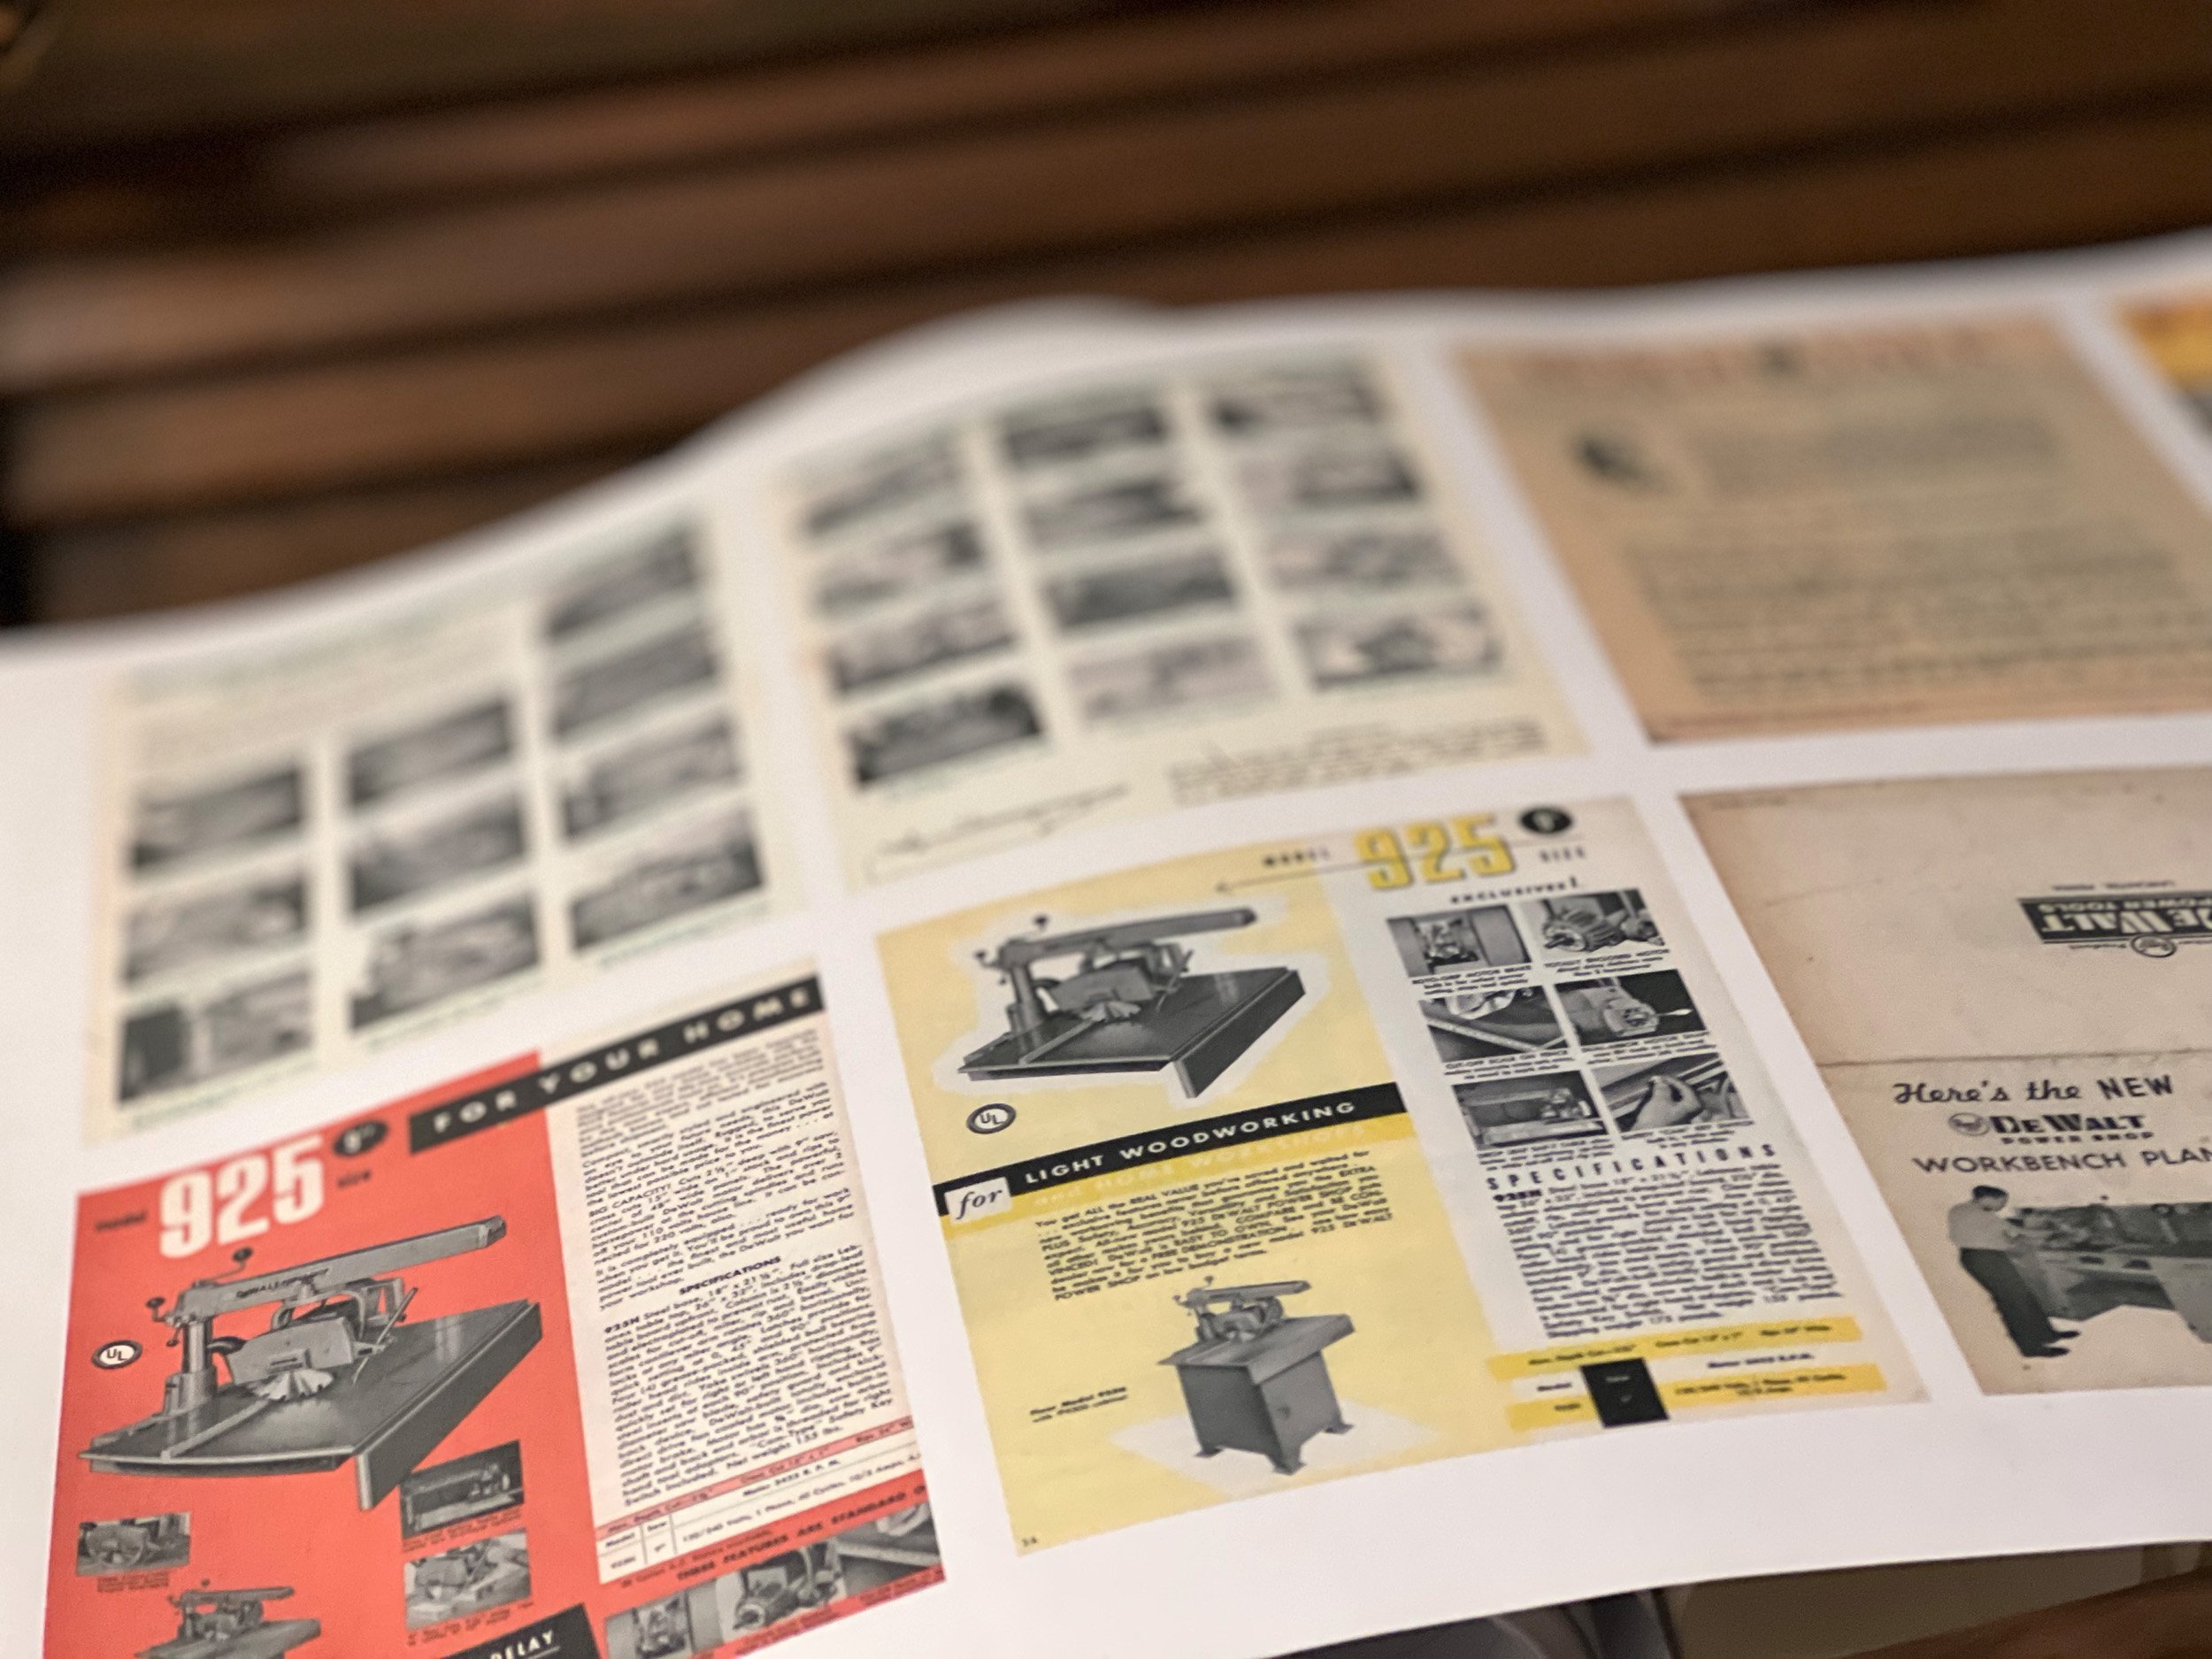
Little vintage prints
Things don’t feel quite complete without some scale-accurate manuals and booklets. Of course, we' need a little print of Master the Radial Arm Saw and a few Bench Talk newsletters. A close look will also find a new Mr. Sawdust School brochure.
At 1:2 scale, you can nicely fit 8 pages of 8.5”x11” documents on a single 13”x19” sheet.
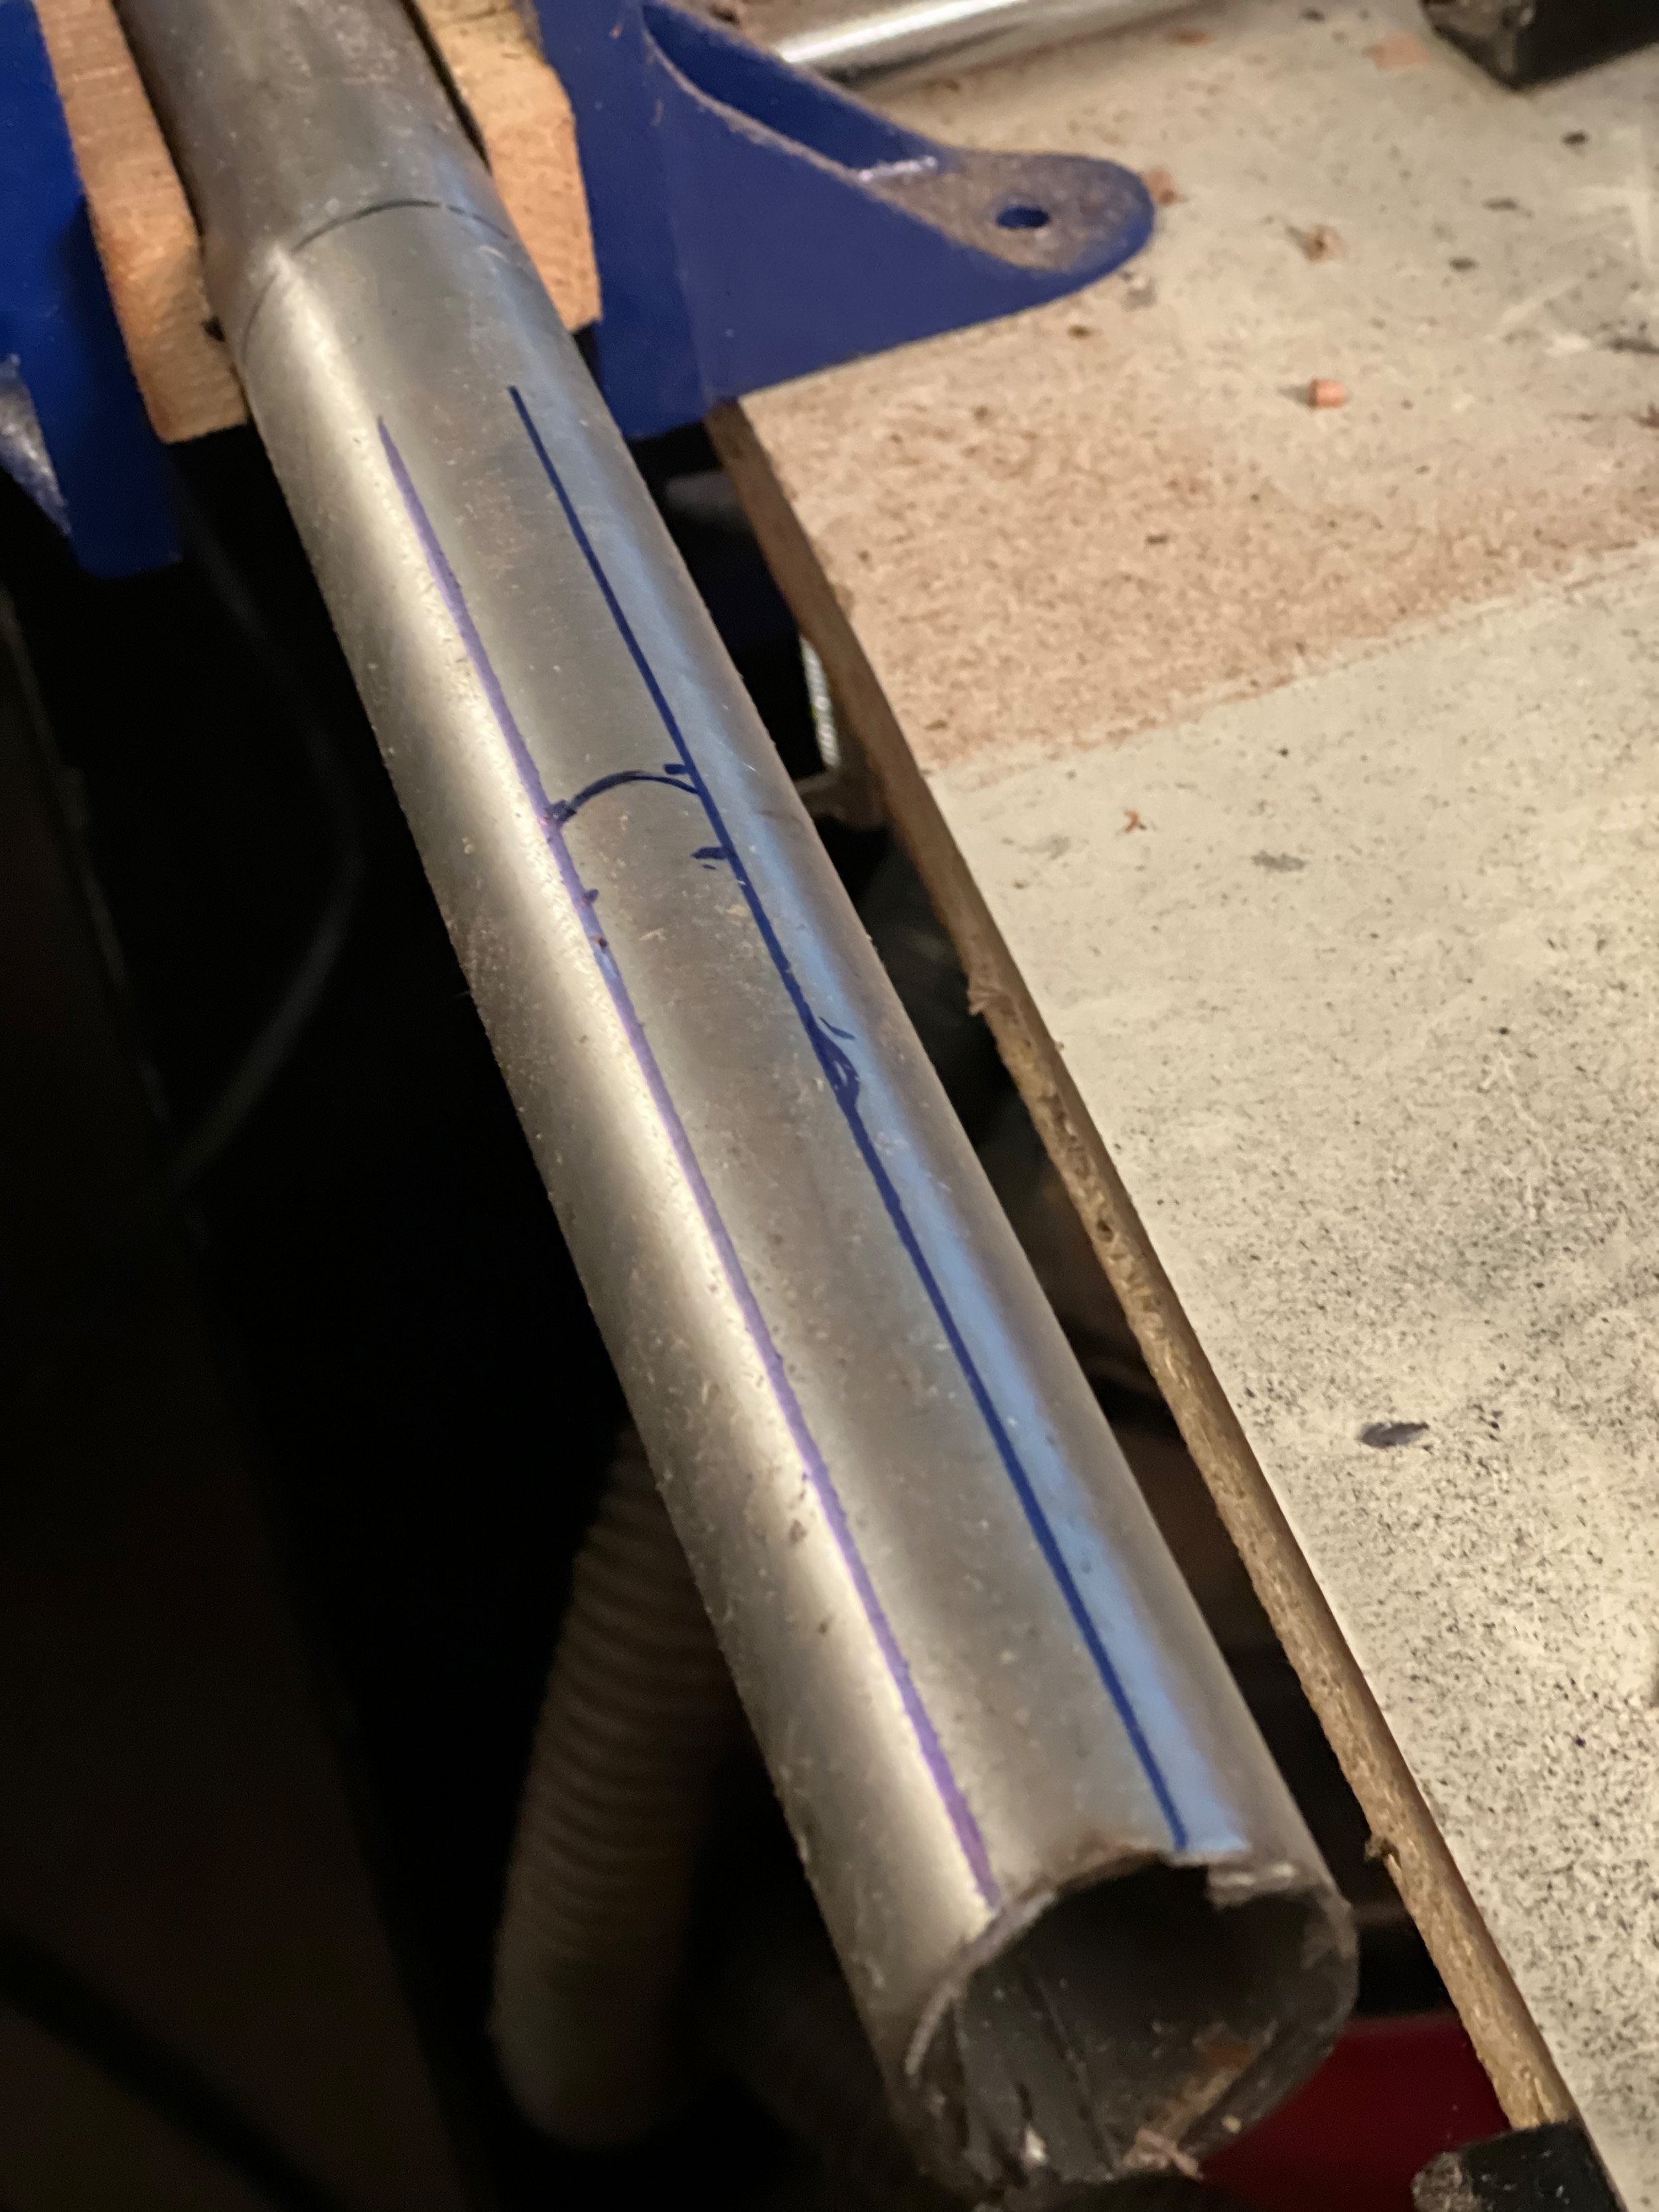
The Elevating Column
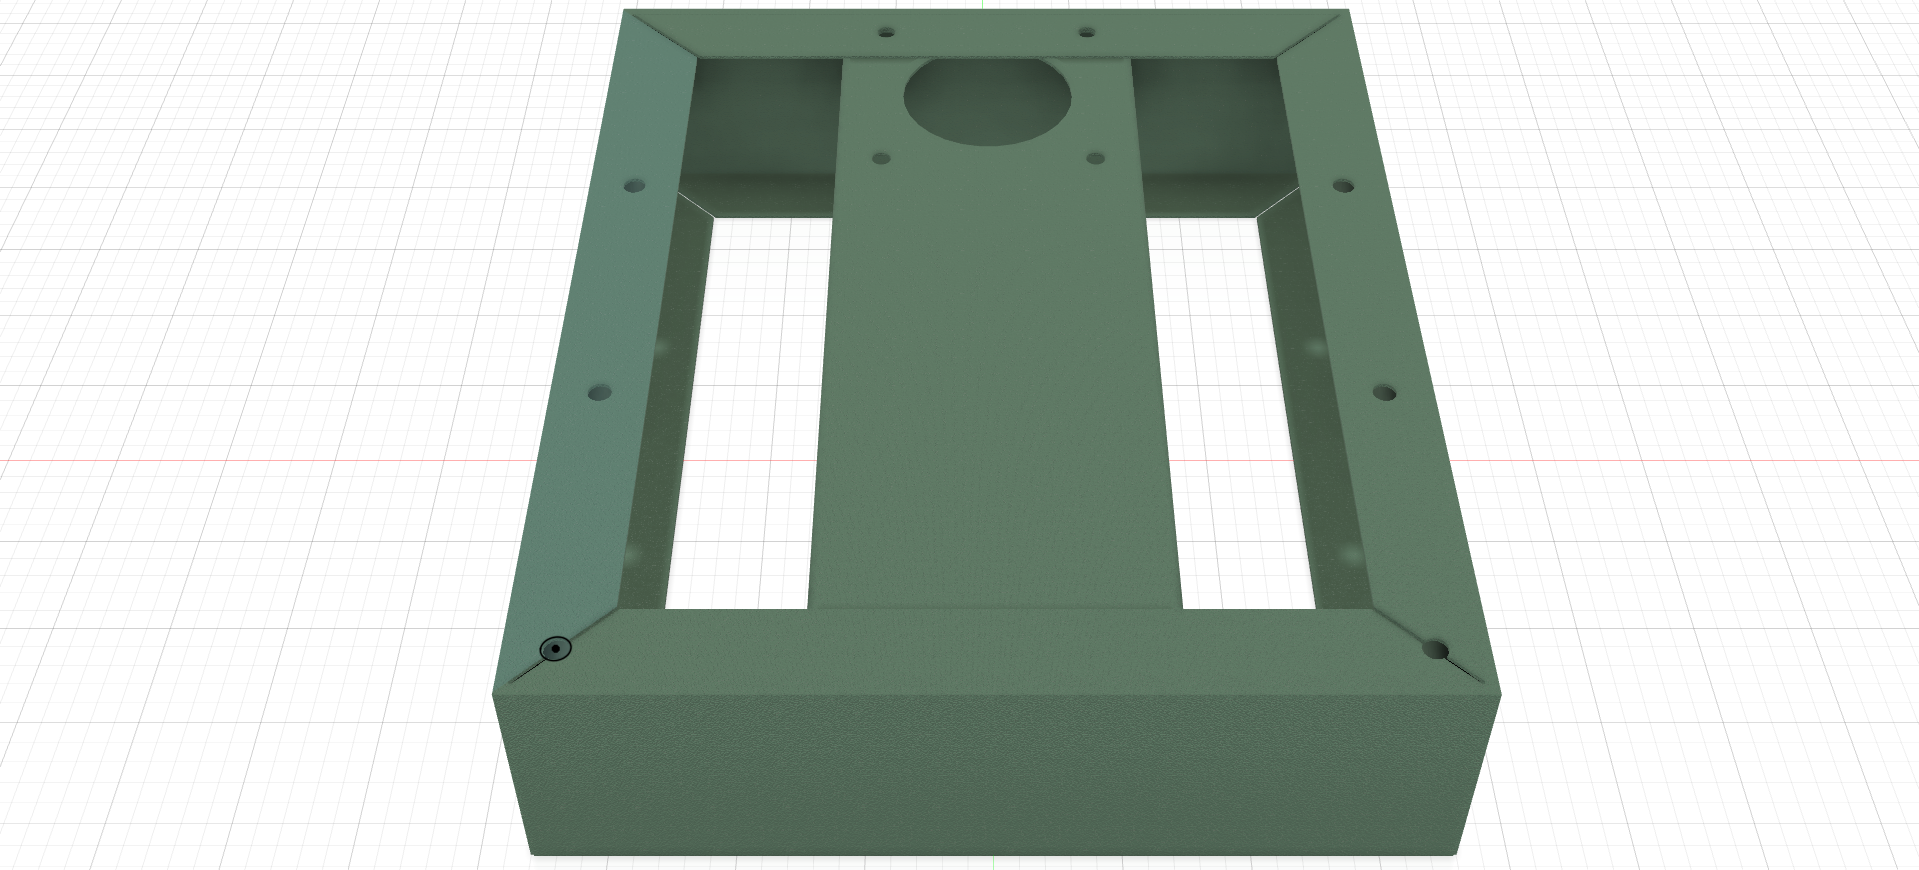
Until I had to make this, I never actually considered how this whole lead-screw elevating mechanism worked. Specifically, it took a moment to realize the column base basically has a suspending nut inside it, which still strikes me as clever. I’m sure there’s a cleaner way to cut this side-channel out of pipe, but the angle grinder got it done. The entire DeWalt column/shaft (the real one) is damn impressive and a bit monolithic — it’s like one unified “thing” that has a bunch of necessary detail/functionality built right into it. While I did manage to replicate the movement, it was a bit of a puzzle.


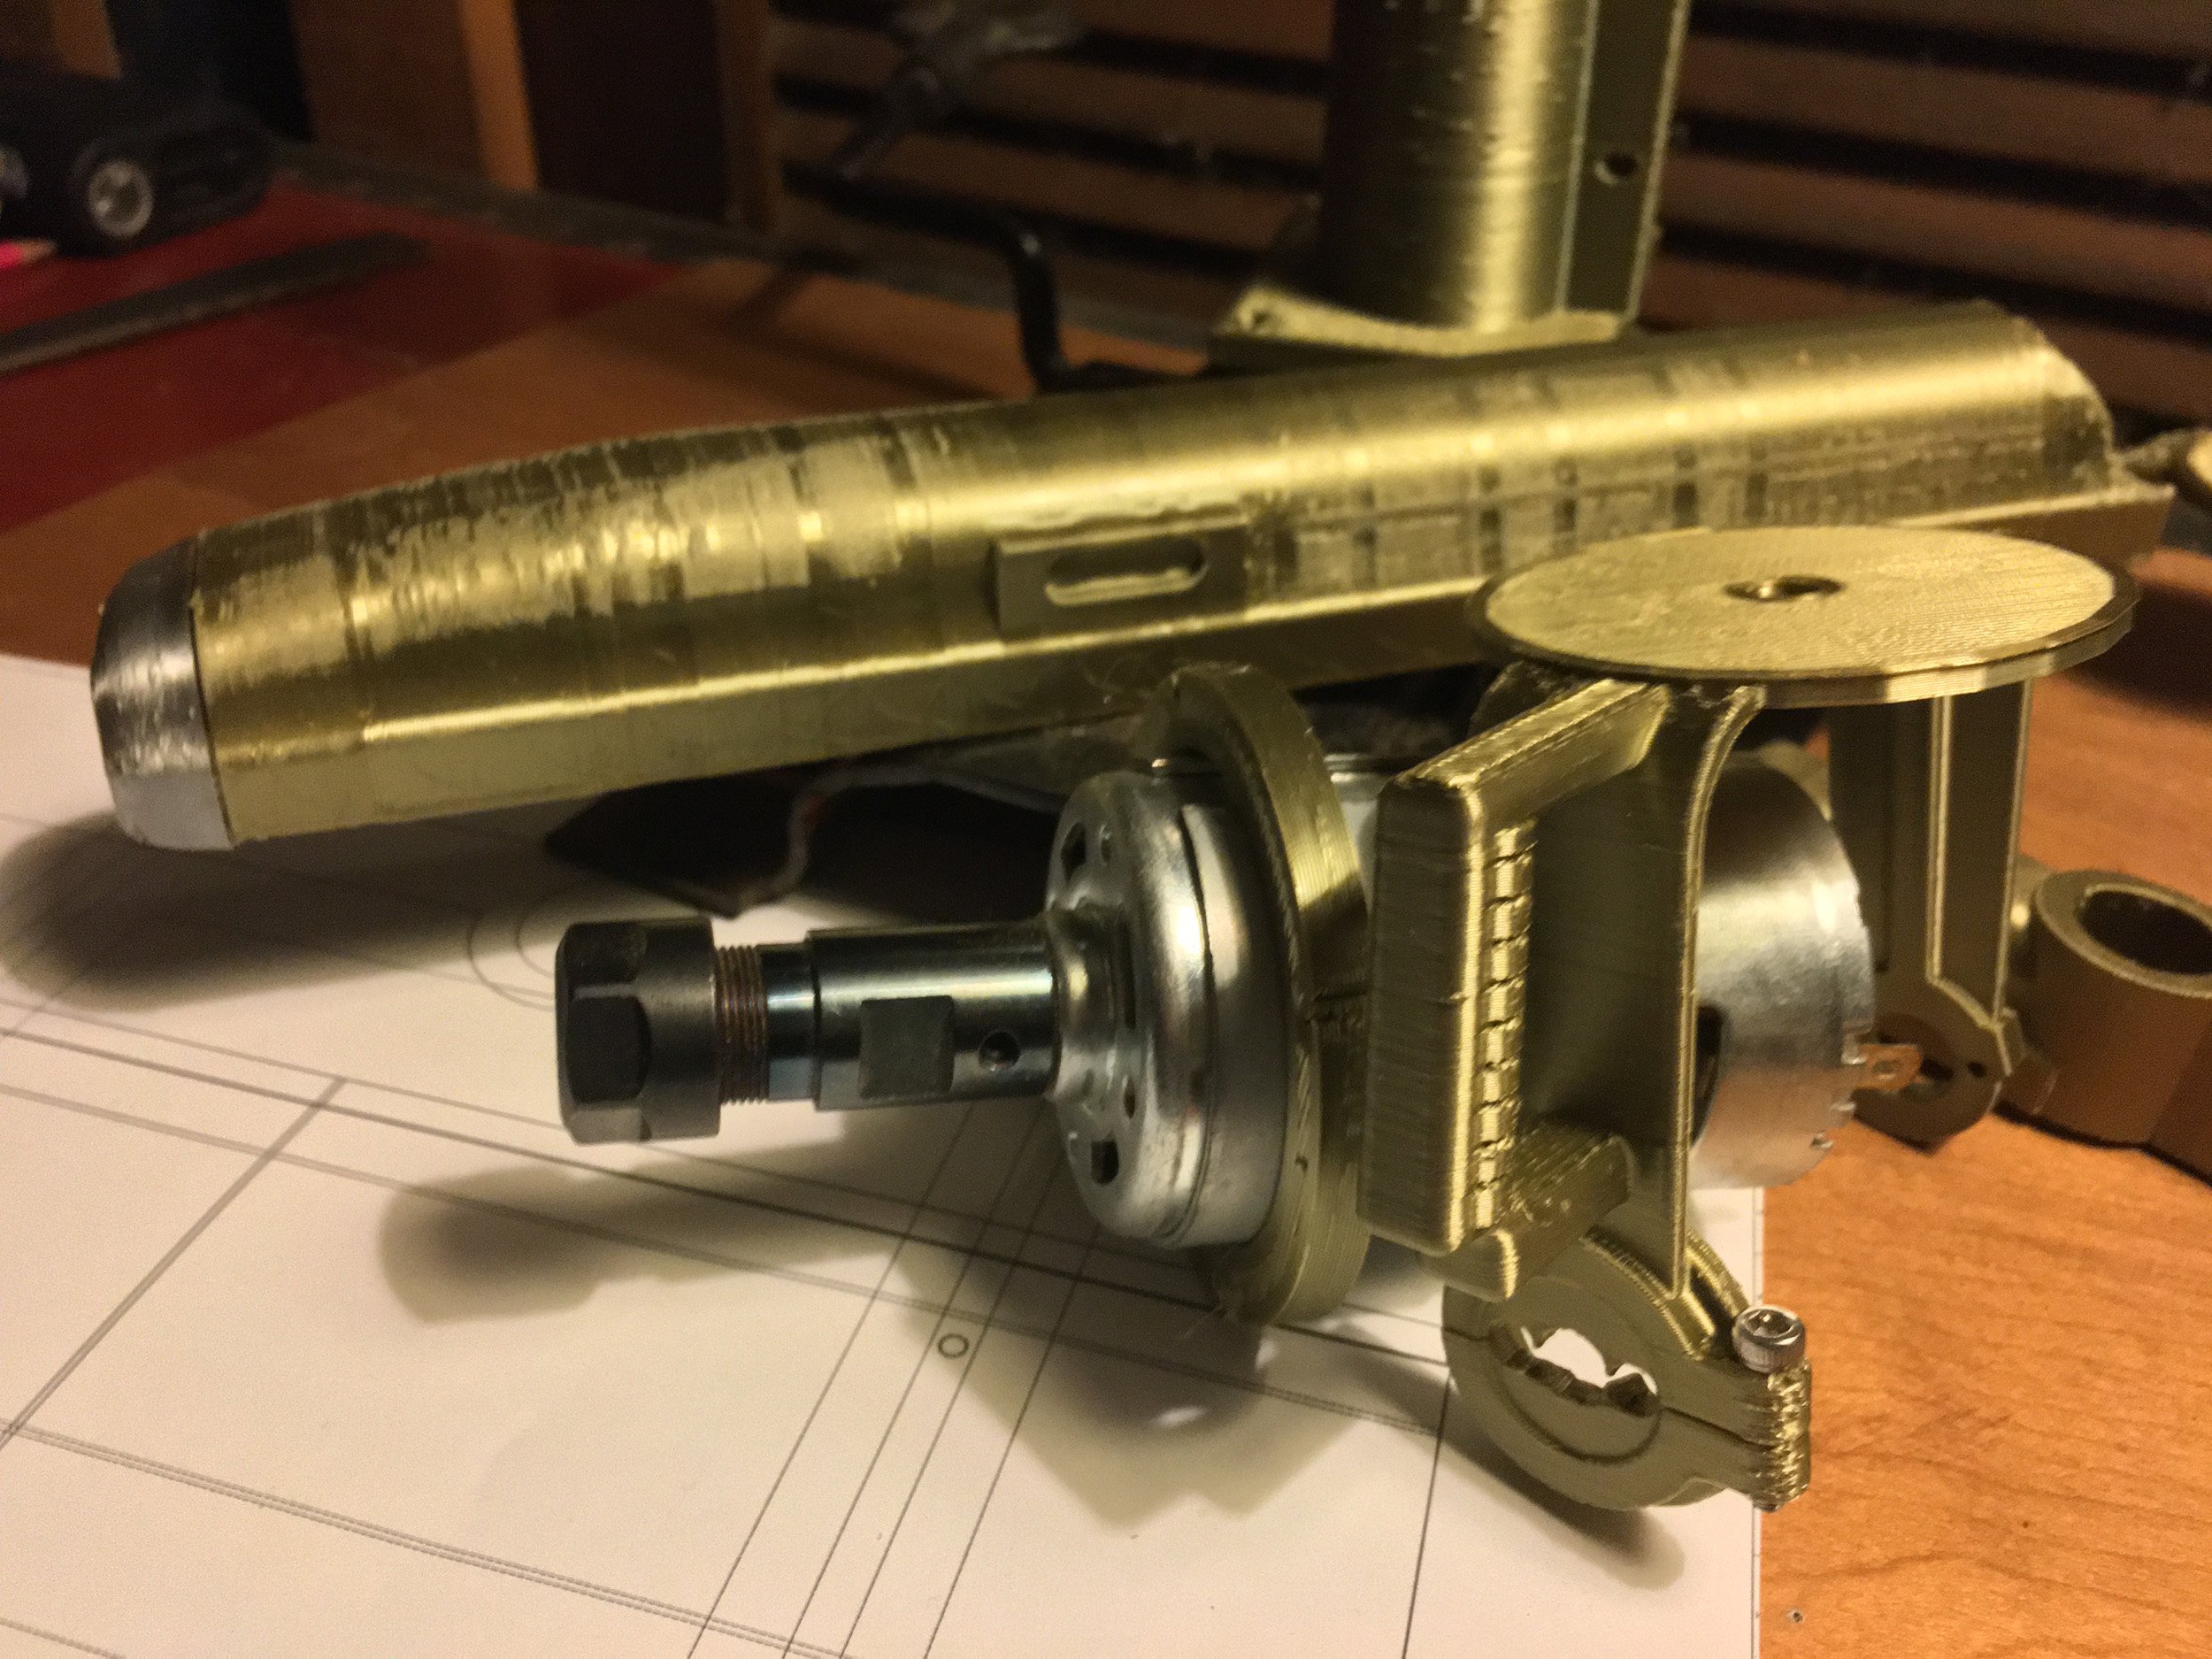
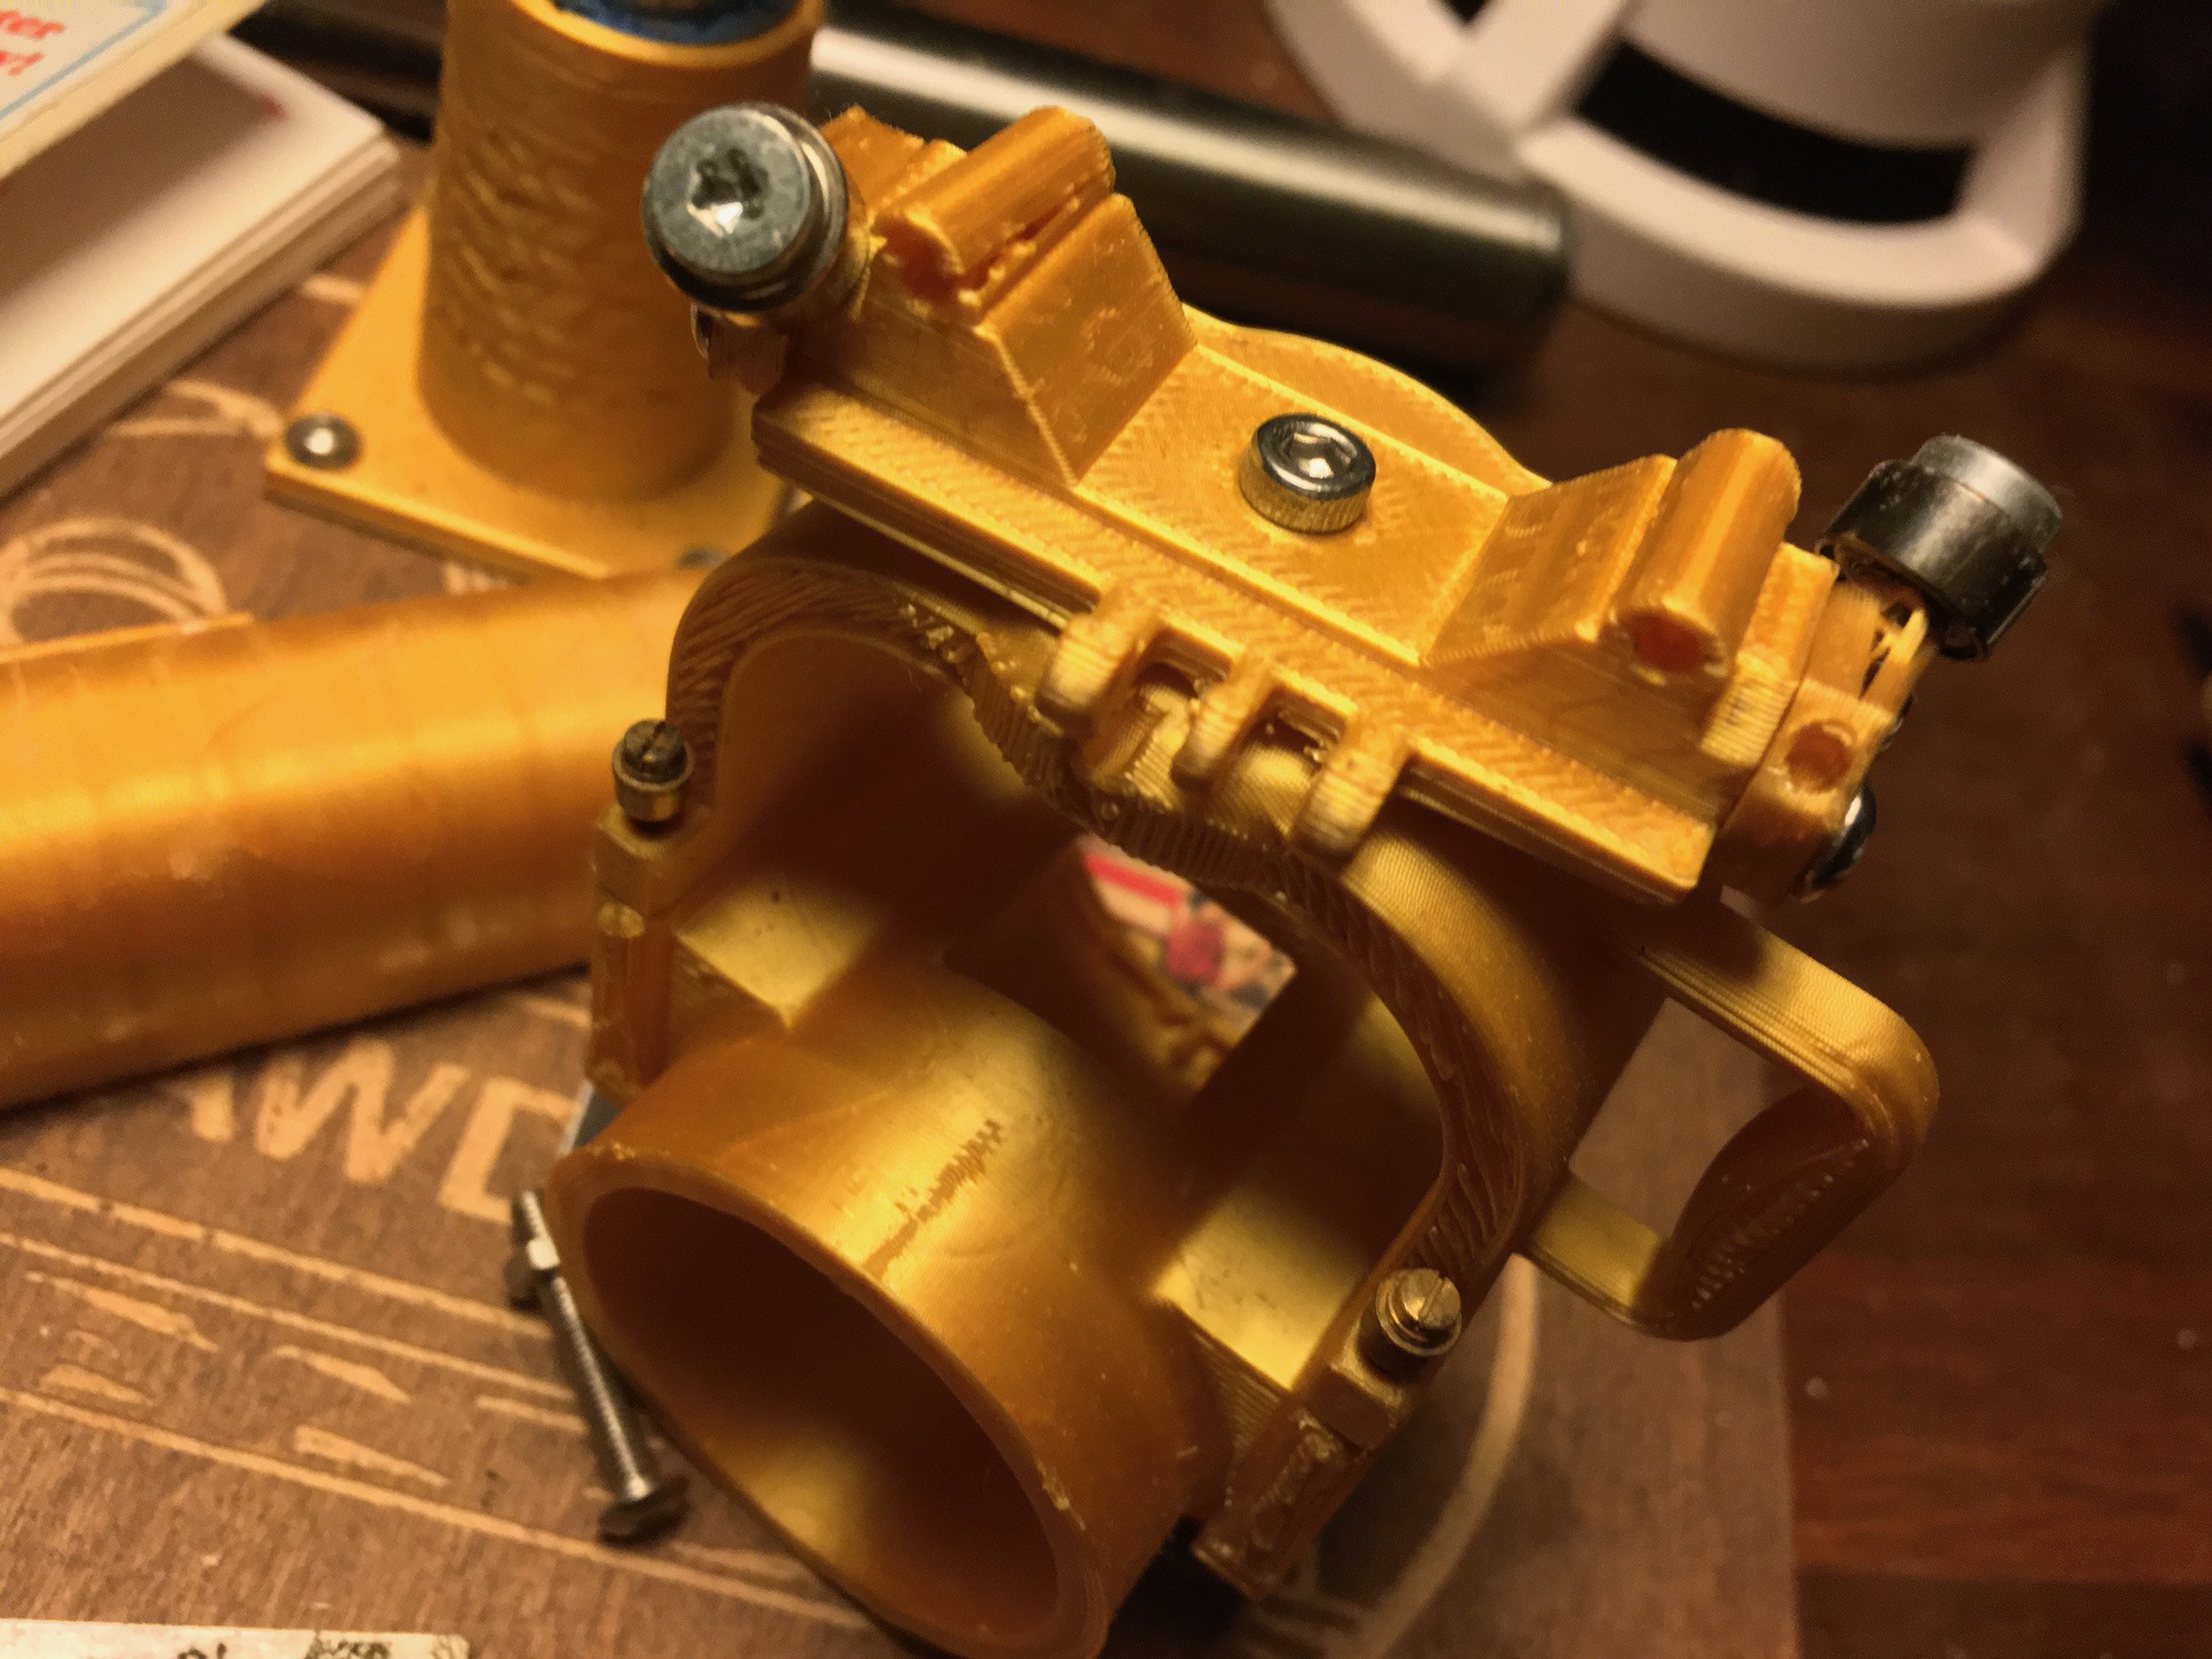
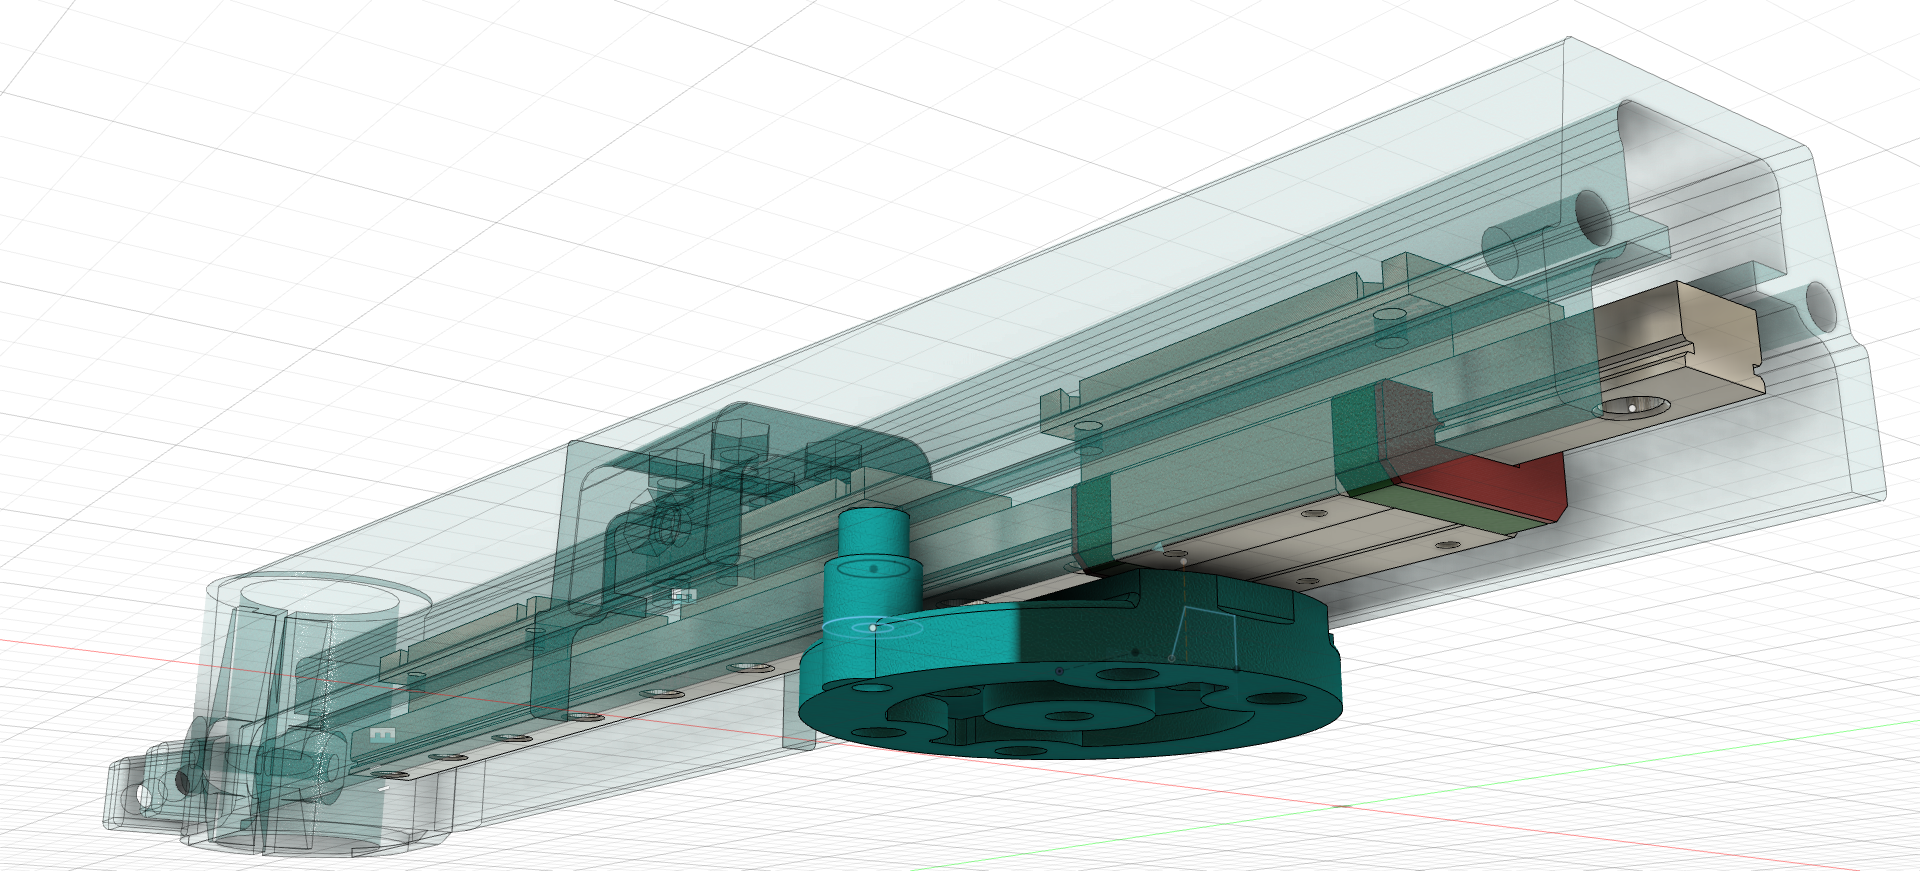
The Rollerhead
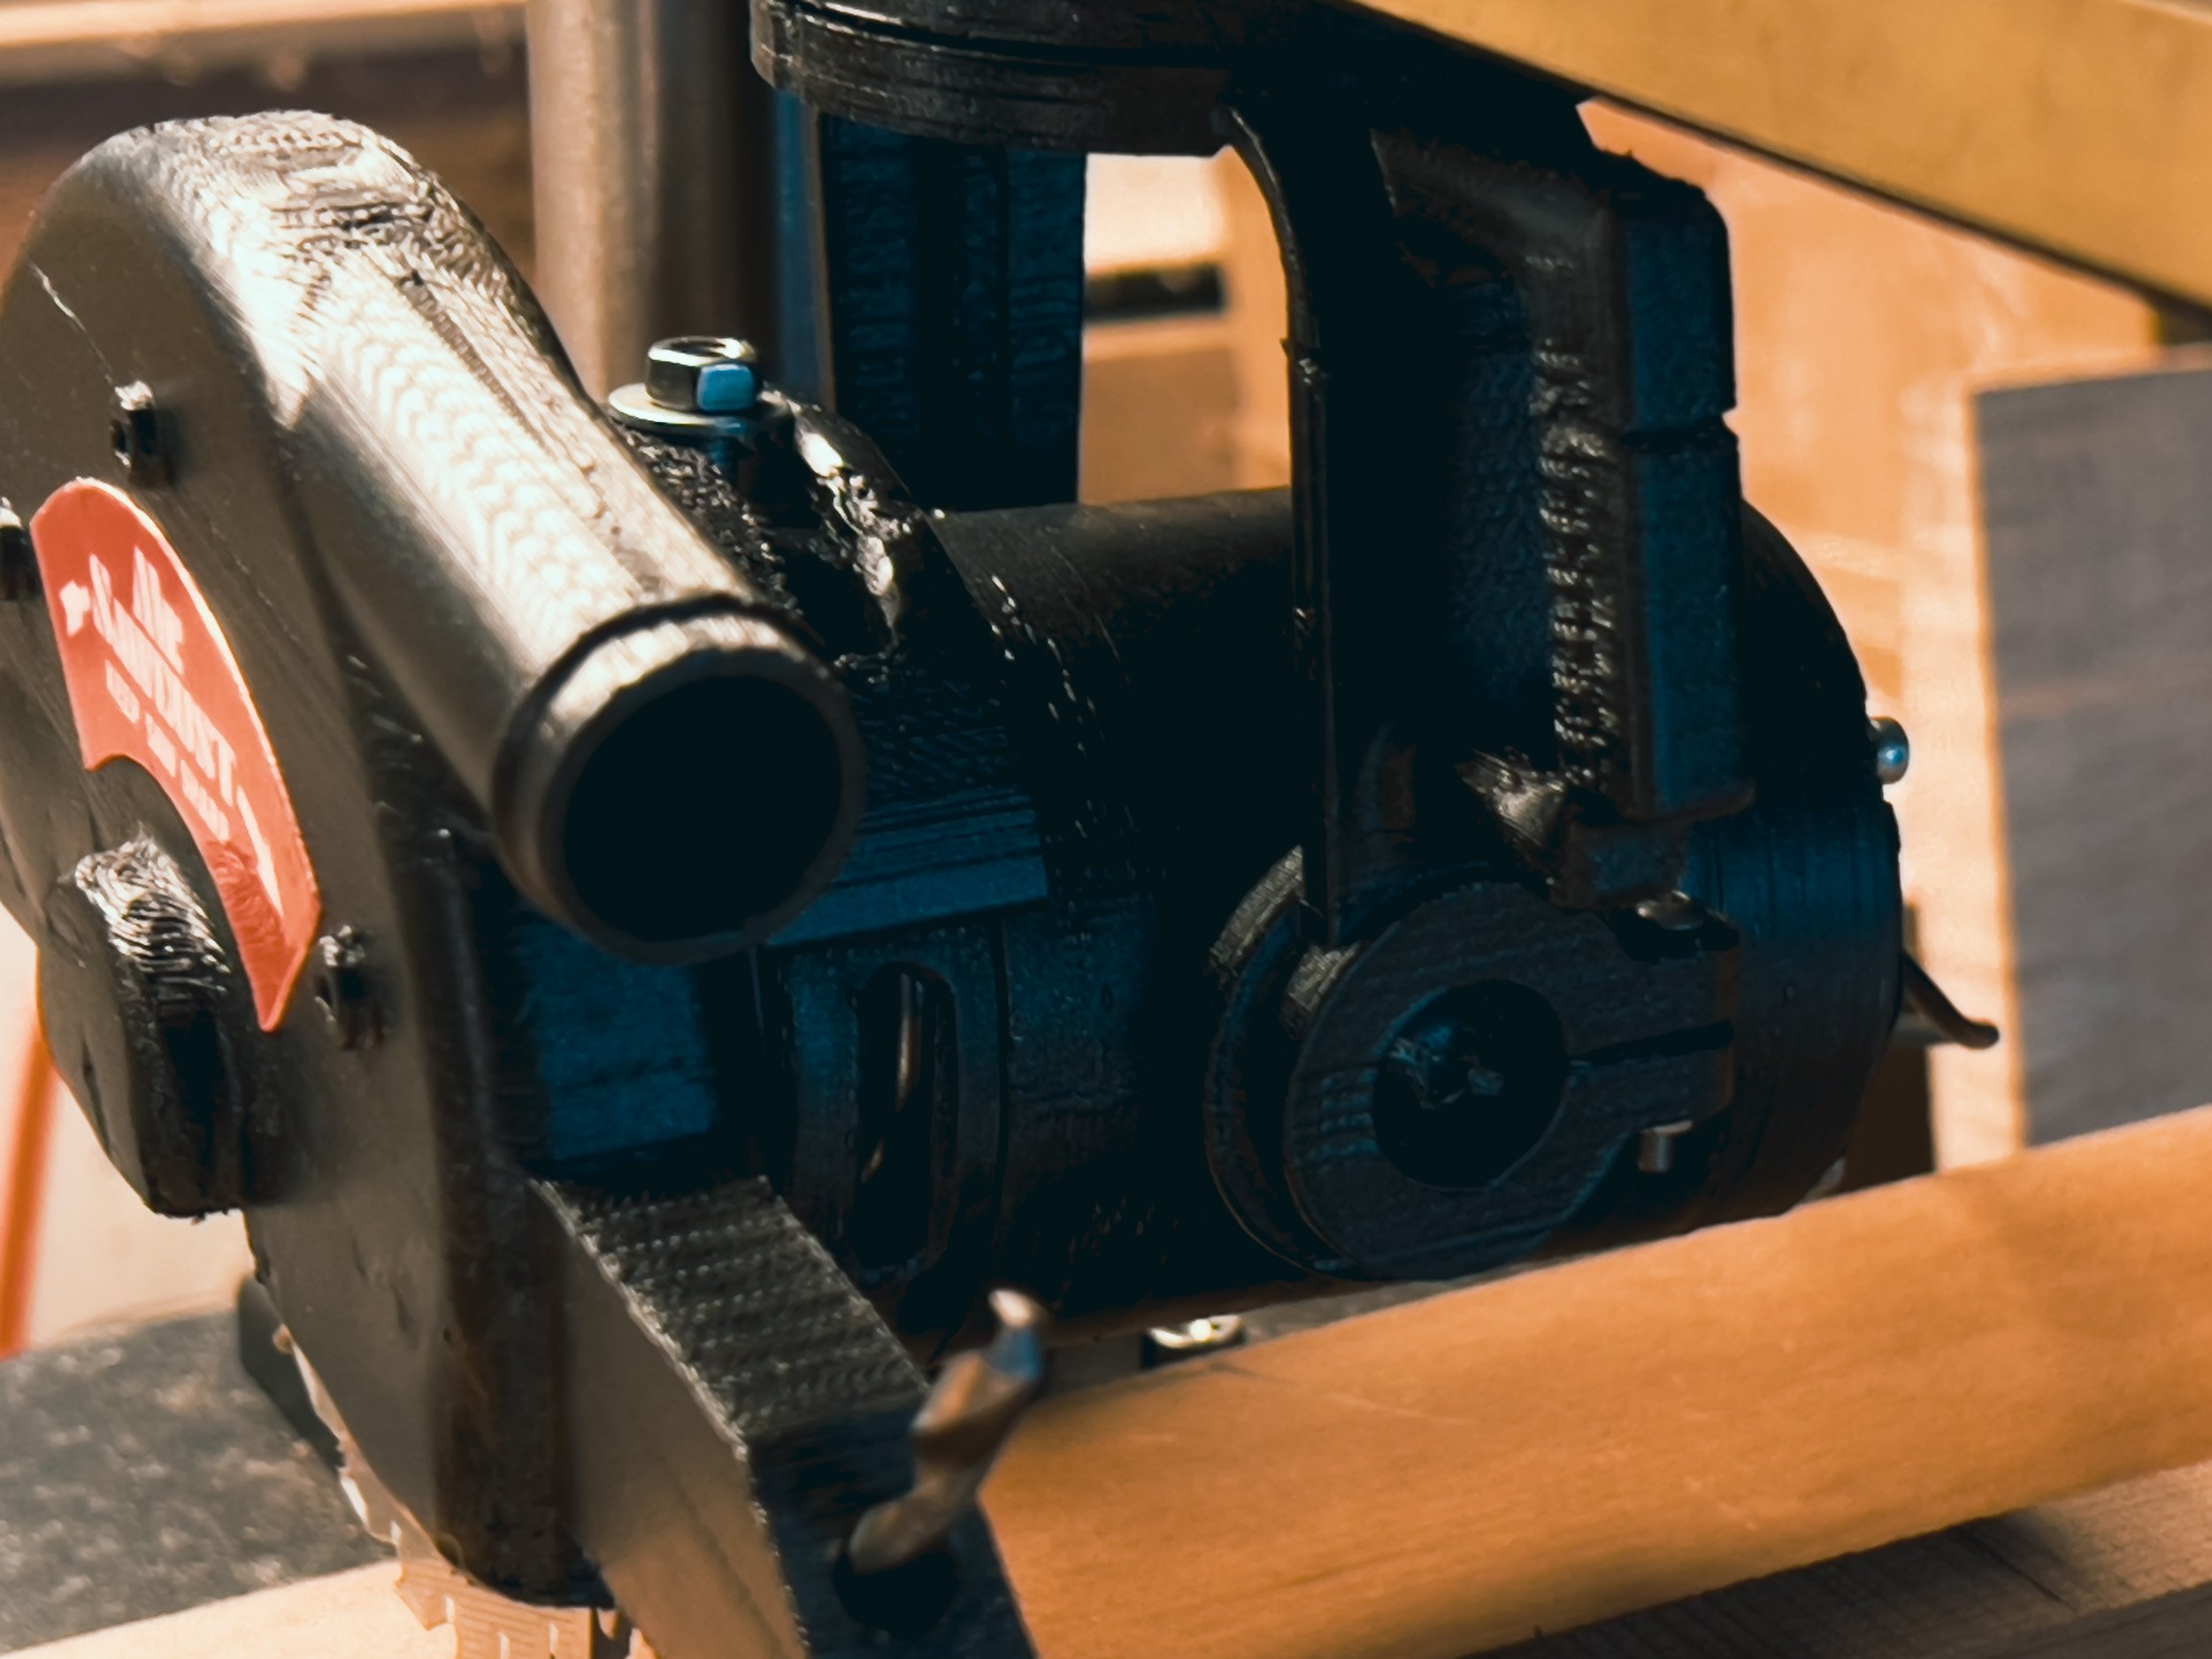
In reality, the motor carriage on these machines moves itself by way of roller-bearings that run along the internal ways of the arm.
While I did replicate that in the miniature MBF, it was more trouble than it was worth for a handful of reasons. Standard V-wheels (urethane or whatever they’re made of) still have some friction riding along 3D printed internal rails. It works, it’s just annoying. In reality, a proportionally super-heavy mass (eg: a real motor), mounted to steel bearings… riding inside smooth cast-iron guideways… now that’s a combination that works beautifully.
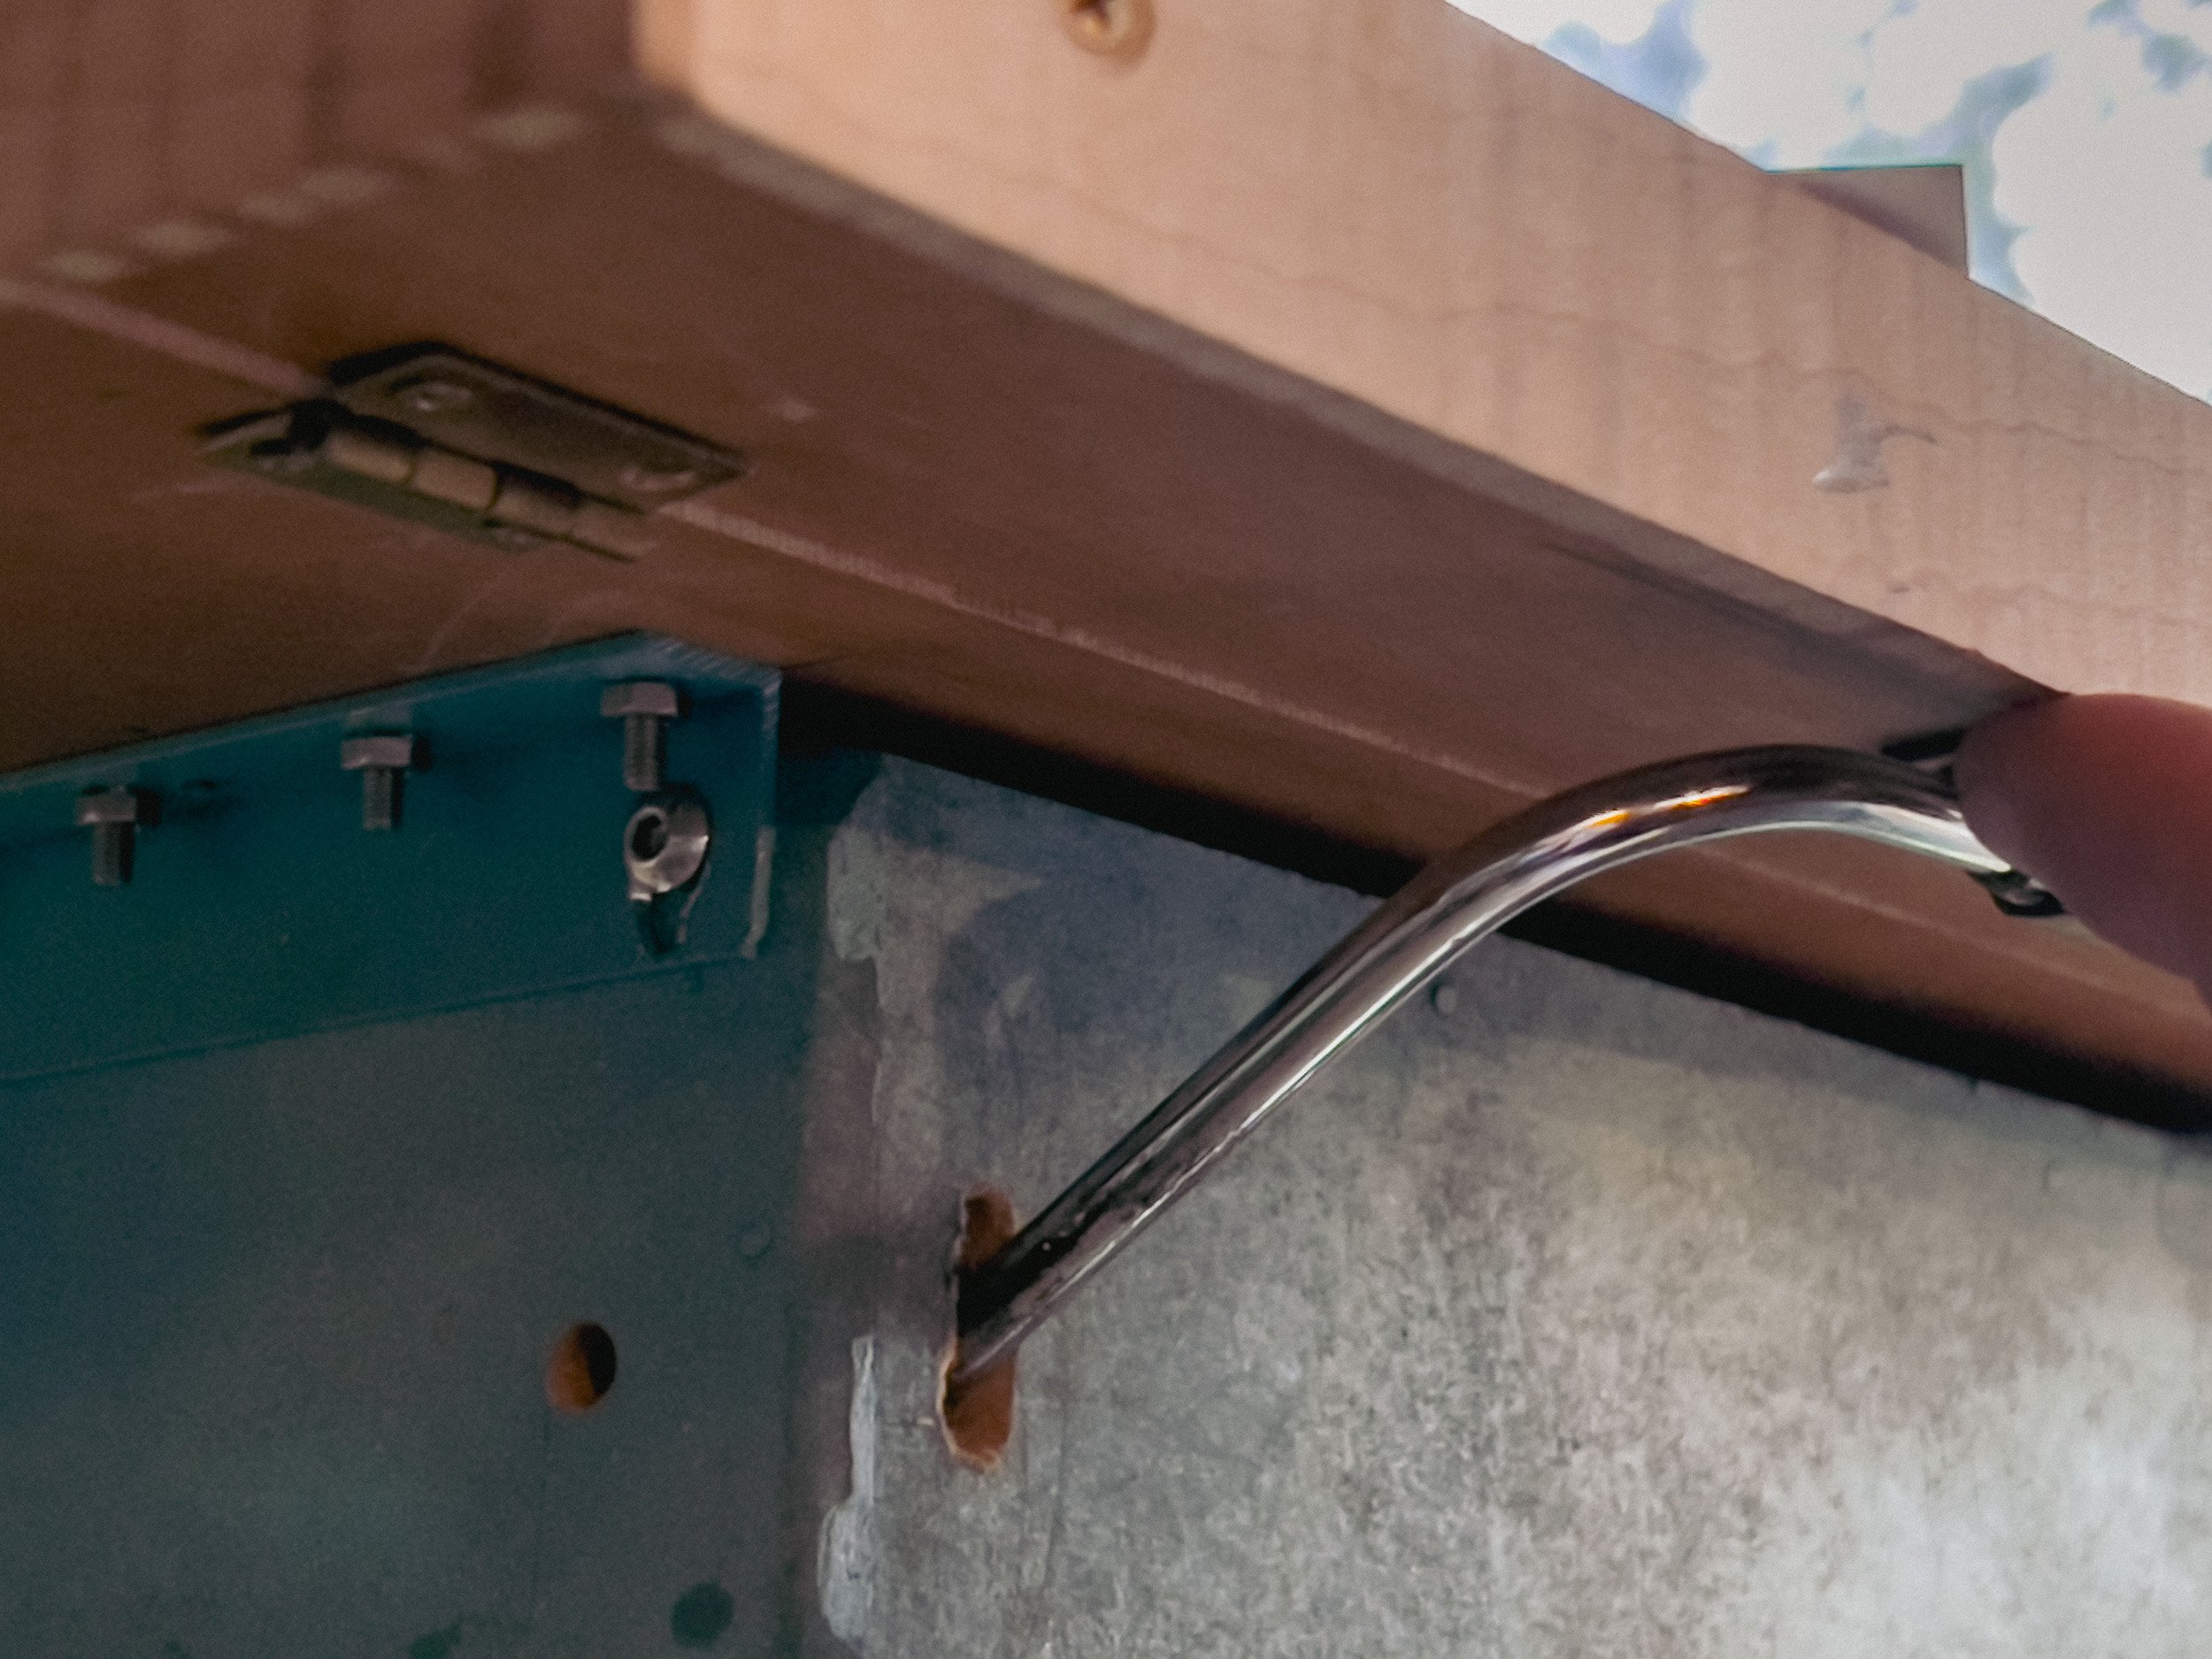
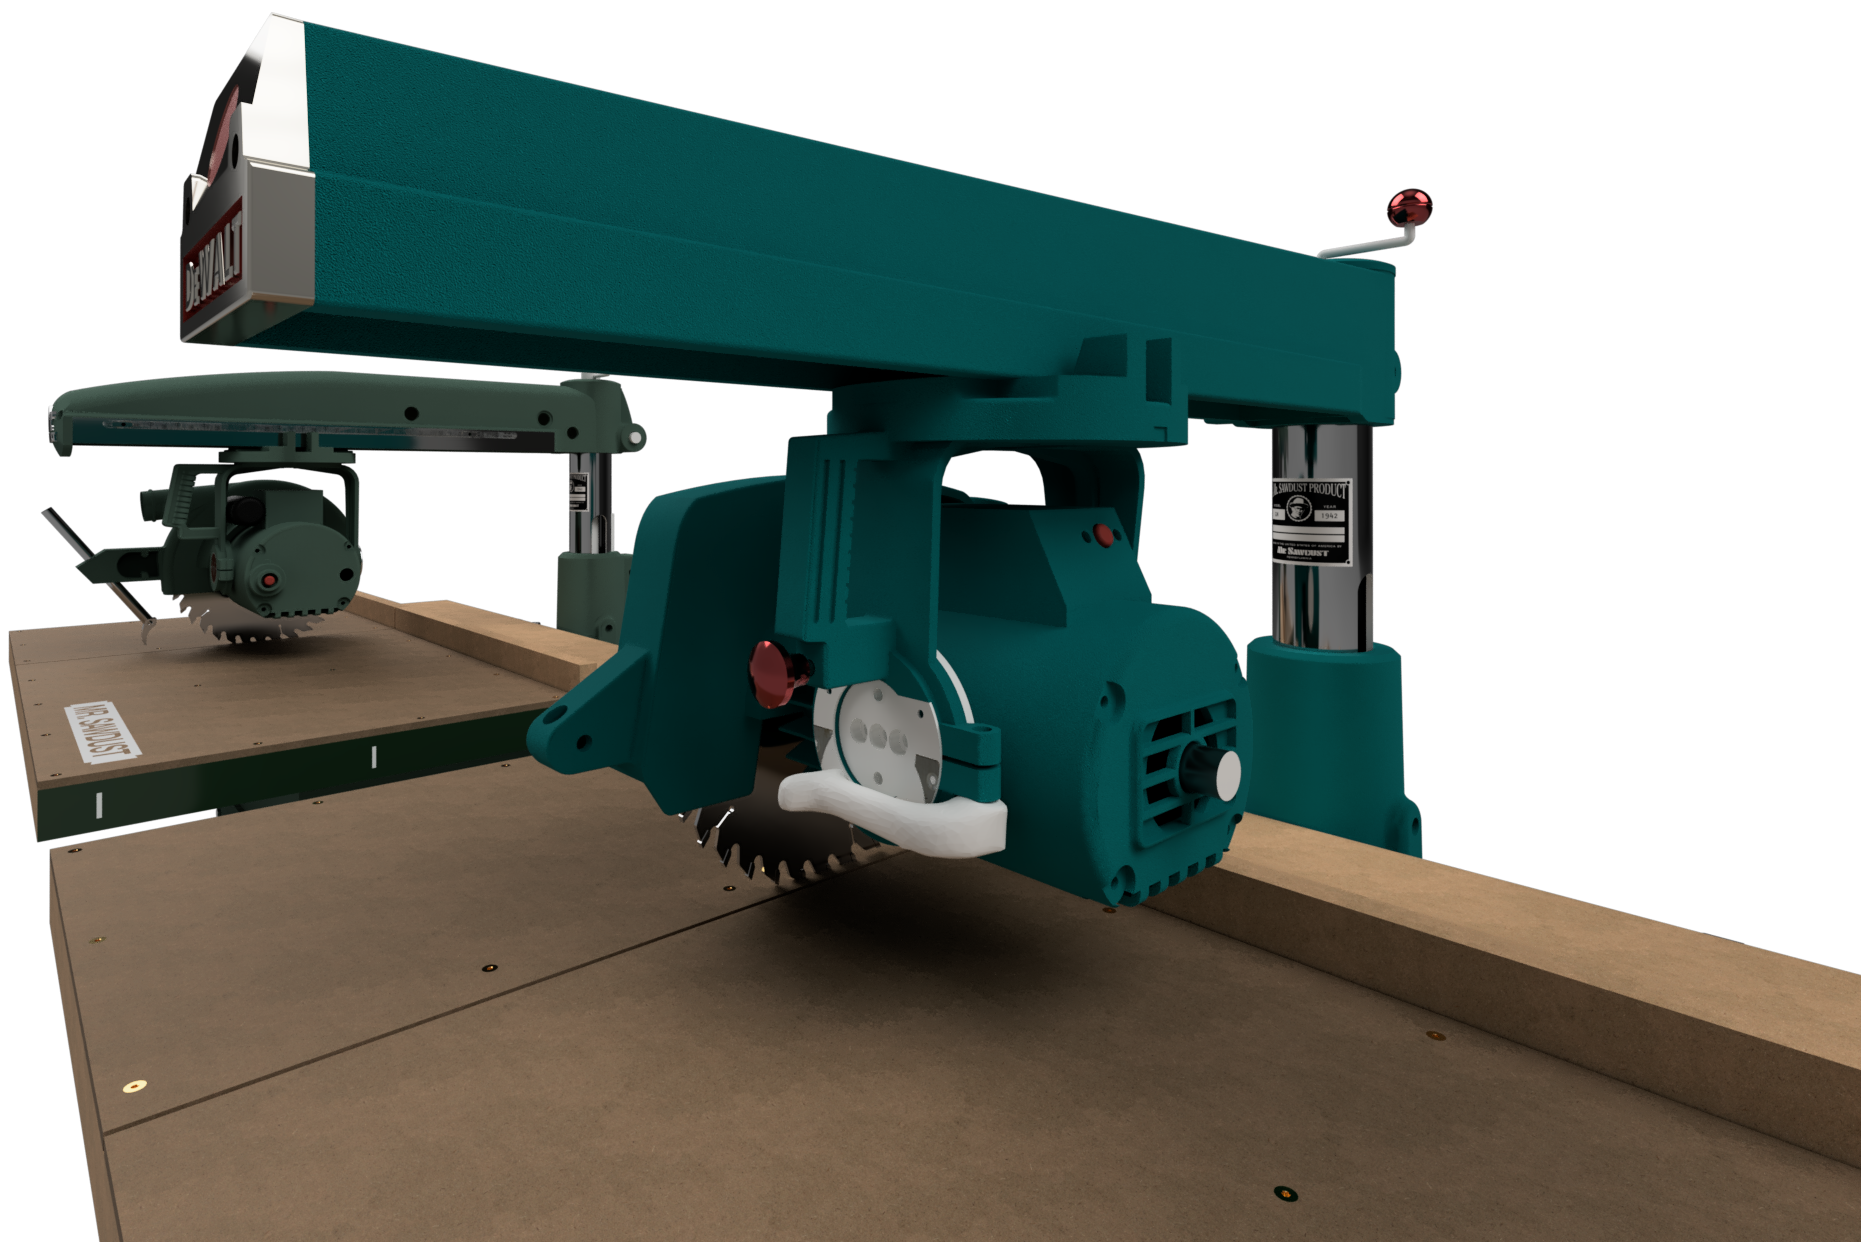
On the 925, I did it right and used what I intended from the start — a perfect little 300mm MGN12 linear rail. These are basically always the right way to get linear motion on whatever-you-want. The secondary benefit, though, is you’re also giving the arm a solid steel backbone.
As is often the case, everything works better and problems just disappear once you put on your big-boy-pants and get the right metal components.

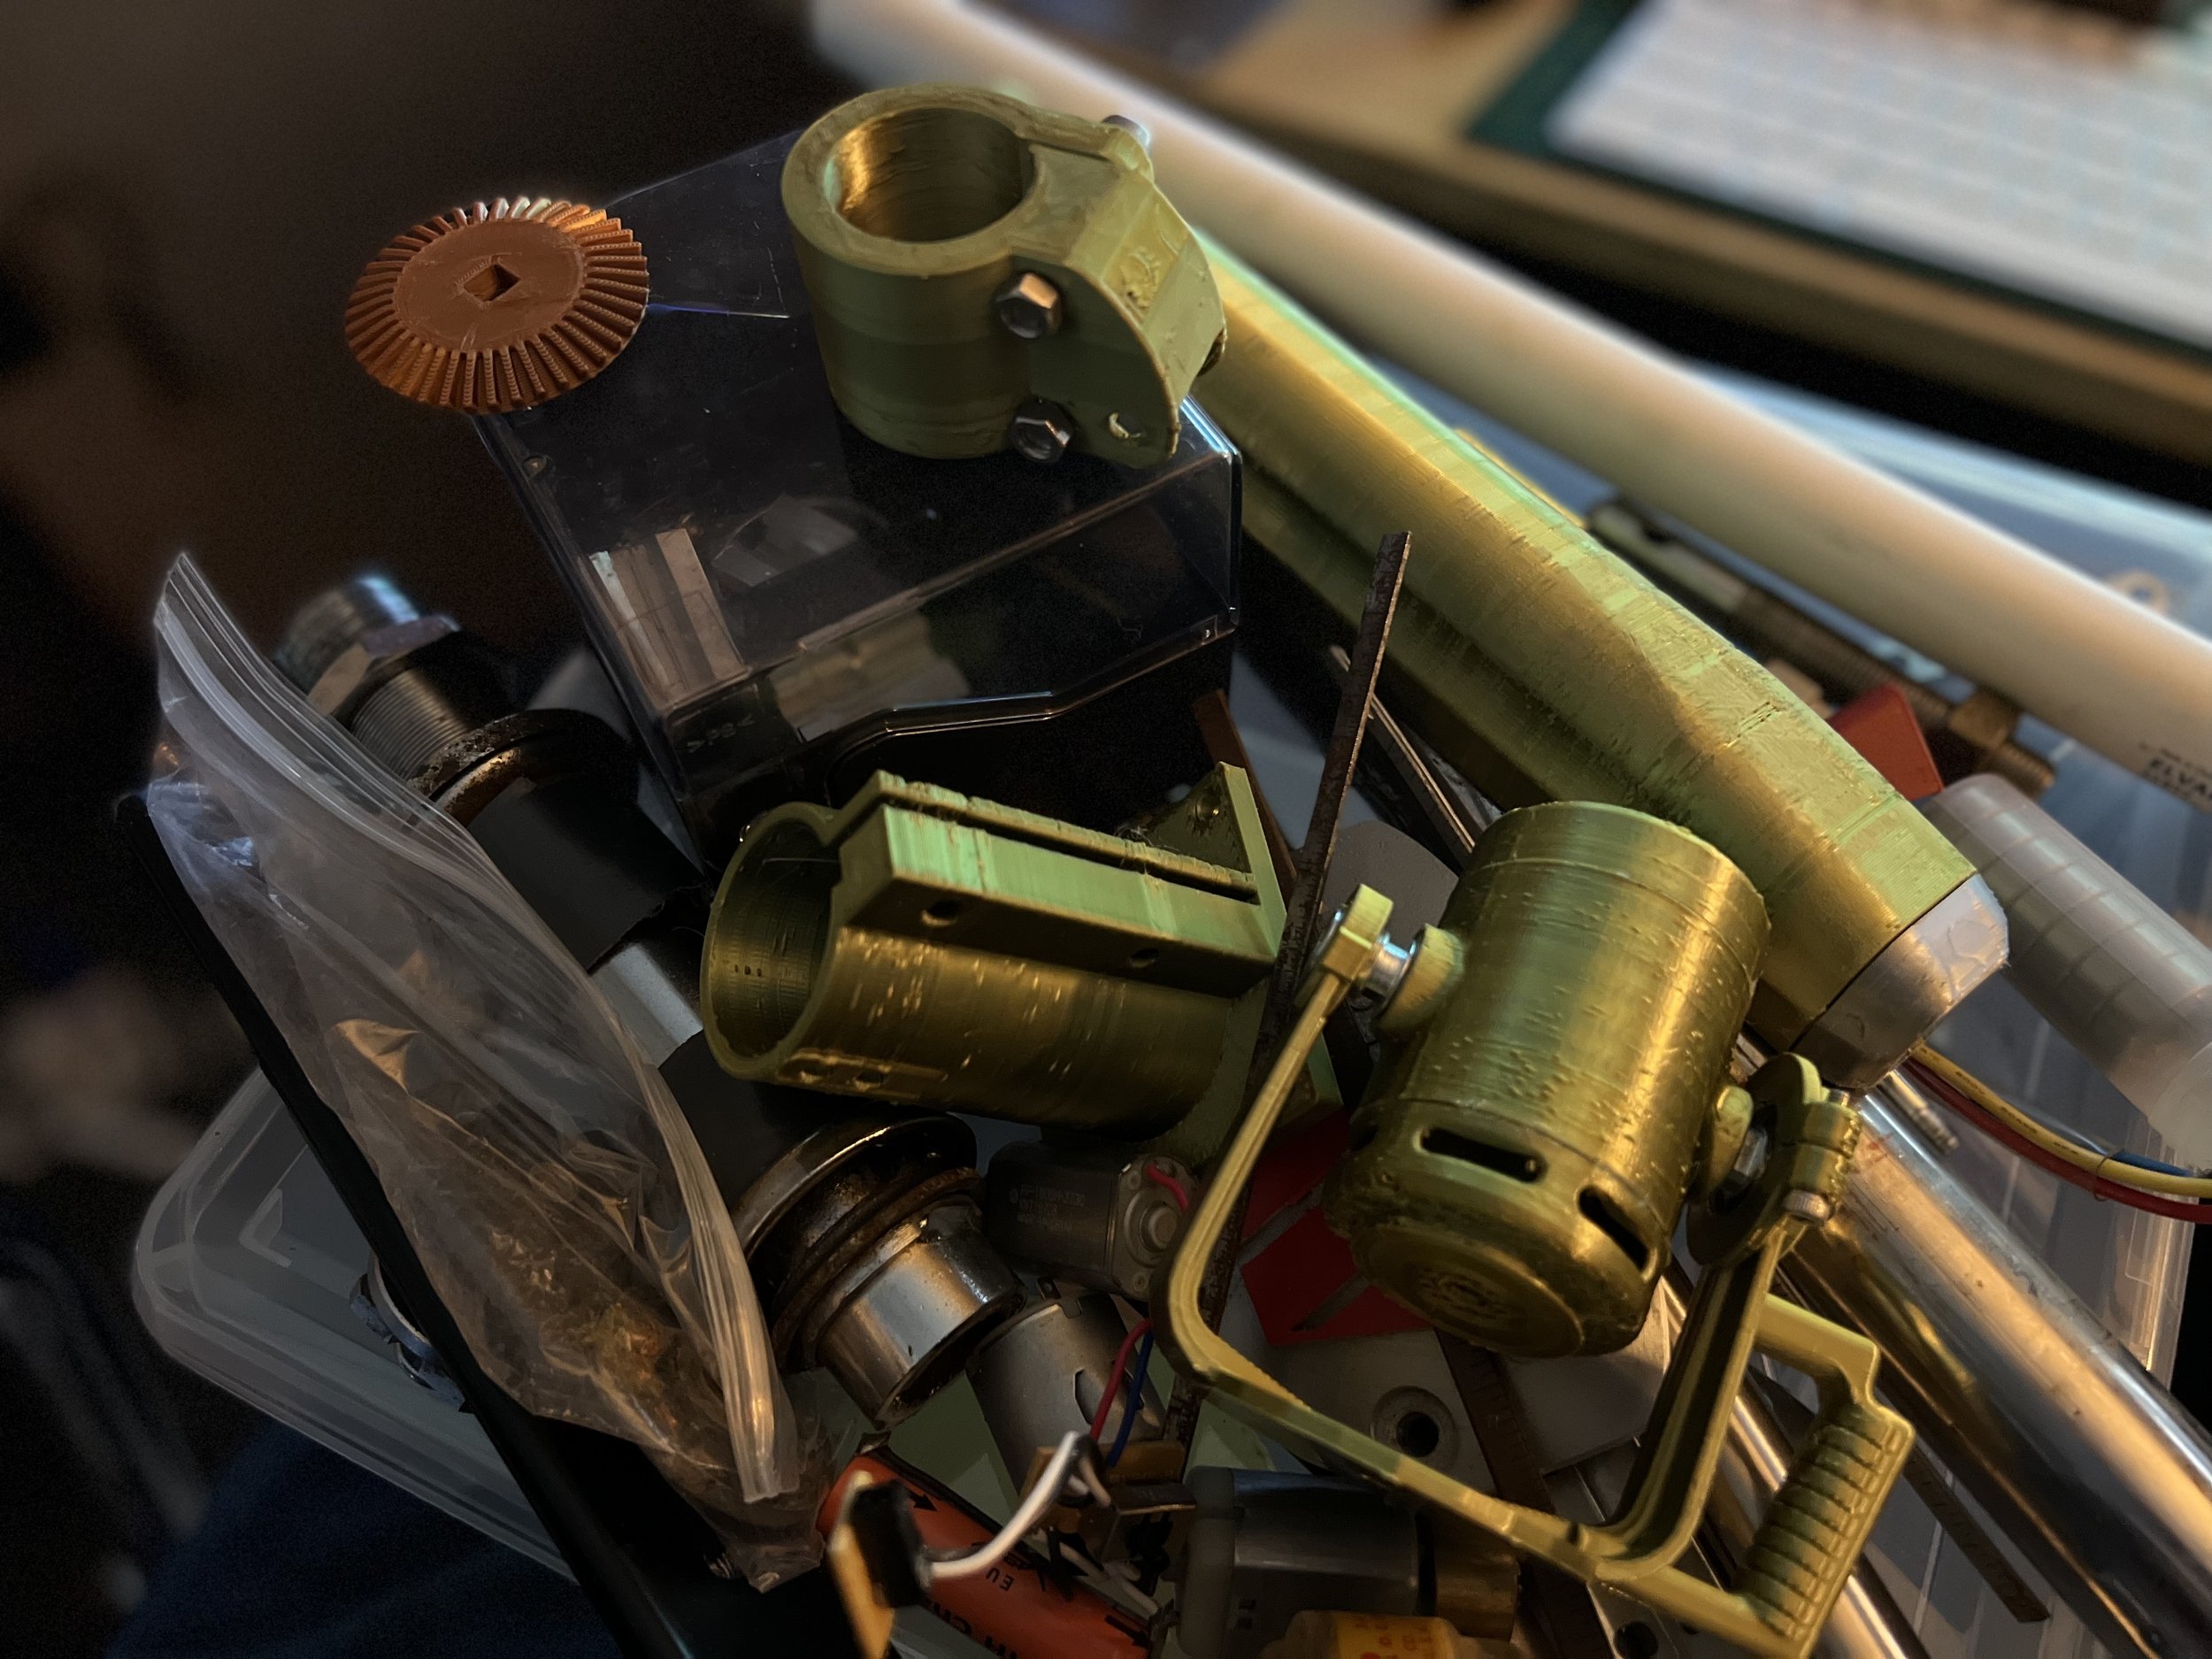
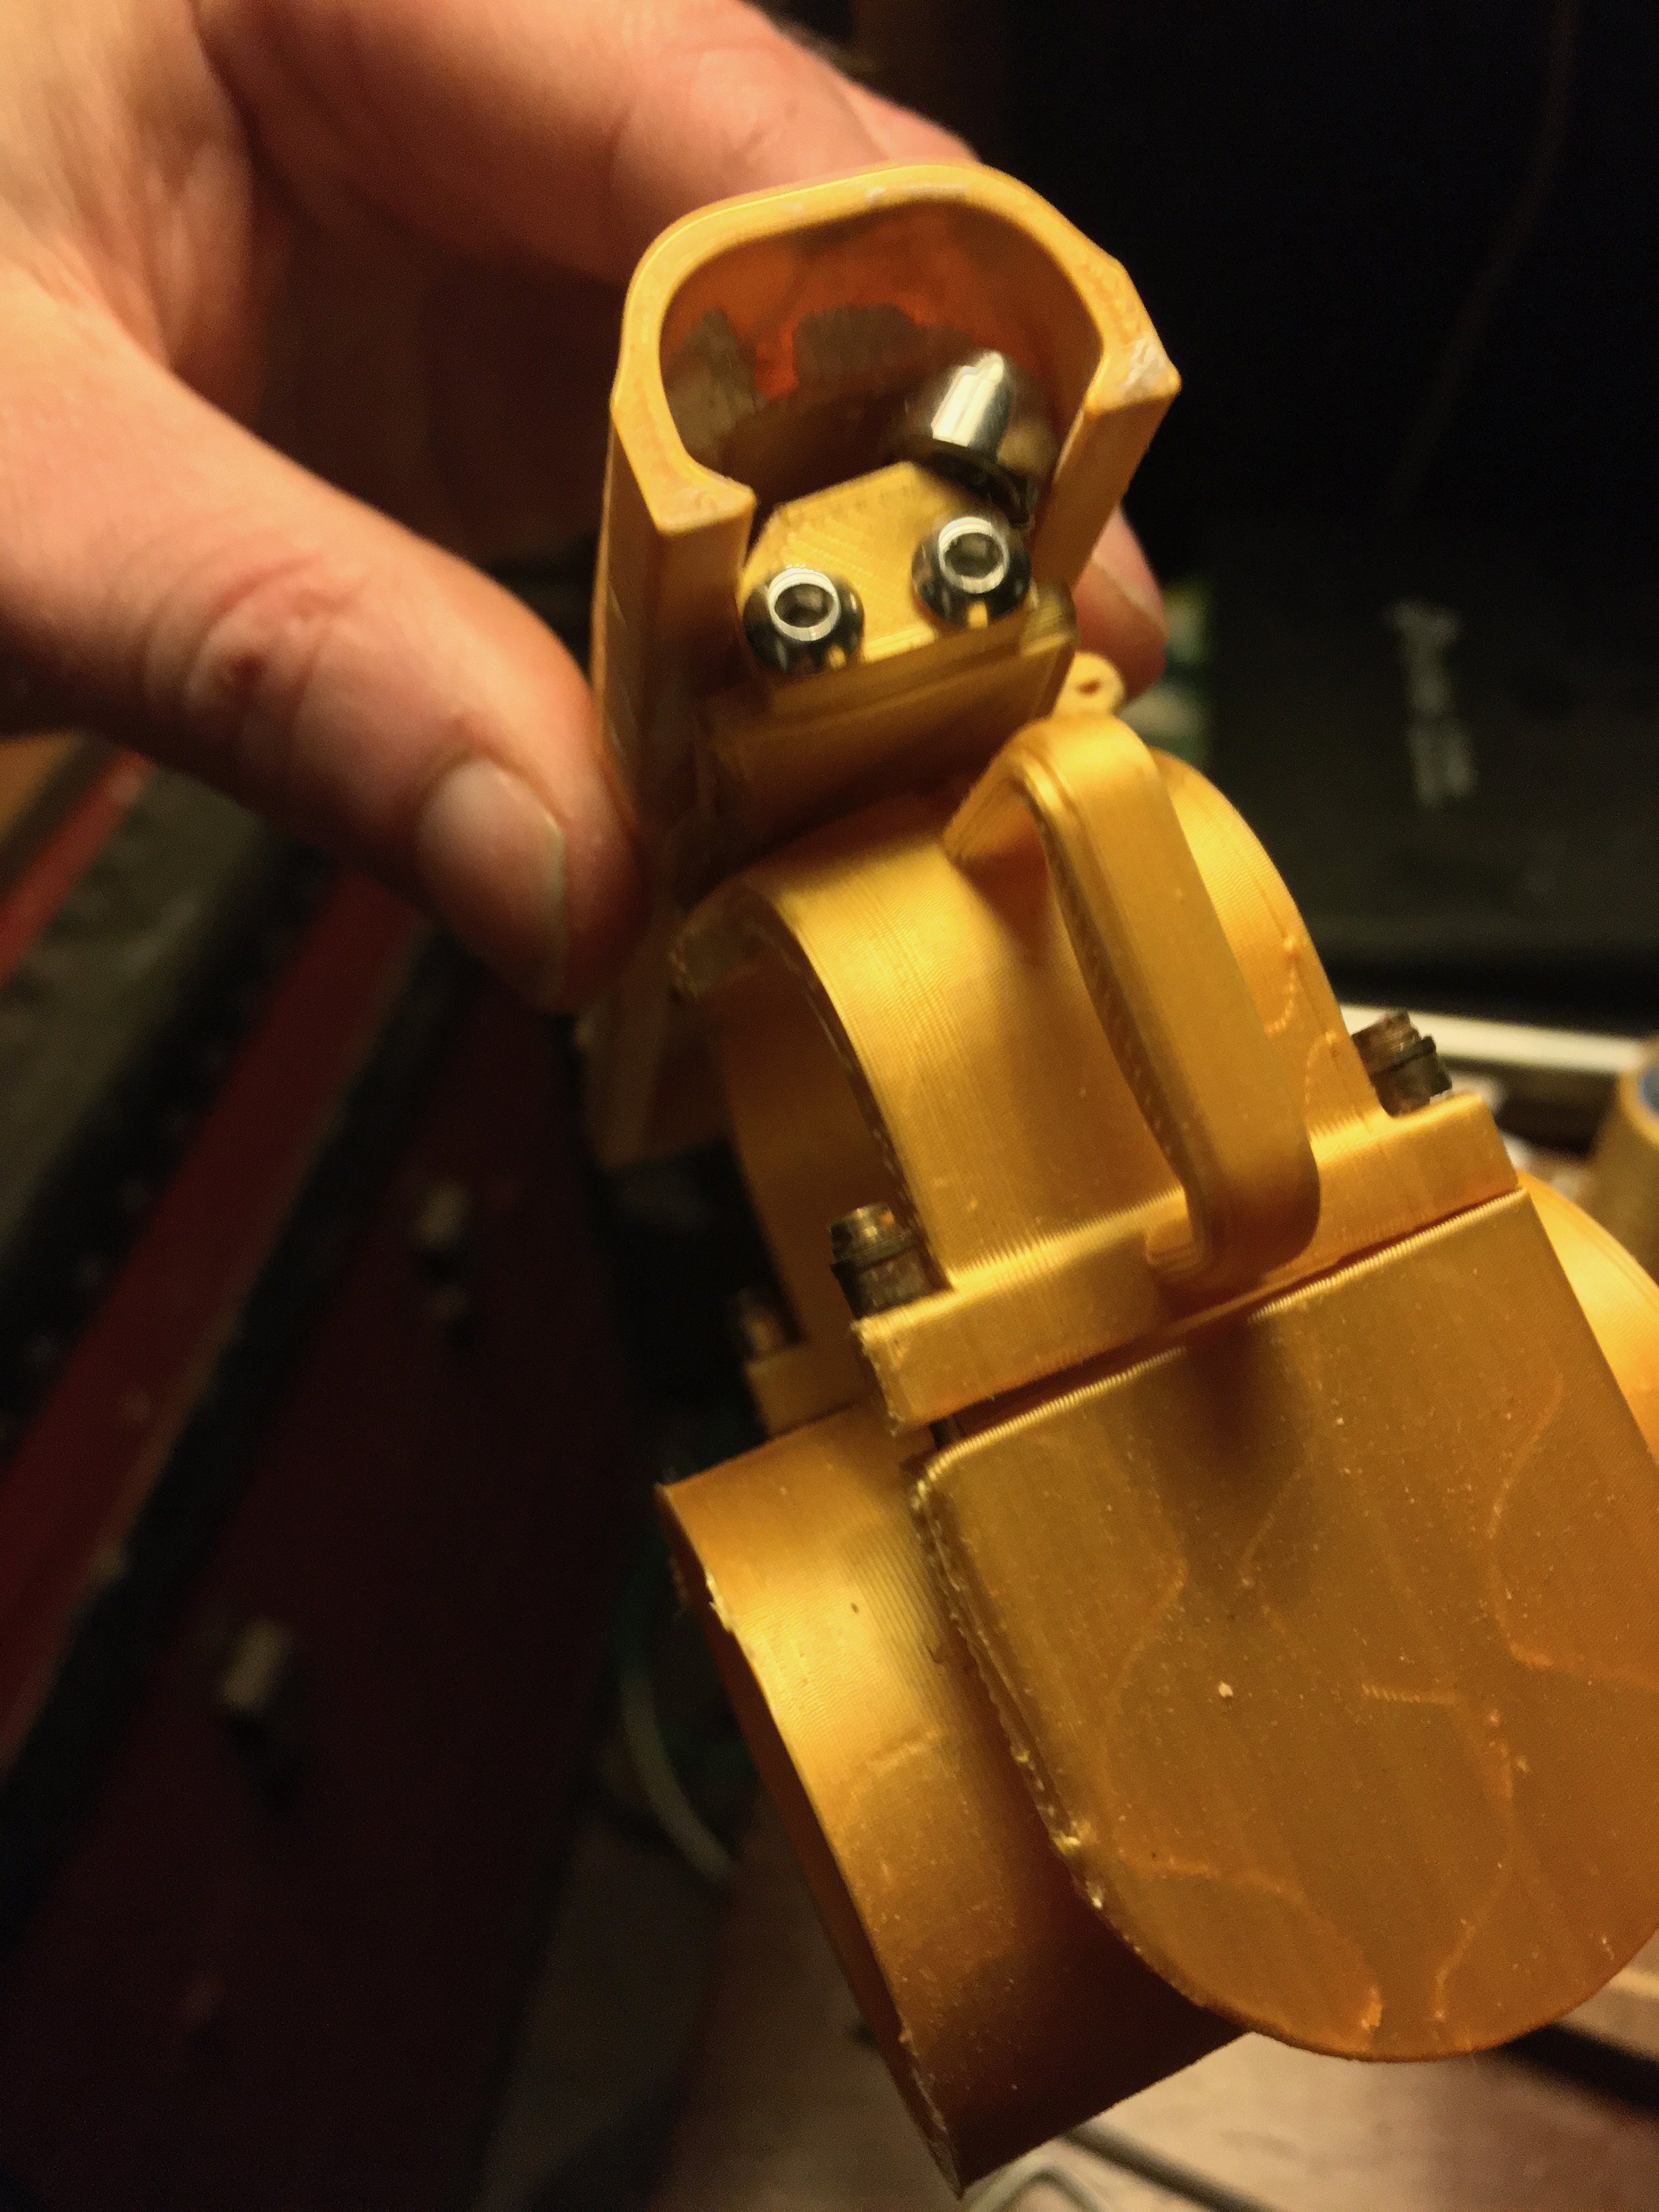
Little motors
I had a few 775 DC motors laying around, which are basically the exact dimensions to fit snugly inside these motor housings. It’s the same basic motor you find in handheld circular saws, or in my case, taken off a small 3018 CNC after switching out for a far more capable 500W spindle.
To actual do any real cutting, they’d likely need the bulky gear-reduction components… but that basically doubles the overall length… so I didn’t go down that rabbit hole. If I ever manage to cast all these 3D prints in metal… then it’d be interesting to actually make it an actual “working” saw.
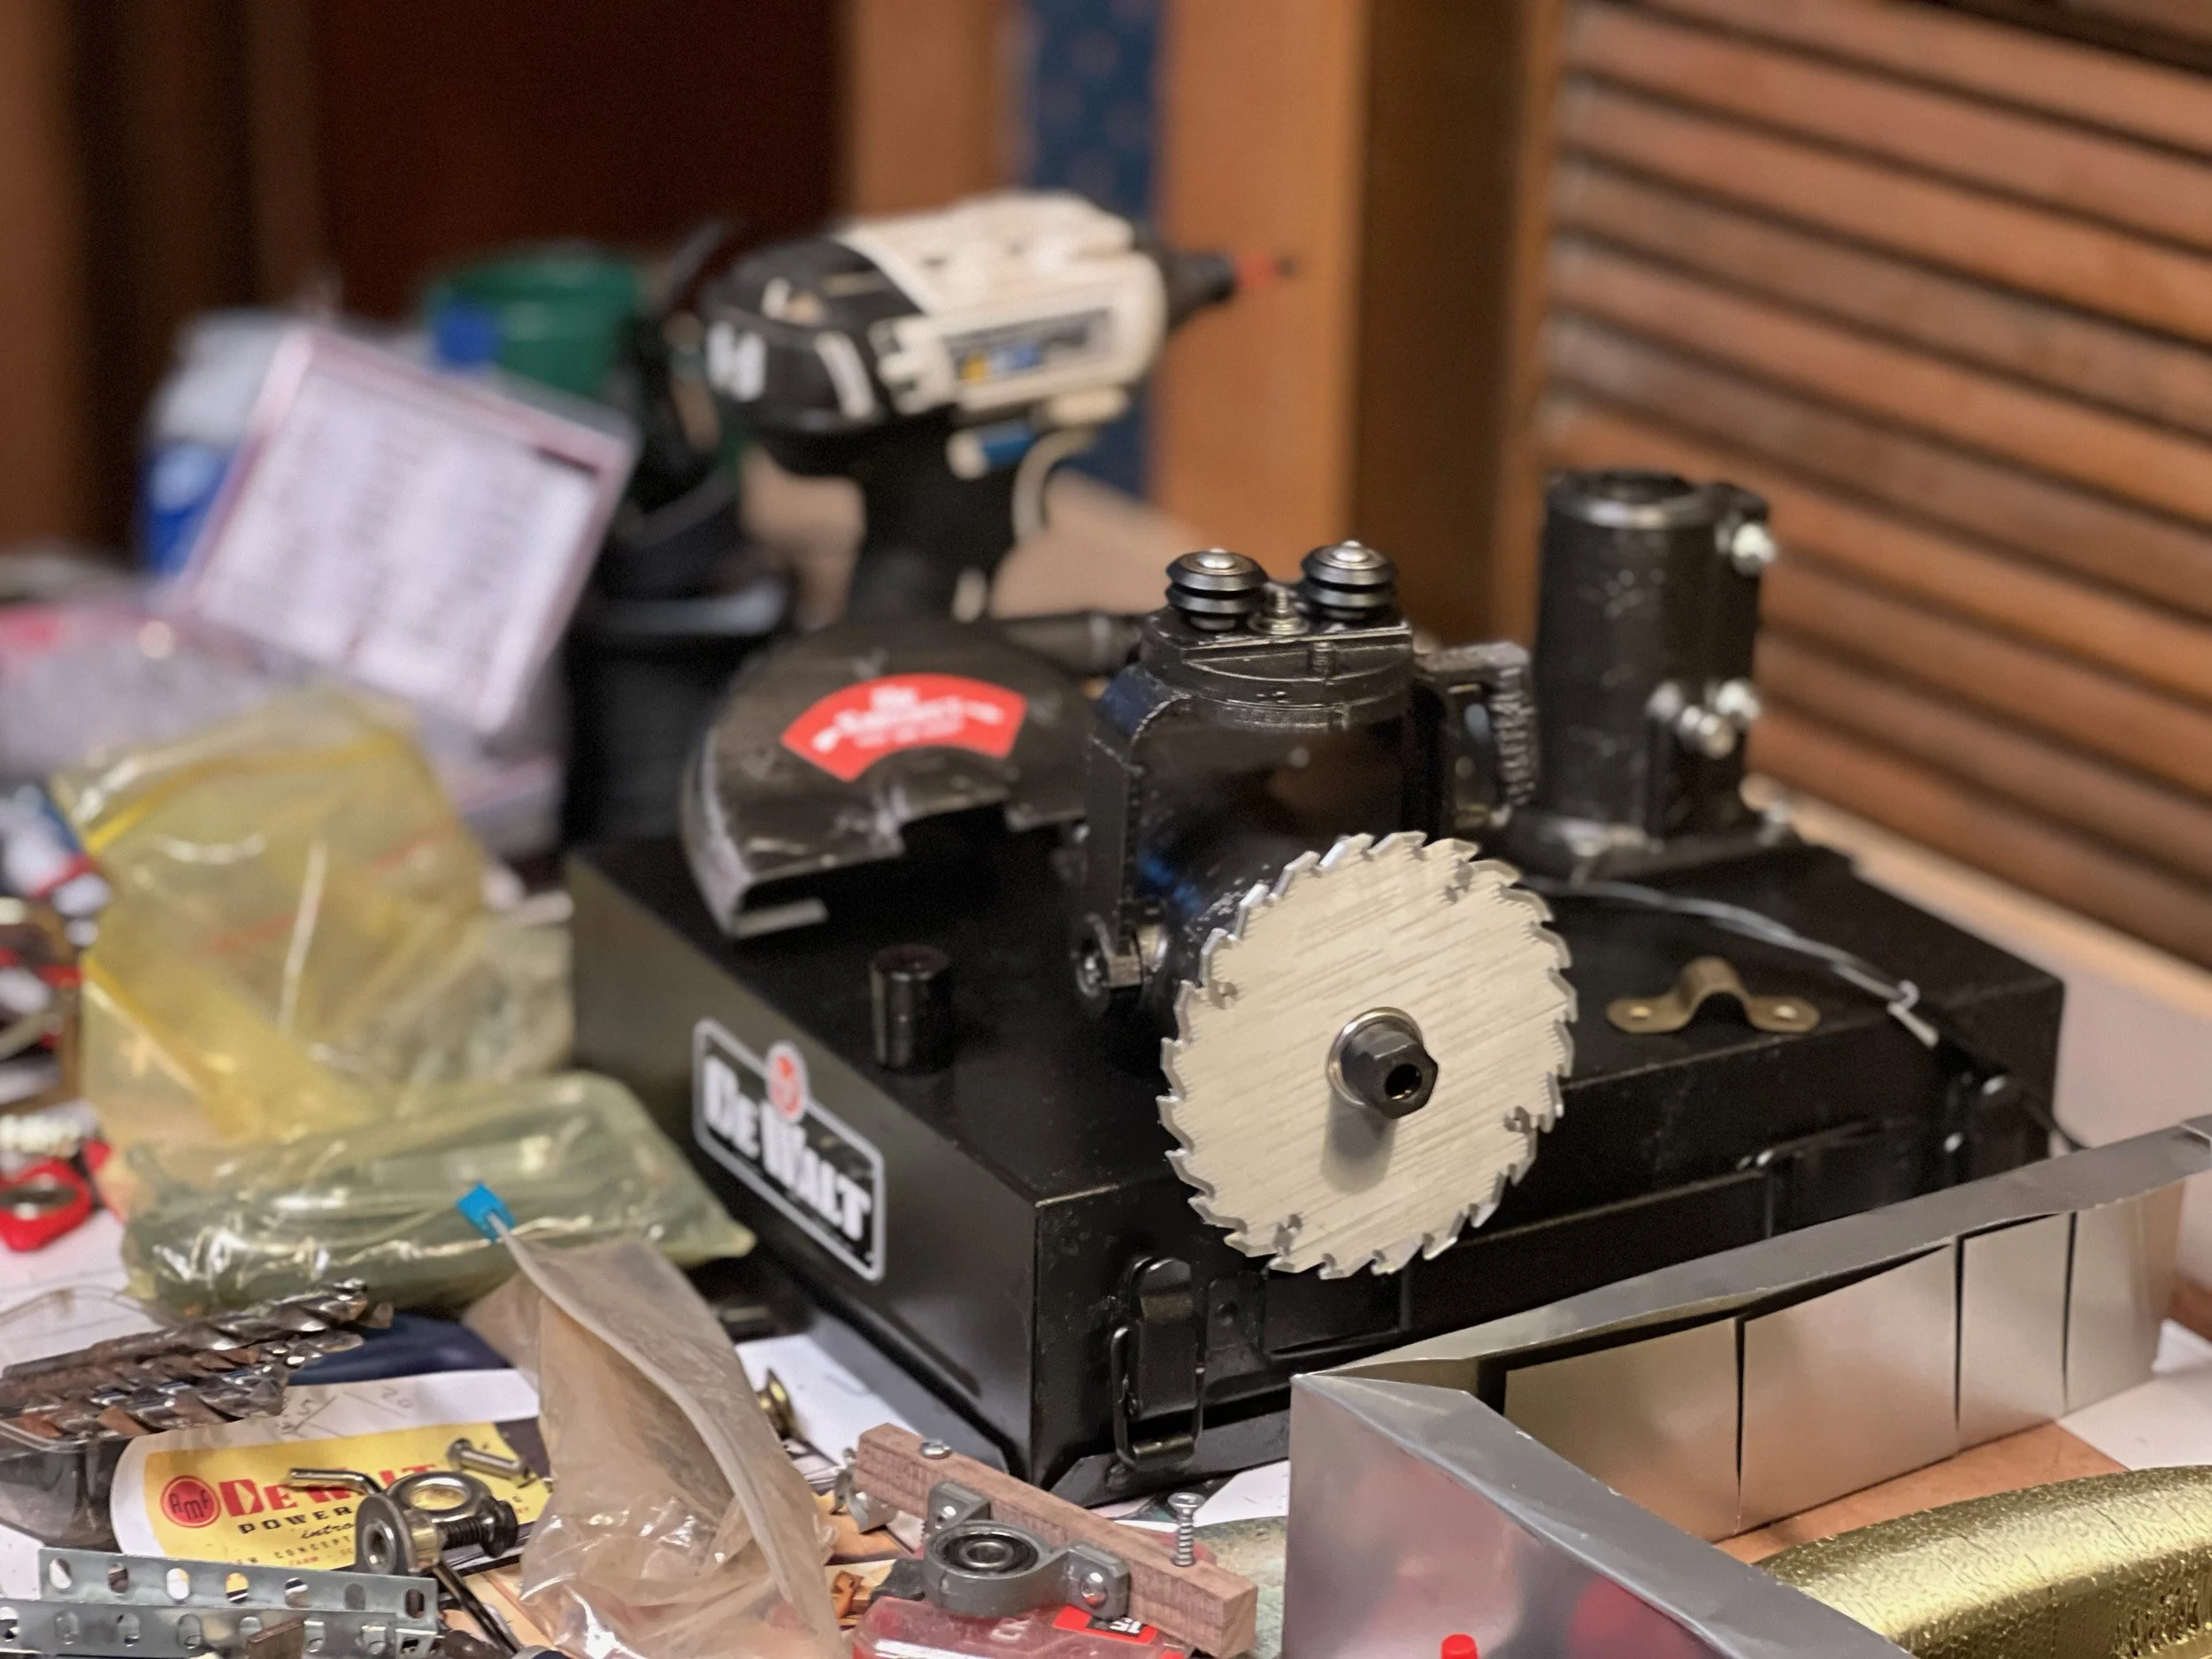
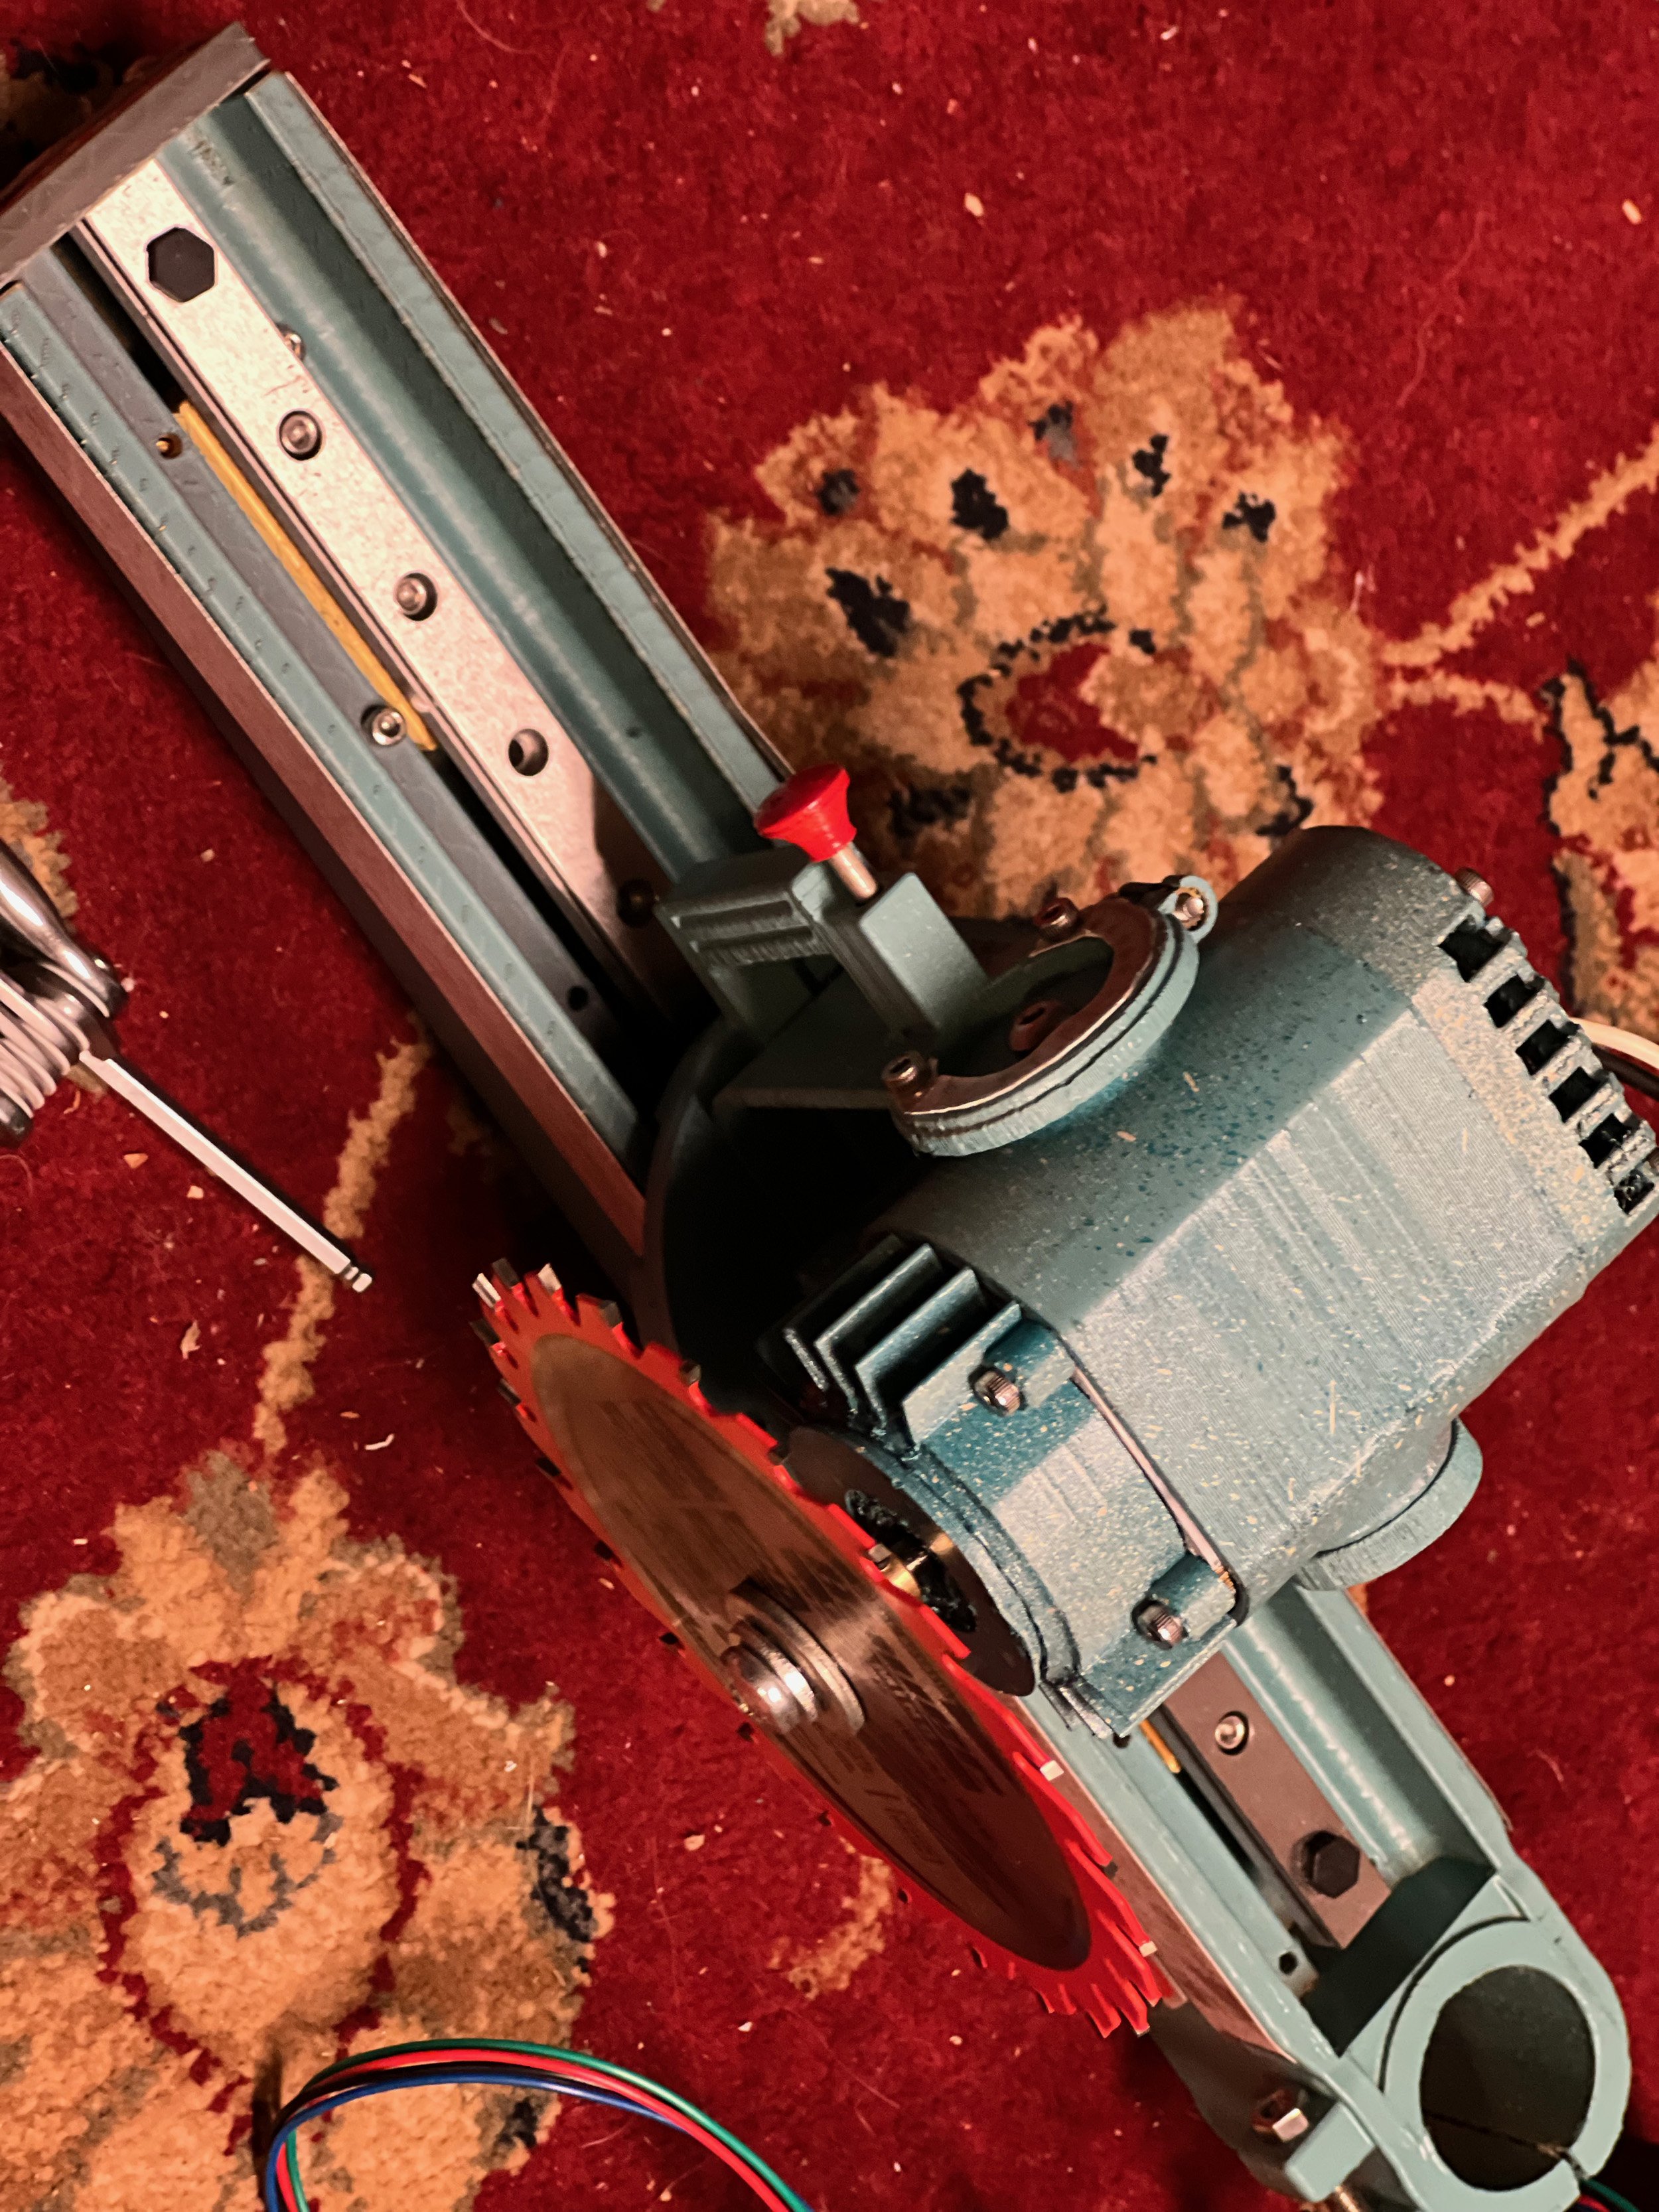
Little blades
Getting a 4.5” circular saw blade on the “arbor” was sketchy, at best. I’d need to source the right adapter to give me the right size threaded shaft for everything to fit properly.
Regardless, the blade was too cute to ignore. I just have to make sure there’s at least one aspect of any project I’m working on that could legitimately hurt me if I’m not paying attention. This keeps things interesting.
I’d first 3D printed a blade while I waited to come across the right size real one (Harbor Freight comes through as always).
That’s all for now.
I could keep detailing and describing all this madness in all sorts of different directions, but I’m calling this a good place to wrap up for now. I spent a whole lot of time doing all sorts of things badly before managing to do any aspect of this… acceptably. There’s a few photos below as evidence of that. Fortunately it’s just been a random personal project pushing me to grapple with a mix of tools – real and digital – that I want to be better working with, in general.
Who knows where this all leads. That’s half the pleasure of it all. As Elon Musk said, “If you don’t make stuff… there is no stuff.”
— David